 Pin this
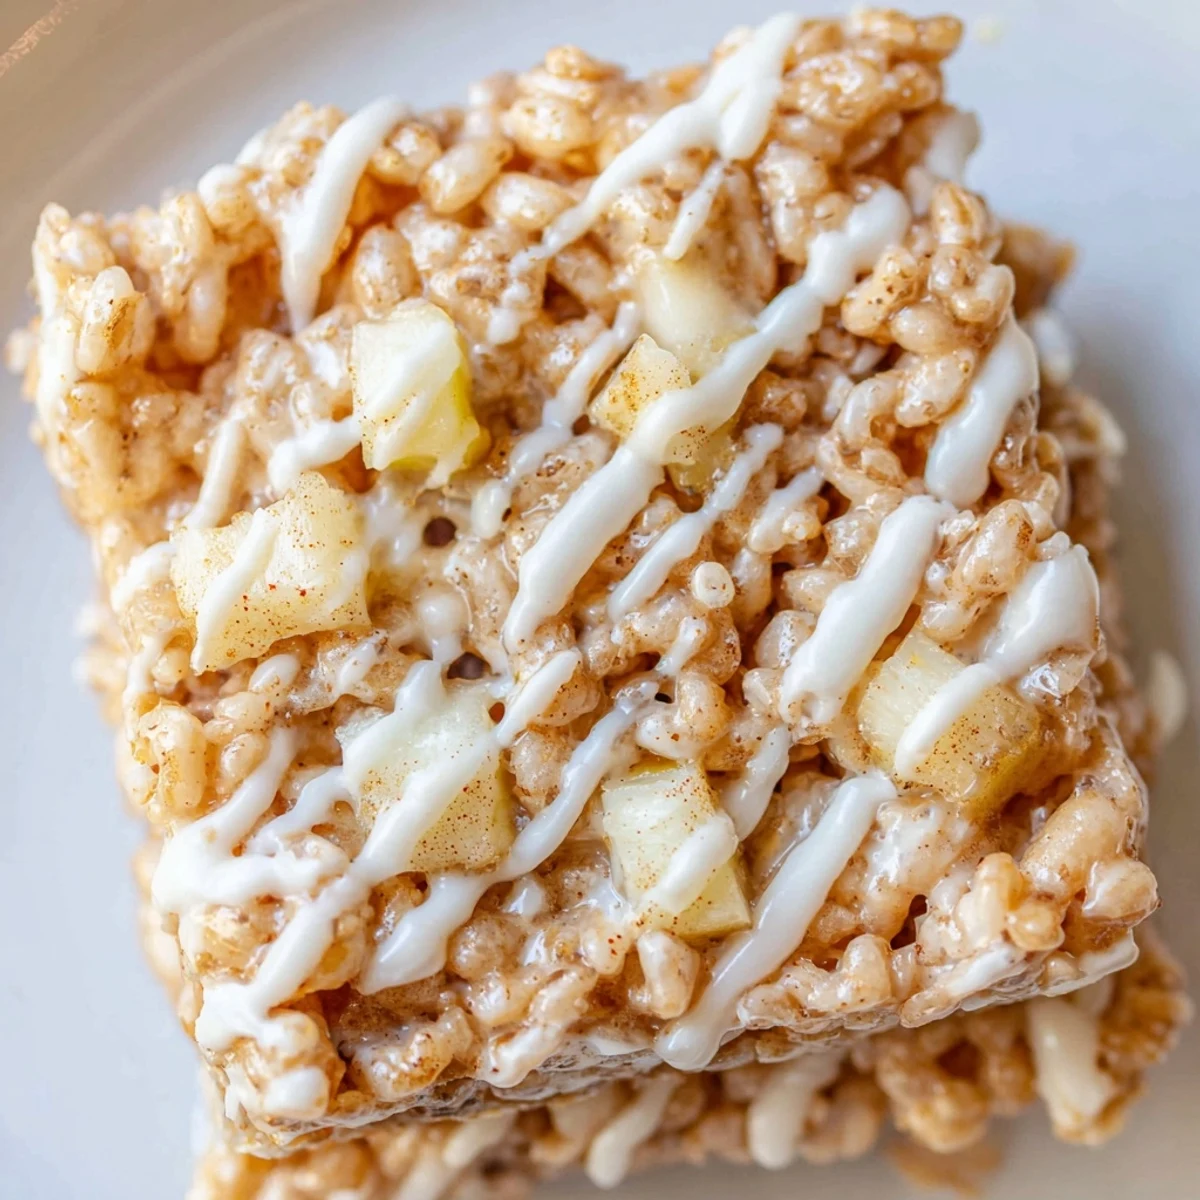
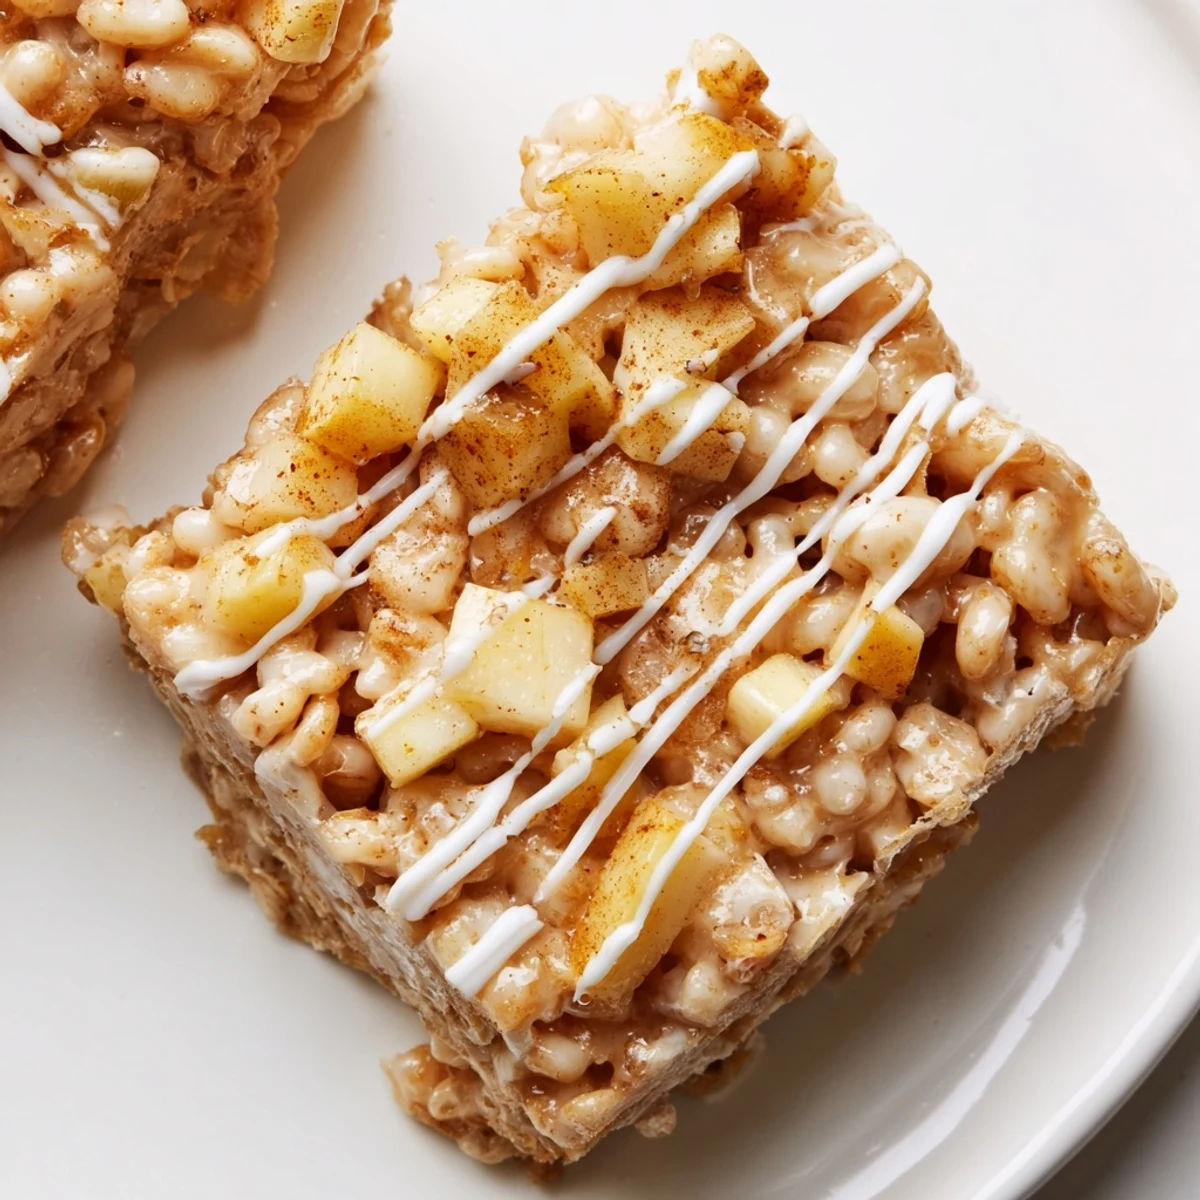
 These Apple Pie Rice Krispie Treats transform the classic no-bake dessert with tender caramelized apples, warm cinnamon, and nutmeg. The gooey marshmallow base gets folded with spiced apple pieces before pressing into a pan, creating a chewy, crispy texture reminiscent of apple pie filling meets childhood favorite. Ready in just 25 minutes, these bars are perfect for fall gatherings, potlucks, or anytime you crave the comforting flavors of baked apples in handheld form.
The first time I brought these to a fall potluck, my friend Sarah actually accused me of buying them from a bakery. She couldn't believe something that smelled like apple pie could have that signature Rice Krispie crunch. Now they're the most requested treat at every gathering.
Last autumn my niece decided she was too old for regular marshmallow treats. She took one bite of these, eyes went wide, and asked if I could teach her how to make them for her school bake sale. Sometimes the best recipes bridge generations.
Ingredients
- 6 cups crispy rice cereal: Use fresh cereal for the best texture and that satisfying crunch in every bite
- 1/4 cup unsalted butter: Real butter makes a difference in the richness and helps achieve that perfect gooey texture
- 1 (10 oz) bag mini marshmallows: Mini marshmallows melt faster and more evenly than regular sized ones
- 1/2 teaspoon vanilla extract: This ties everything together and adds that homemade bakery flavor
- 1 medium apple, peeled, cored, diced small: Granny Smith holds its shape best but Honeycrisp adds lovely sweetness
- 2 tablespoons unsalted butter: For sautéing the apples until theyre perfectly tender
- 2 tablespoons light brown sugar: Creates that caramelized apple pie flavor we all love
- 3/4 teaspoon ground cinnamon: Warm spice that makes these taste like autumn in a bar
- 1/8 teaspoon ground nutmeg: Just enough to add depth without overpowering
- Pinch of salt: Balances the sweetness and enhances all the apple pie spices
- 2 ounces white chocolate, melted (optional): Adds a pretty finish and extra creamy sweetness
Instructions
- Prep your pan:
- Line a 9x9-inch baking dish with parchment paper and give it a light greasing. This saves you so much cleanup later and ensures the bars release perfectly.
- Make the apple pie filling:
- Melt 2 tablespoons butter in a small skillet over medium heat. Add diced apple, brown sugar, cinnamon, nutmeg, and salt. Cook for 4 to 5 minutes until the apples are tender and coated in caramelized goodness.
- Melt the marshmallows:
- In a large saucepan, melt 1/4 cup butter over low heat. Add mini marshmallows and stir constantly until completely melted and smooth. Remove from heat and stir in vanilla extract.
- Combine everything:
- Fold the cooked apple mixture into the marshmallow mixture, then add the rice cereal. Stir quickly but gently until every piece of cereal is coated and those spice flecked apples are distributed throughout.
- Press into the pan:
- Transfer the mixture to your prepared dish. Press firmly with a spatula to compact it well. This step is crucial for bars that hold together perfectly when cut.
- Add the finishing touch:
- Drizzle melted white chocolate over the top if you're feeling fancy. Let everything cool at room temperature for at least an hour before cutting into 16 squares.
 Pin this
 My dad, who claims he doesn't like sweets, ate three of these the last time he visited. He said they reminded him of the apple pies his grandmother used to make, but somehow better. Food memories work in mysterious ways.
Getting the Right Apple Texture
I learned the hard way that large apple chunks create awkward gaps in the treats. Dice your apples small and cook them until they're tender but not mushy. They should still have a little bite, like in a proper apple pie filling.
The Marshmallow Melting Trick
Low and slow is the way to go with marshmallows. If you rush this step, they can seize up and turn into a sticky mess. Patience rewards you with that smooth, glossy consistency that makes these treats irresistible.
Storage and Make Ahead Tips
These stay fresh for up to three days when stored in an airtight container at room temperature. Layer them between sheets of wax paper so they don't stick together. You can also freeze the uncut slab for up to a month.
- Warm a square in the microwave for 10 seconds to recreate that fresh from the pan experience
- Package them in cellophane bags with ribbon for an easy homemade gift
- These bars actually develop better flavor after sitting for a day
 Pin this
 There's something magical about watching people bite into these expecting regular treats and getting that warm apple pie surprise instead. Happy baking.
Recipe FAQs
- → Can I use fresh apples instead of cooking them first?
-
No, cooking the apples first is essential. Raw apples would remain crunchy and release excess moisture into the marshmallow mixture, making the treats soggy. Caramelizing the apples concentrates their flavor and ensures the proper chewy texture.
- → What apple variety works best?
-
Granny Smith apples provide a nice tart contrast to the sweet marshmallow, while Fuji or Gala offer a sweeter profile. Avoid very soft apples like Red Delicious as they can become mushy during cooking.
- → How should I store these treats?
-
Store in an airtight container at room temperature for up to 3 days. The marshmallow will eventually harden slightly, but they remain delicious. Avoid refrigeration as the cold makes them overly firm and changes the texture.
- → Can I make these ahead of time?
-
Yes, prepare these up to 24 hours before serving. The flavors actually develop better after sitting for a few hours. If making for an event, cut them just before serving for the freshest appearance.
- → Why did my treats turn out hard?
-
Overcooking the marshmallows or pressing the mixture too firmly into the pan can create hard, dense treats. Melt marshmallows just until smooth and press gently but evenly. Using stale marshmallows can also affect texture.
- → Can I freeze these treats?
-
Yes, wrap individual squares tightly in plastic wrap and freeze for up to 2 months. Thaw at room temperature for 30 minutes before serving. The texture may be slightly different but still enjoyable.
