 Pin this
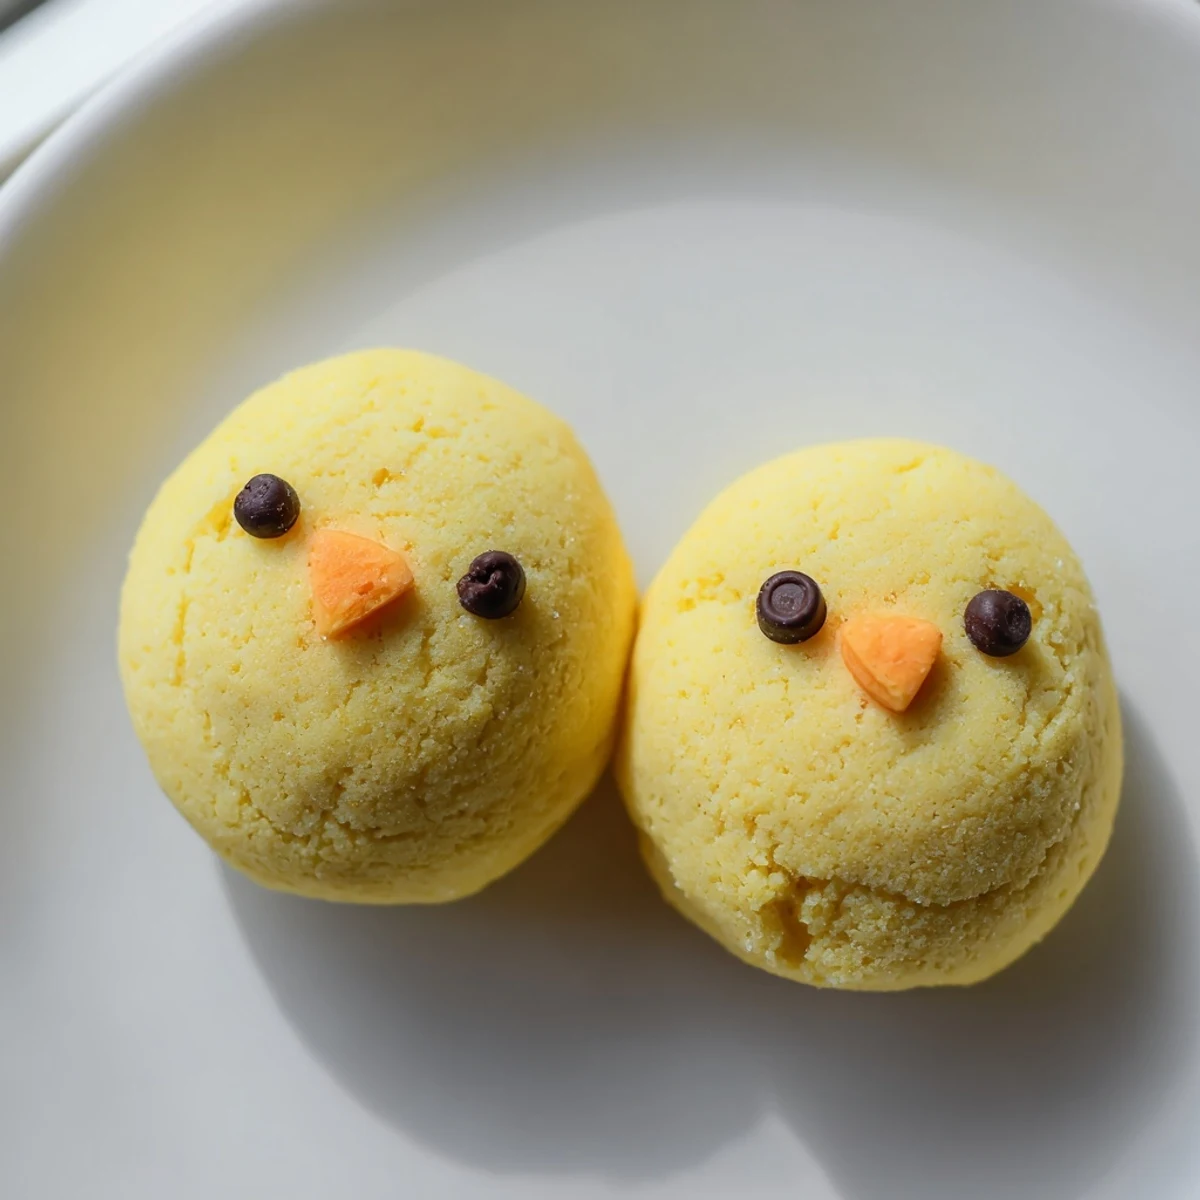
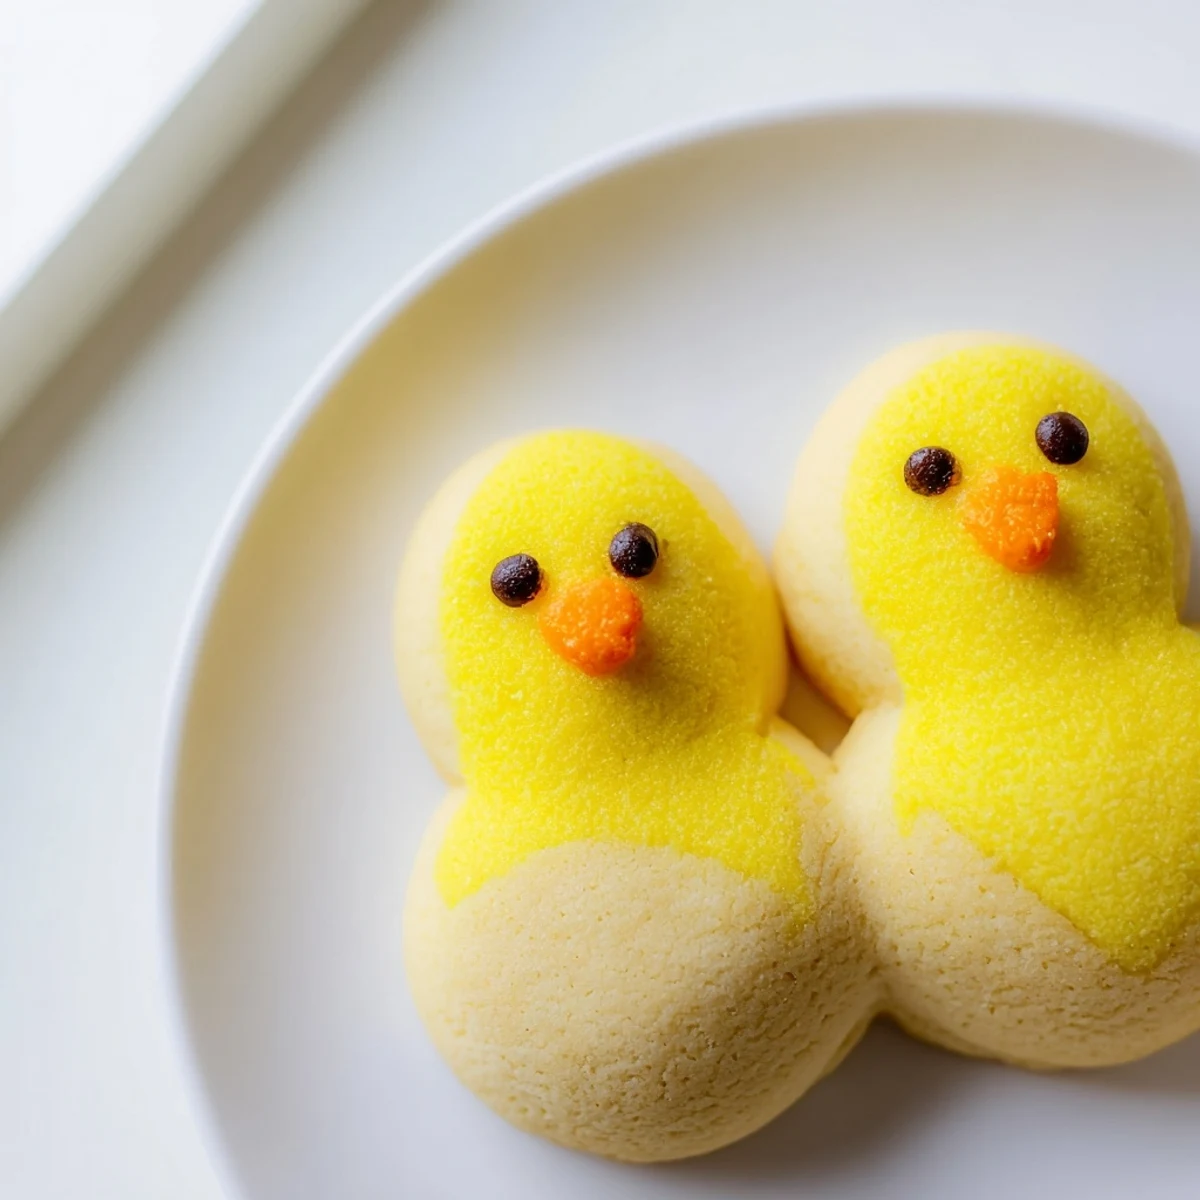
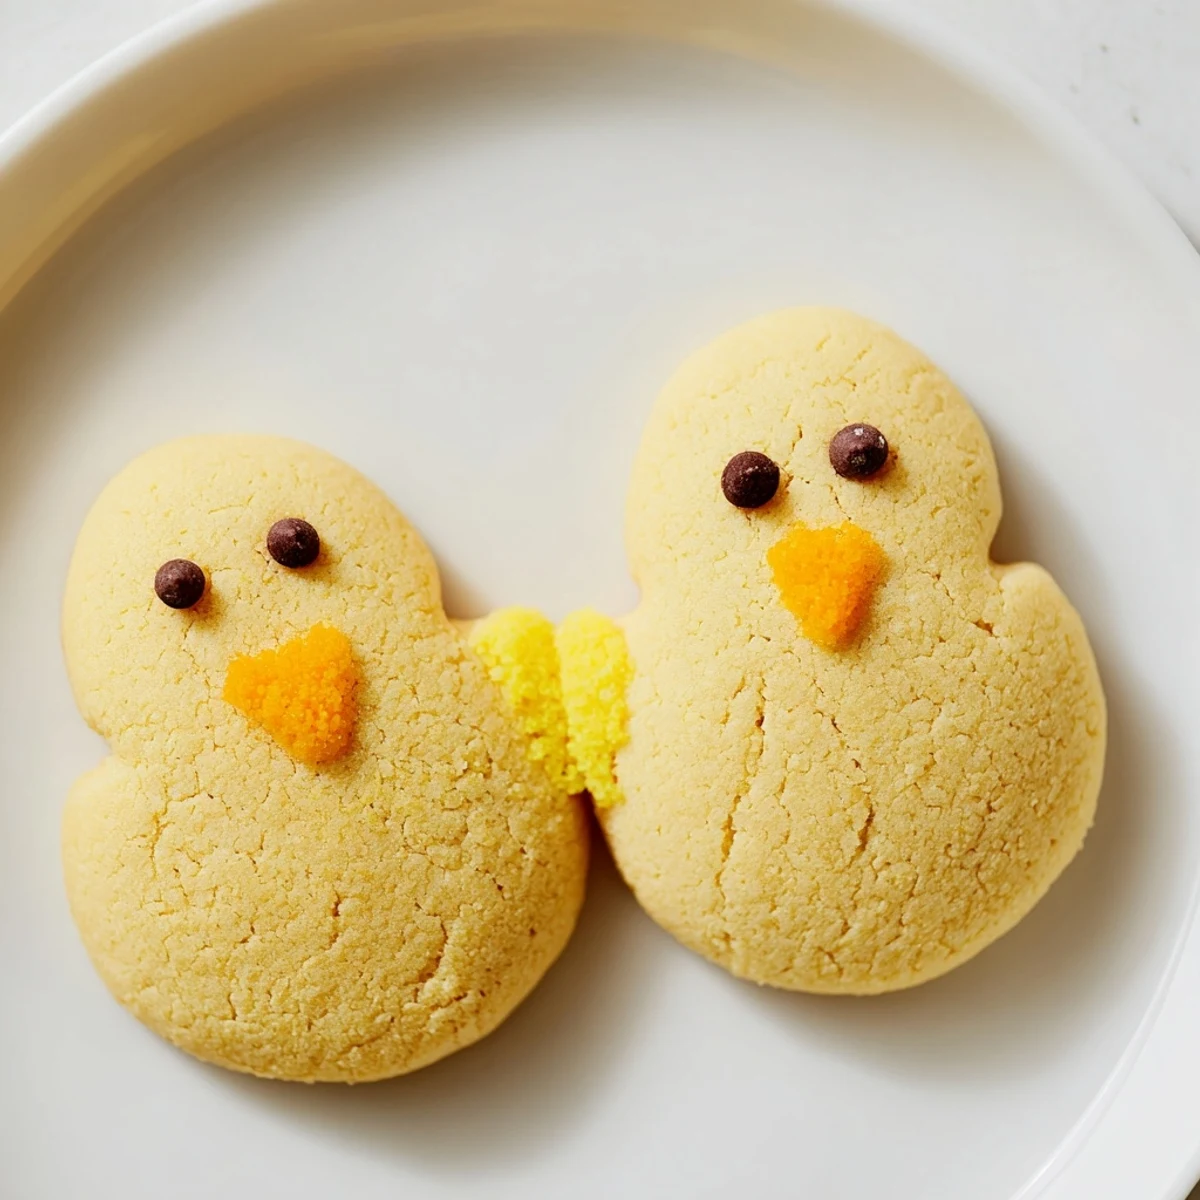
 These delightful chick-shaped cookies combine a classic buttery sugar dough with vibrant yellow coloring and charming faces. The process involves creaming butter and sugar for a fluffy base, then incorporating vanilla for warmth. After mixing dry ingredients and adding food coloring, shape the dough into chick forms with a larger body and smaller head. A quick bake yields tender cookies with just-golden edges. Finish with a simple powdered sugar glaze for shine, then add personality with chocolate chip eyes and orange candy beaks.
My daughter spotted these in a magazine last spring and begged to make them for her class party. We spent a rainy Saturday afternoon covered in flour and yellow food coloring, giggling every time a chick came out looking slightly ridiculous. Now they are our go-to spring baking project.
Last Easter my niece accidentally made one chick with an enormous head and tiny body and it became the family mascot we still talk about. These cookies have a way of making everyone smile regardless of how they turn out.
Ingredients
- 2 1/4 cups all-purpose flour: The foundation that gives these chicks their structure without making them tough or dry
- 1/2 teaspoon baking powder: Just enough lift to keep the cookies tender and light rather than flat and hard
- 1/4 teaspoon salt: Balances the sweetness and brings out the buttery vanilla flavor
- 3/4 cup unsalted butter at room temperature: Use real butter and let it soften properly for the creamiest texture and best flavor
- 3/4 cup granulated sugar: Sweetens the dough while creating that perfect crisp edge and soft center
- 1 large egg: Binds everything together and adds richness for a cookie that holds its shape
- 1 teaspoon vanilla extract: Pure vanilla makes these taste like a professional bakery cookie
- Yellow food coloring: Gel coloring works best for vibrant yellow without adding excess liquid
- 3/4 cup powdered sugar mixed with 2 tablespoons milk: Creates a simple shiny glaze that makes the chicks look polished
- Black decorating gel or mini chocolate chips: For the eyes that give each chick its personality
- Orange decorating gel or candy: The beaks that bring these little guys to life
Instructions
- Get your oven ready:
- Preheat to 350°F and line two baking sheets with parchment paper so the chicks do not stick
- Mix the dry ingredients:
- Whisk flour baking powder and salt in a bowl so everything is evenly distributed
- Cream the butter and sugar:
- Beat until light and fluffy then add the egg and vanilla until completely combined
- Combine everything:
- Gradually mix in the dry ingredients until a smooth dough forms
- Make it yellow:
- Add drops of yellow food coloring and knead until the color is consistent throughout
- Shape your chicks:
- Roll dough into 1-inch balls then place one ball for the body and a smaller one on top for the head pressing gently together
- Arrange and bake:
- Place cookies 2 inches apart on baking sheets and bake for 8 to 10 minutes until edges are barely golden
- Cool completely:
- Let the cookies cool fully before decorating or the glaze will melt right off
- Add the glaze:
- Mix powdered sugar with milk until thin and brush over cooled cookies for a pretty shine
- Give them faces:
- Add black gel or chips for eyes and orange for beaks then let everything set before serving
 Pin this
 These have become my signature contribution to every spring gathering and children always gravitate toward the plate first. Something about food that looks like tiny creatures makes it taste twice as good to little ones.
Making These With Kids
The shaping part is where children really shine because there is no wrong way to make a chick. I let my kids decide which chicks get tiny beaks and which get enormous ones and the personality variations are the best part.
Storage and Make Ahead Tips
Undecorated dough balls freeze beautifully for up to three months so you can bake fresh chicks whenever spring inspiration strikes. Already baked and decorated cookies stay fresh in an airtight container for about five days.
Ways to Customize Your Chicks
The basic recipe is just a starting point for all sorts of spring creations. Use the same technique to make bunnies or lambs by changing the colors and adding different details.
- Add ½ teaspoon lemon zest to the dough for a bright citrus variation that tastes like sunshine
- Use colored sugars or sprinkles on the wet glaze for extra sparkle and texture
- Try pink coloring with heart sprinkles for Valentine chicks or pastel rainbow colors for birthday parties
 Pin this
 These little chicks bring so much joy to spring celebrations and disappear faster than any other cookie I make. Happy baking.
Recipe FAQs
- → Can I make the dough ahead of time?
-
Yes, refrigerate the dough for up to 2 days wrapped tightly. Let it soften slightly at room temperature for 10-15 minutes before shaping and baking.
- → How do I store these cookies?
-
Store in an airtight container at room temperature for up to 5 days. Place parchment paper between layers to prevent the decorations from smudging.
- → Can I freeze the chick cookies?
-
Freeze undecorated baked cookies for up to 3 months. Thaw completely before adding the glaze and facial decorations for best results.
- → What if I don't have decorating gel?
-
Mini chocolate chips work perfectly for eyes. For beaks, use orange M&Ms, candy corn pieces, or tint a small amount of frosting with orange food coloring.
- → How can I make the dough easier to handle?
-
Chill the colored dough for 15-30 minutes if it feels too soft or sticky. This makes shaping the chick bodies and heads much simpler and maintains their form during baking.
- → Can I skip the glaze?
-
Absolutely! The glaze adds shine and sweetness, but the cookies are delicious without it. You can also brush with egg white before baking for a subtle glossy finish.
