 Pin this
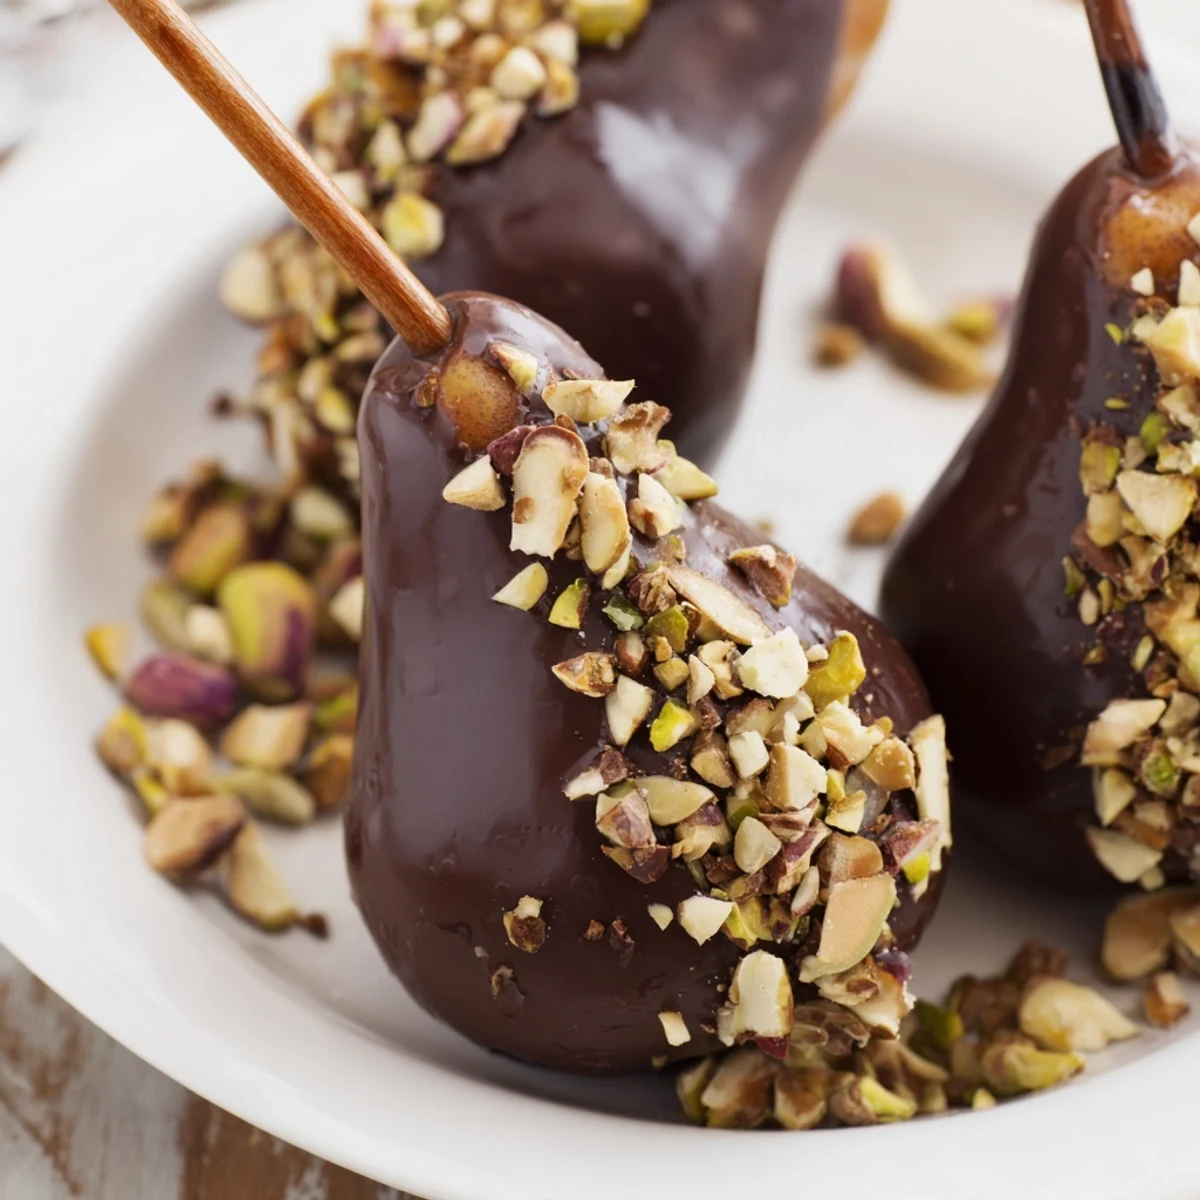
 Enjoy ripe pears halved and dipped into smooth melted dark chocolate, then topped with finely chopped mixed nuts for a delightful combination of textures and flavors. The chocolate coating can be set by chilling or enjoyed at room temperature. This simple yet elegant dish offers a perfect balance of juicy fruit and rich chocolate with the added crunch from nuts, delivering a satisfying and visually appealing indulgence.
This method uses a double boiler to melt the chocolate gently, ensuring a smooth coating over the pears. Optional coconut oil adds silkiness to the chocolate. Variations include using milk or white chocolate and swapping nuts for hazelnuts, pecans, or macadamias. Serve chilled or at room temperature for a refreshing treat that complements dessert wines nicely.
The kitchen was already full of chocolate smells when my sister walked in and immediately started laughing at the sight of me hovering over the double boiler like it might bite. I was attempting chocolate covered pears for what was supposed to be an elegant dinner party dessert, though my hands were shaking and I had chocolate smeared across my cheek from an earlier taste test.
That dinner party turned into everyone standing around the counter, grabbing pear halves with their fingers and letting chocolate drip onto their plates, which is honestly the best way to eat them. The conversation kept circling back to how something so simple could feel so special and festive.
Ingredients
- 2 large ripe pears: Choose fruit that gives slightly when pressed but still feels firm in your hand because overripe pears will turn to mush once chocolate hits them
- 150 g dark chocolate (6070% cocoa), chopped: Higher cocoa percentage creates that sophisticated snap and prevents the coating from melting too quickly against the juicy fruit
- 50 g mixed nuts: A combination of pistachios, almonds, and walnuts adds multiple textures and flavors that dance with the chocolate
- 1 tsp coconut oil (optional): This little trick makes the chocolate flow beautifully and creates that glossy finish you see in professional chocolatiers
Instructions
- Prep your pears like a pro:
- Wash and completely dry each pear because even tiny water droplets will seize your chocolate. Slice in half lengthwise, carefully remove the core with a small knife or melon baller, then push a wooden skewer into what used to be the stem end to create a handle for dipping.
- Set up your dipping station:
- Cover a baking sheet with parchment paper and have your chopped nuts ready in a shallow bowl because once chocolate meets pear, everything moves fast.
- Melt with patience:
- Set a heatproof bowl over a pan of barely simmering water, toss in your chopped chocolate and coconut oil if using, then stir gently until completely smooth and glossy. Never let the water touch the bottom of the bowl.
- The dipping moment:
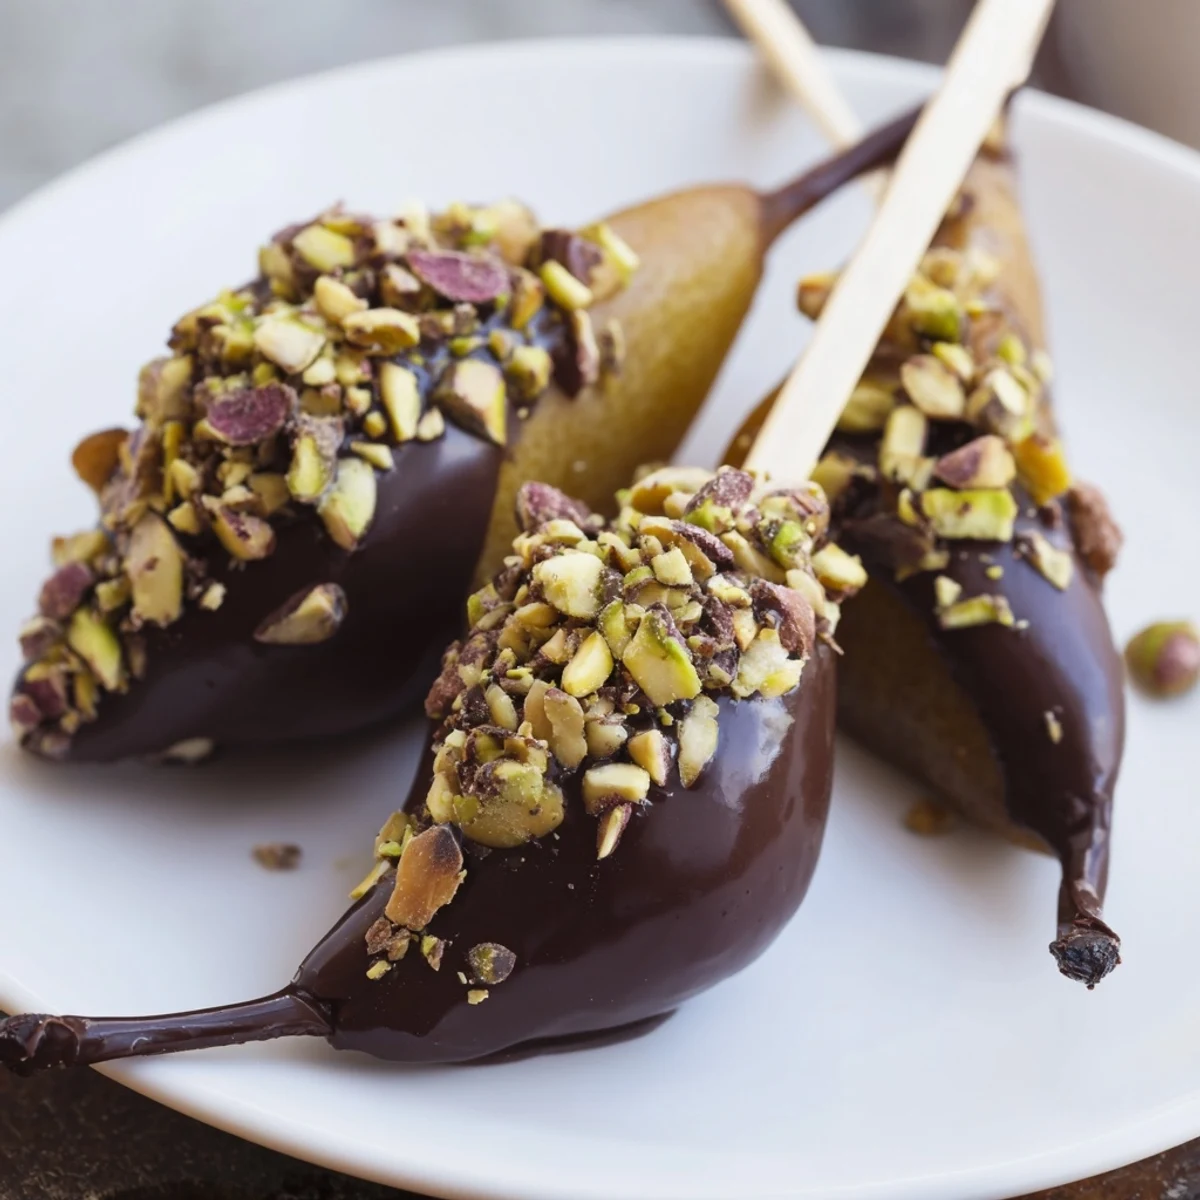
- Dip each pear half about two thirds of the way into the chocolate, letting the excess drip off for a few seconds before working quickly to sprinkle or press the nuts into the still wet coating.
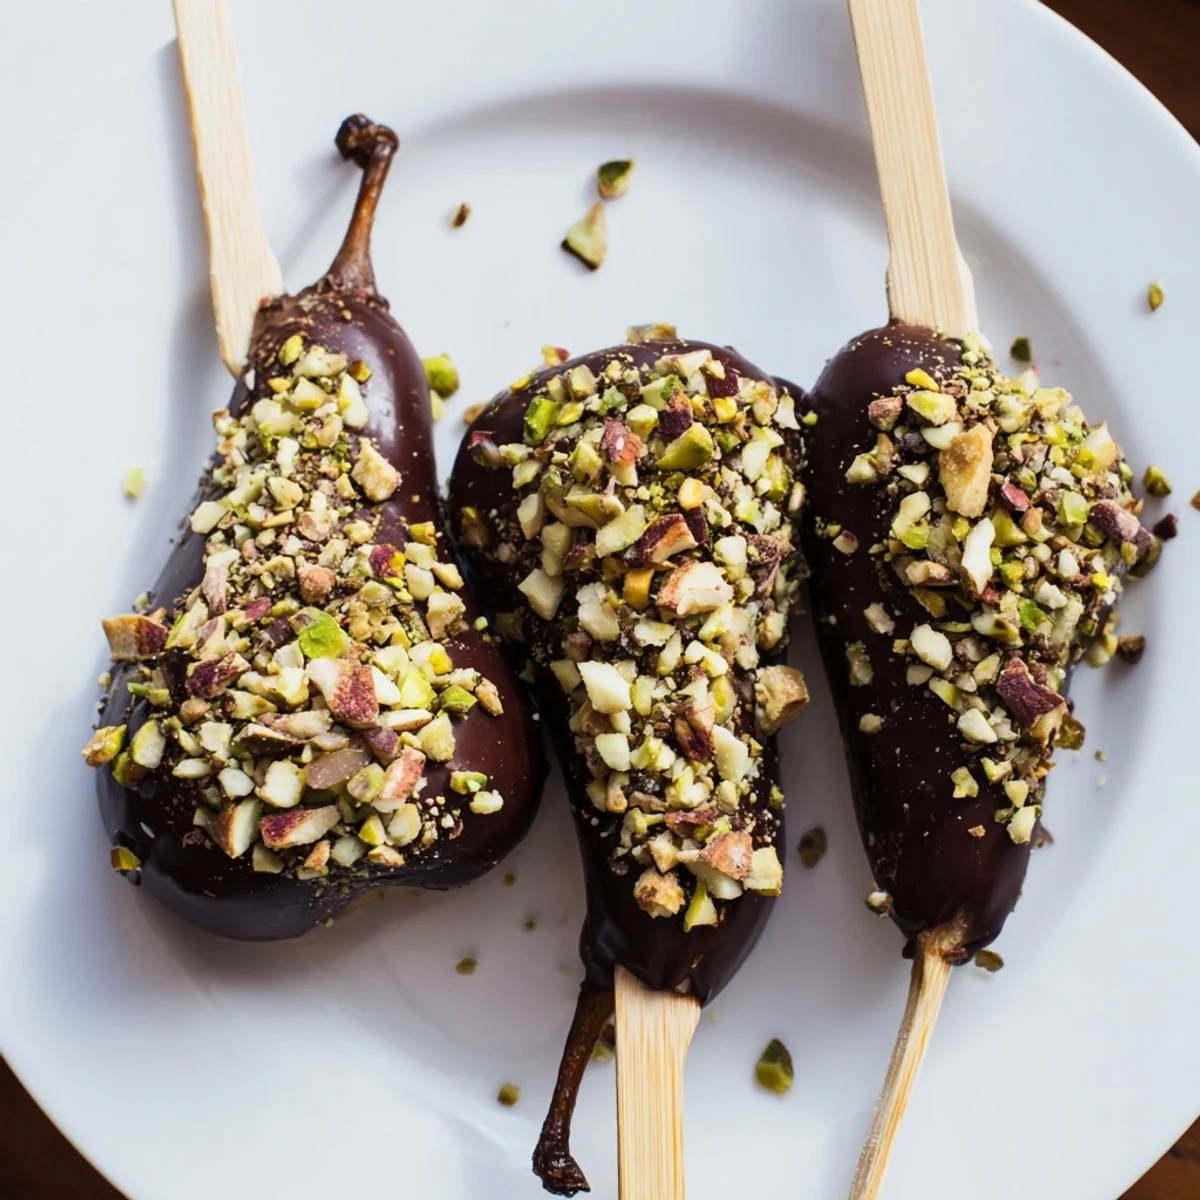
- Let them rest:
- Arrange the pears on your prepared baking sheet and pop them in the refrigerator for about twenty minutes until the chocolate is firm and set.
 Pin this
 These have become my go to when someone says they are coming over last minute because they are impressive enough for company but casual enough that no one feels guilty eating them with their hands.
Chocolate Matters More Than You Think
I have learned through many batches that the chocolate quality makes or breaks this recipe. Cheap chocolate will never set quite right and often develops that odd white bloom overnight, while good dark chocolate maintains its sheen and snap for days if they somehow last that long.
The Nut Question
Fine chopping is worth the extra minute because large nut chunks can fall off in dramatic pieces when you bite into the chocolate coating. Smaller pieces adhere better and distribute crunch evenly throughout every mouthful.
Make Them Your Own
Milk or white chocolate work beautifully if that is your preference, though the set time is longer and the final texture is softer. A drizzle of contrasting chocolate over the nuts creates that professional bakery look that makes people think you have secret culinary training.
- Try rolling them in crushed graham crackers for a s'mores vibe
- Cinnamon stirred into the melted chocolate adds unexpected warmth
- These are best eaten the same day but will keep overnight in the refrigerator
 Pin this
 There is something deeply satisfying about making something that looks this fancy with your own two hands, especially when it involves chocolate and fresh fruit in the same bite.
Recipe FAQs
- → What type of chocolate works best for coating pears?
-
Dark chocolate with 60–70% cocoa content melts smoothly and provides a rich, balanced flavor that complements juicy pears well.
- → Can different nuts be used for topping?
-
Yes, you can substitute mixed nuts with hazelnuts, pecans, macadamias, or your favorite nuts to vary the taste and texture.
- → How do I prevent the chocolate from cracking when serving?
-
Allow the chocolate to set at room temperature or chill briefly to harden. Avoid quick temperature changes to keep the coating smooth.
- → Is it necessary to use skewers for dipping pears?
-
Inserting skewers in the pear halves makes dipping easier and helps to evenly coat the fruit without mess.
- → Can the chocolate be altered for a smoother texture?
-
Adding a small amount of coconut oil while melting the chocolate creates a silkier, smoother coating on the pears.
