 Pin this
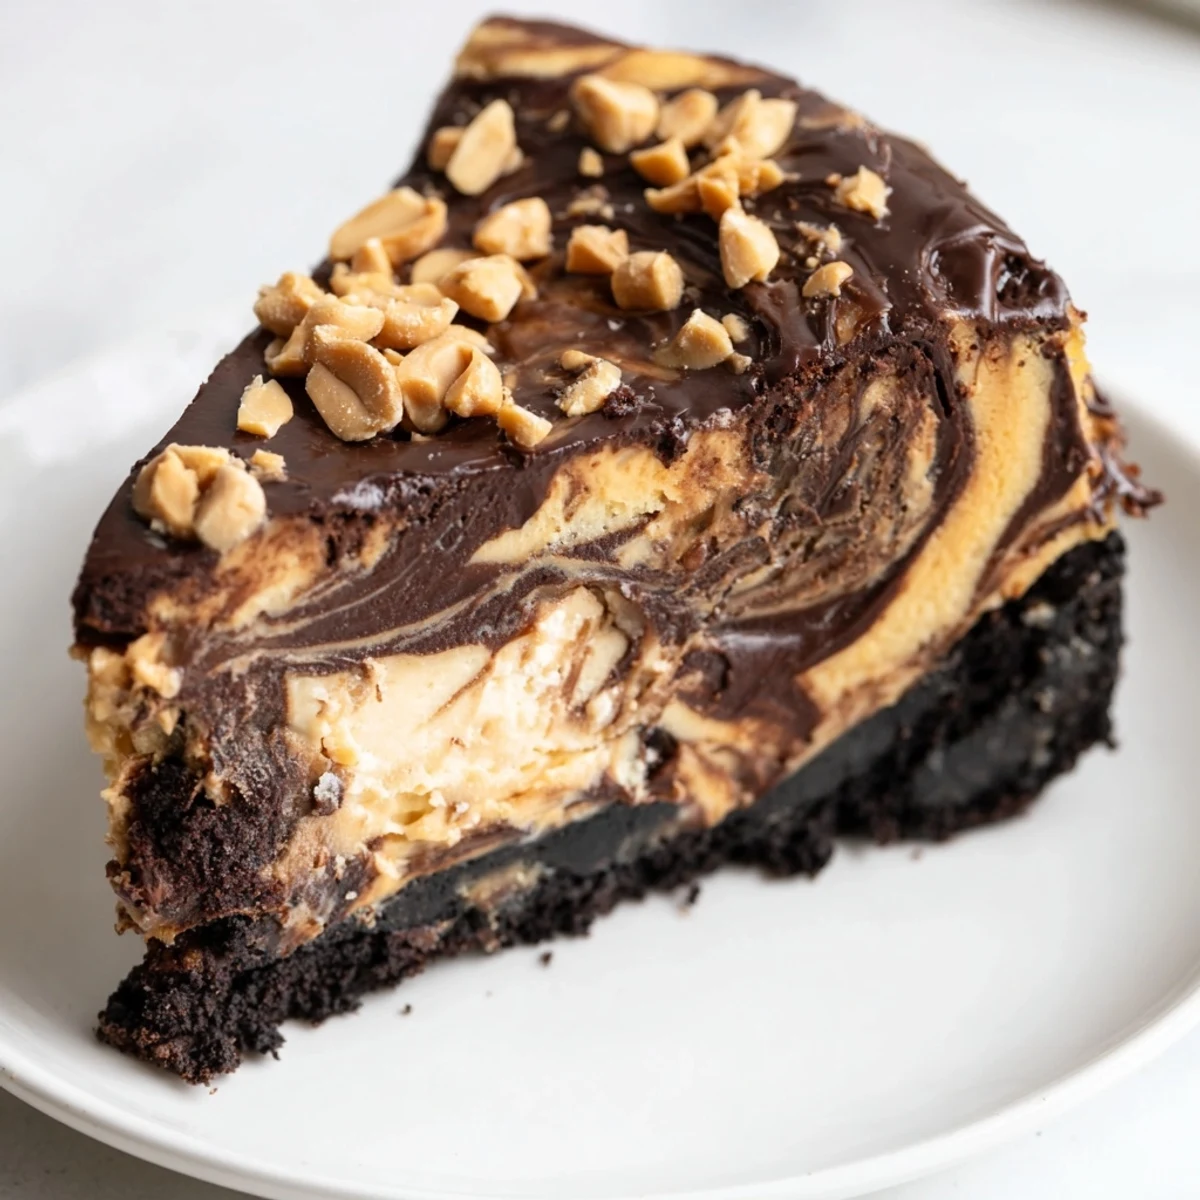
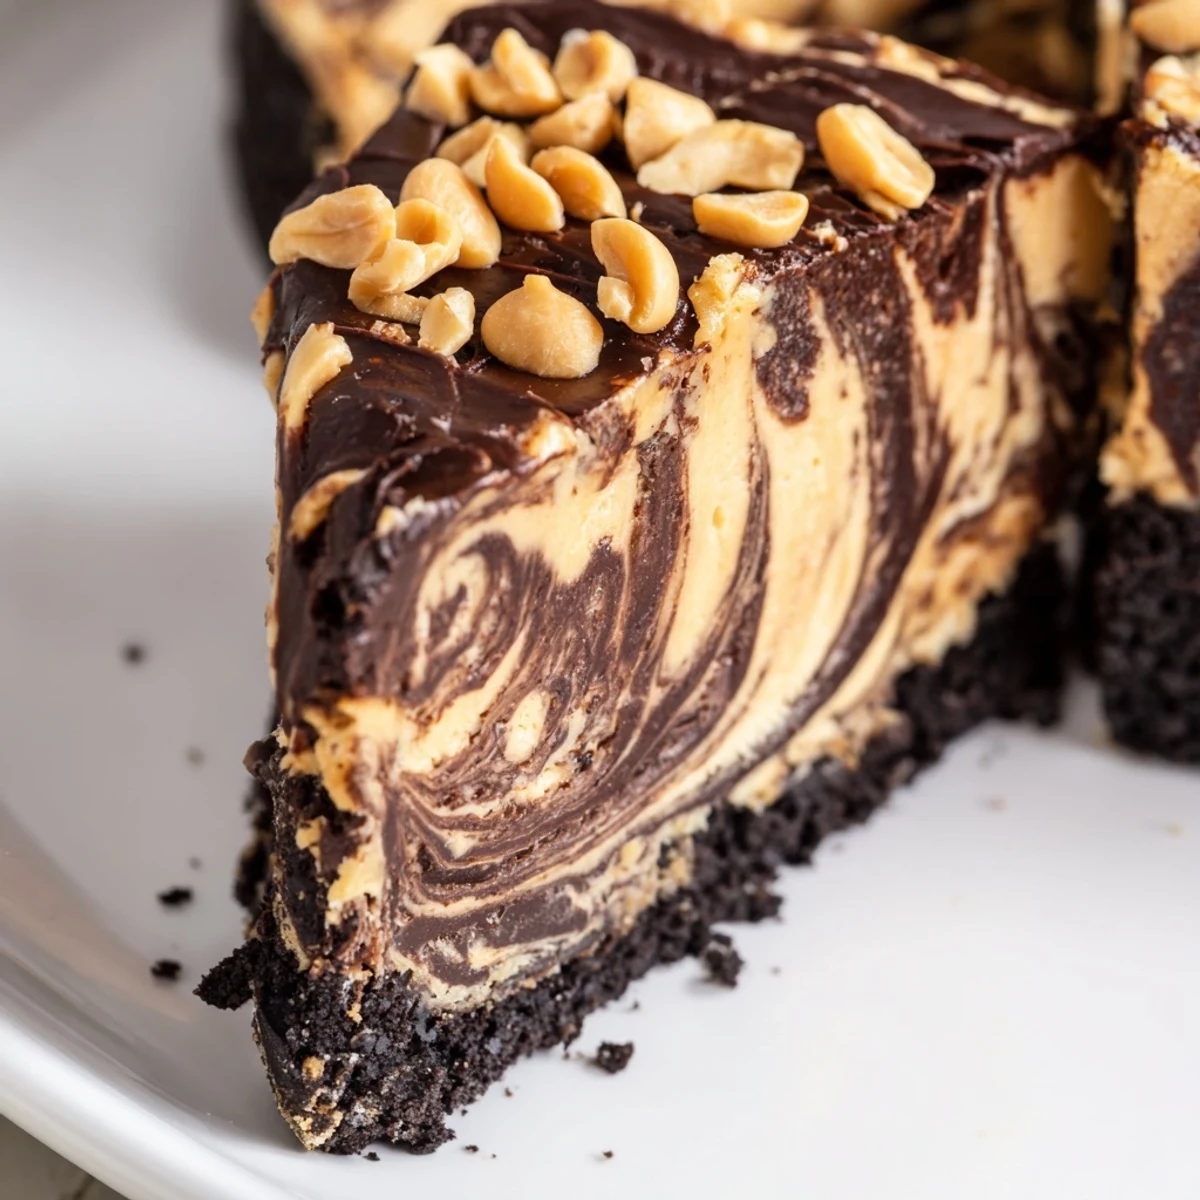
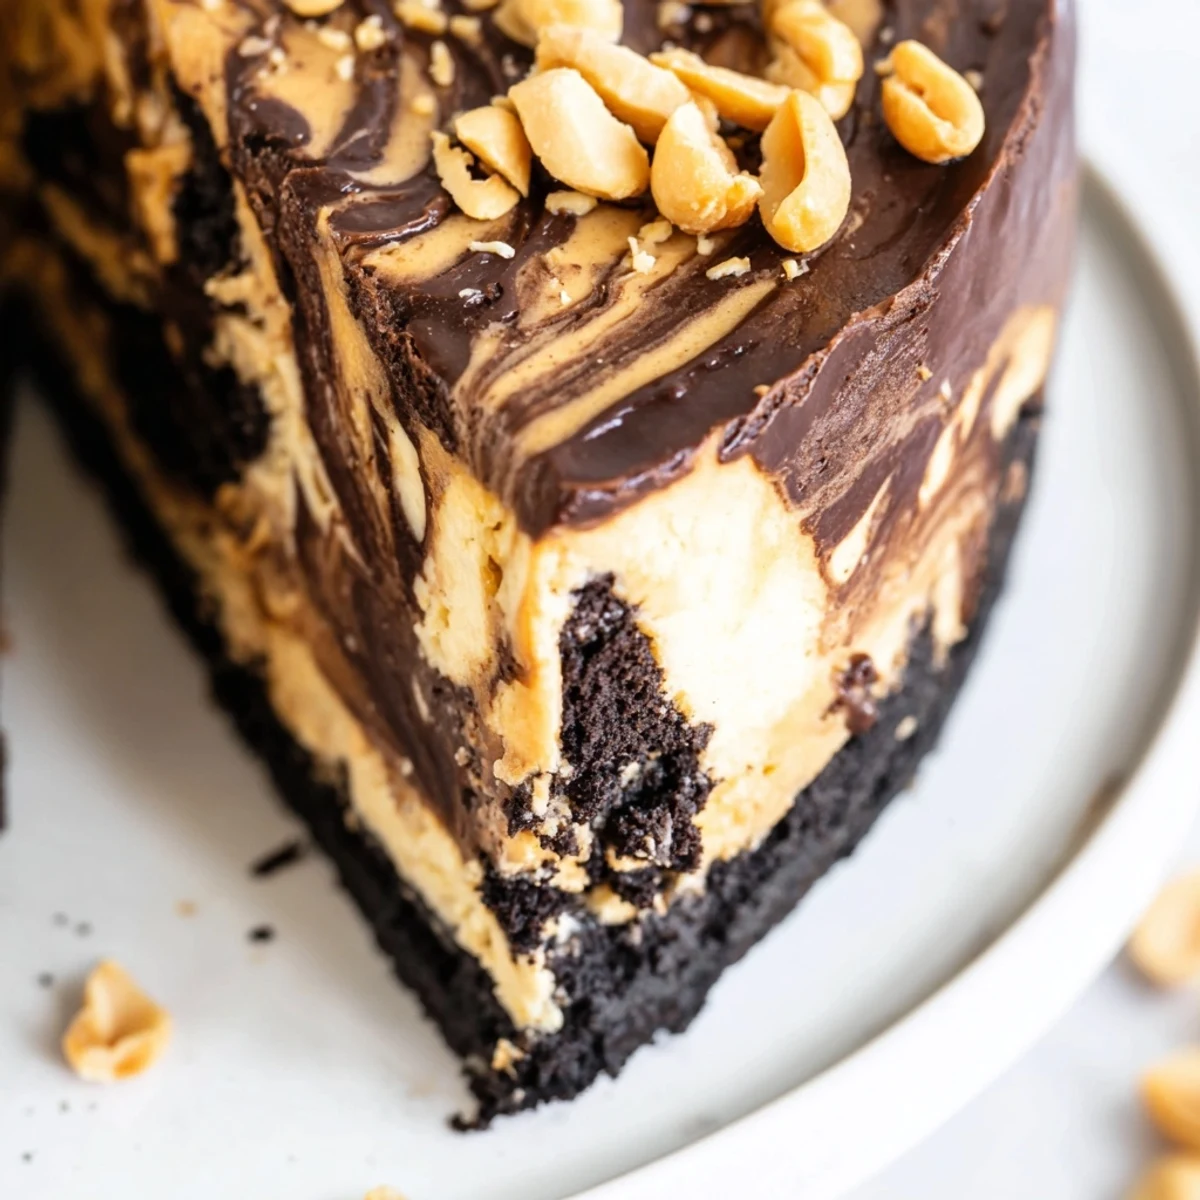
 This chocolate peanut butter cheesecake brings together two beloved flavors in one stunning dessert. A crunchy chocolate cookie crust forms the base, topped with a swirled marble of rich dark chocolate and smooth peanut butter cheesecake filling.
After a slow bake and thorough chilling, the cheesecake is finished with a glossy chocolate peanut butter ganache and a sprinkle of roasted peanuts. It yields 12 generous servings and is perfect for celebrations, holidays, or any occasion that calls for something truly indulgent.
The rain was hammering against the kitchen window the afternoon I got the call that my sister was coming to visit with her new boyfriend, and I had exactly six hours to impress somebody whod later describe himself as a peanut butter fanatic. I rummaged through the pantry, found a forgotten pack of chocolate sandwich cookies, and decided a cheesecake was the only reasonable answer to that kind of pressure. The oven clicked on, the butter started melting, and somewhere between panic and ambition this cheesecake was born. It worked, because two years later hes still around and still asks for it at every family gathering.
I learned the slow cooling trick the hard way when my first attempt cracked straight across the middle because I yanked it out of a hot oven into cold air like an impatient fool.
Ingredients
- 200 g chocolate sandwich cookies, crushed: Oreos are the obvious choice but any chocolate sandwich cookie works, and you want them crushed to fine rubble, not dust.
- 60 g unsalted butter, melted: This binds the crust together and a little extra wont hurt if your cookies lean dry.
- 600 g cream cheese, softened: Take it out of the fridge at least two hours ahead because cold cream cheese will leave you with lumps no amount of beating can fix.
- 200 g smooth peanut butter: Use a commercial brand like Skippy or Jif for the most reliable texture and sweetness.
- 200 g granulated sugar: This may seem like a lot but the peanut butter and dark chocolate balance it out beautifully.
- 3 large eggs: Room temperature eggs blend more smoothly into the batter and help avoid overmixing.
- 1 tsp vanilla extract: A quiet background note that rounds everything off without stealing attention.
- 120 ml sour cream: This adds a gentle tang that keeps the richness from becoming cloying.
- 100 g dark chocolate, melted and slightly cooled: Go for something around sixty to seventy percent cacao so it cuts through the sweetness.
- 120 ml heavy cream: For the ganache topping, and the fattier the better for a silky set.
- 120 g dark chocolate, chopped: Also for the topping, and chopping it small helps it melt evenly into the hot cream.
- 2 tbsp creamy peanut butter: Stirred into the ganache for a salty, nutty dimension that pushes the topping over the top.
- Chopped roasted peanuts (optional): A scattering of these gives a welcome crunch against all that velvet creaminess.
Instructions
- Build the foundation:
- Preheat your oven to 160 degrees Celsius, grease and line a 23 centimeter springform pan, then toss the crushed cookies with melted butter and press the mixture firmly into the base. Bake for ten minutes until it smells like toasted cocoa and let it cool completely while you move on.
- Make the silky base:
- Beat the softened cream cheese and sugar together in a large bowl until completely smooth with no pale streaks remaining, then blend in the peanut butter until the mixture looks uniformly tan and luxurious.
- Add the eggs gently:
- Drop in the eggs one at a time on low speed, letting each disappear before adding the next, then stir in the vanilla and sour cream with just a few folds so you do not whip excess air into the batter.
- Split and conquer:
- Divide the filling evenly into two bowls, then fold the melted dark chocolate into one half until it turns a deep, glossy brown and leave the other half pale and peanut buttery.
- Create the swirl:
- Pour the chocolate layer over the cooled crust and spread it flat, then spoon the peanut butter mixture on top in dollops and drag a butter knife through both layers in lazy figure eights for a marbled effect.
- Bake low and slow:
- Slide the pan into the oven for fifty to sixty minutes, checking near the end that the edges are set while the center still has a gentle wobble like set jelly.
- Cool with patience:
- Turn off the oven, crack the door open with a wooden spoon, and let the cheesecake sit inside for a full hour so it cools gradually without cracking across the top.
- Chill overnight if you can:
- Transfer to the refrigerator for at least four hours, though overnight is best because the texture transforms into something dense and fudgy that holds a clean slice.
- Finish with ganache:
- Heat the cream in a small saucepan until it steams, remove from heat, add the chopped chocolate and stir until you have a smooth ganache, then blend in the peanut butter and spread it over the cold cheesecake.
- Garnish and serve:
- Scatter chopped peanuts over the ganache if you like a bit of crunch, then slice with a hot clean knife for the neatest portions.
 Pin this
 The moment my sisters boyfriend closed his eyes after the first bite and nodded slowly without saying a word, I knew this recipe had earned a permanent spot in the family rotation.
Choosing Your Chocolate Wisely
I once used a cheap cooking chocolate that was mostly sugar and oil, and the whole cheesecake tasted flat despite every other ingredient being on point. Spend a little more on decent dark chocolate with real cocoa butter in the ingredients list and you will taste the difference in every single layer. The ganache especially depends on it because there are only three ingredients and nowhere for mediocre chocolate to hide.
Peanut Butter Matters More Than You Think
Natural peanut butter with the oil on top seems like the wholesome choice but it will make your filling greasy and prone to separating during the long bake. Stick with a stabilized commercial peanut butter for the filling and save the fancy artisan stuff for spreading on toast. The sugar and fat ratio in brands like Skippy gives the cheesecake a consistent, sliceable texture that sets up beautifully after chilling.
Serving and Storage Pointers
Let slices sit at room temperature for about fifteen minutes before serving because the cold mutes both the chocolate and the peanut butter flavors. A hot dry knife wiped clean between each cut gives you those bakery smooth edges that make people think you bought it instead of made it.
- Store leftovers tightly wrapped in the fridge for up to five days, though the crust softens a bit by day three.
- You can freeze individual slices wrapped in plastic and foil for up to two months and thaw them overnight in the fridge.
- Always add the peanut garnish just before serving so the nuts stay crunchy rather than going soft in the fridge.
 Pin this
 Some desserts are just dessert, but this one lands on the table like a promise that you care enough to spend six hours on somebody, and that makes every single second worth it.
Recipe FAQs
- → Can I make this cheesecake ahead of time?
-
Yes, this cheesecake actually benefits from being made in advance. It needs at least 4 hours of chilling, but refrigerating it overnight yields the best texture and flavor. It will keep well in the refrigerator for up to 5 days covered tightly.
- → Why did my cheesecake crack on top?
-
Cracks usually occur from overmixing the batter, which incorporates too much air, or from sudden temperature changes. Mixing eggs on low speed and cooling the cheesecake slowly in the oven with the door cracked helps prevent cracking. The topping will cover any imperfections anyway.
- → Can I use crunchy peanut butter instead of smooth?
-
Smooth peanut butter is recommended for the filling to achieve that creamy, uniform texture. However, you can use crunchy peanut butter if you prefer little bursts of peanut texture throughout. The topping works well with either variety.
- → How do I get a clean slice when cutting the cheesecake?
-
Use a sharp knife dipped in hot water and wiped dry between each cut. This melts through the topping cleanly and gives you beautiful, presentable slices. Cutting while the cheesecake is well-chilled also helps maintain clean edges.
- → Can I freeze this cheesecake?
-
Yes, you can freeze it for up to 2 months. Wrap the whole cheesecake or individual slices tightly in plastic wrap, then in foil. Thaw overnight in the refrigerator before serving. Add the topping after thawing for the freshest presentation.
- → What can I substitute for sour cream in the filling?
-
Plain Greek yogurt works as a direct substitute for sour cream in this cheesecake. Full-fat yogurt will maintain the richest texture. You can also use crème fraîche if available, though sour cream remains the most accessible option.
