 Pin this
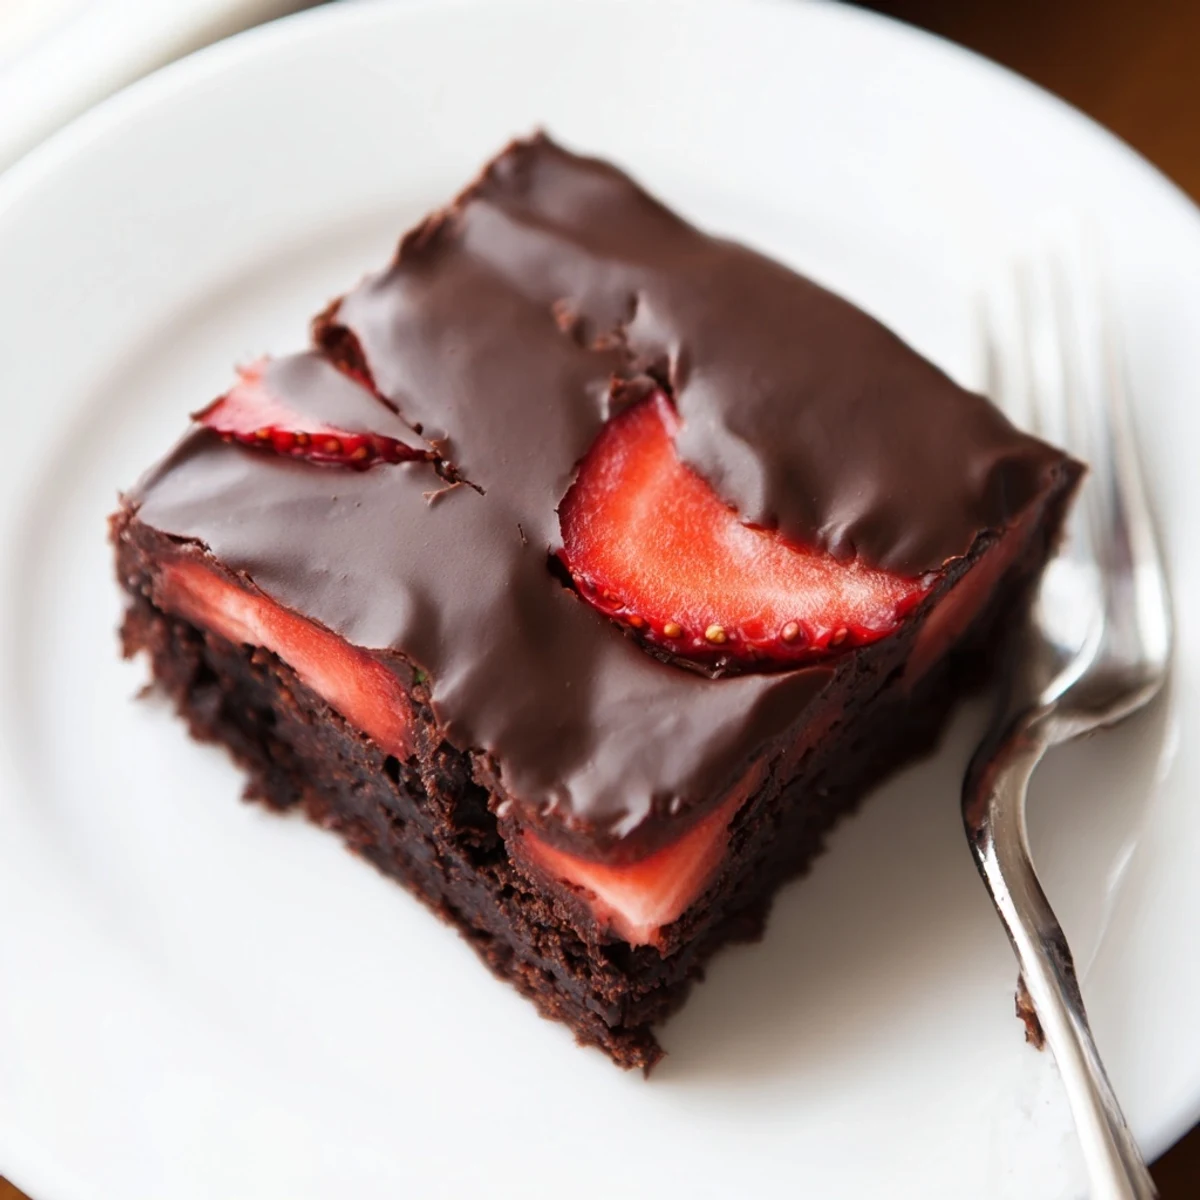
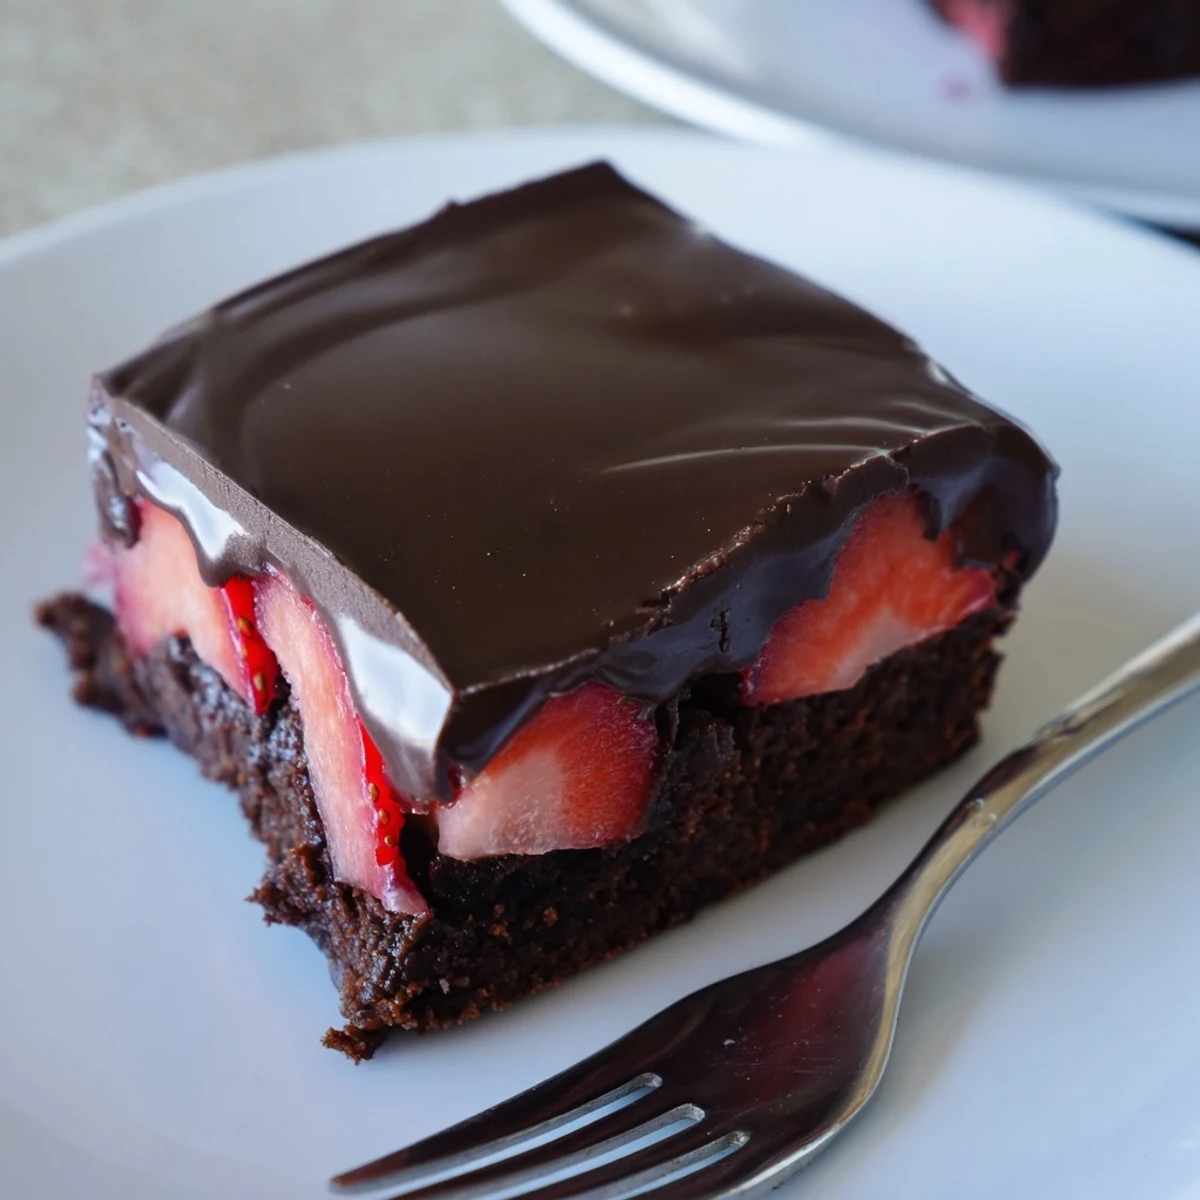
 These chocolate covered strawberry brownies combine three irresistible layers into one showstopping treat. A dense, fudgy brownie base provides the foundation, topped with thinly sliced fresh strawberries that add brightness and juiciness. Everything gets sealed beneath a glossy chocolate coating that snaps when you bite into it.
The assembly is straightforward: bake the brownie layer, arrange strawberries over the cooled surface, then pour on the melted chocolate mixture. After an hour in the fridge, the coating sets firmly and you can slice into neat squares. They keep beautifully for a couple of days, making them ideal for preparing ahead of gatherings or gifting.
The smell of melting chocolate and ripe strawberries hit me at the same time, and suddenly I was standing in my friend Maren's kitchen on a rainy February afternoon, watching her pour glossy chocolate over a pan of something that looked too beautiful to cut into. We made these brownies on a whim, inspired by a half-eaten box of Valentine's Day strawberries sitting on her counter. Three hours later, not a single square survived the night.
I brought a batch of these to a potluck once and watched a quiet coworker named David eat four of them standing up before he even said hello to anyone. He later told me they reminded him of a chocolate strawberry his grandmother used to bring him from a shop near her house. Food does that, pulls things out of people you never expected to hear.
Ingredients
- 115 g unsalted butter: Good butter makes a noticeable difference here since the brownie base is so simple and every flavor shines through.
- 200 g dark chocolate (60 to 70% cocoa), chopped: The higher percentage gives depth without bitterness, and chopping it yourself melts more evenly than chips.
- 150 g granulated sugar: Balances the dark chocolate and keeps the crumb tender without making it overly sweet.
- 2 large eggs: Room temperature eggs incorporate more smoothly into the warm batter and give better lift.
- 1 tsp vanilla extract: A quiet background note that rounds out all the chocolate intensity.
- 75 g all-purpose flour: Measured by weight for accuracy since too much flour turns fudgy brownies into cakey ones.
- Half tsp salt: Essential for making the chocolate taste like itself instead of flat sweetness.
- 250 g fresh strawberries, hulled and thinly sliced: Pick berries that smell like strawberries at the store since fragrant ones have the best flavor once layered under chocolate.
- 170 g semisweet chocolate chips or chopped chocolate: This is your coating layer, so semisweet gives you that snappy shell without being too harsh.
- 1 tbsp coconut oil or unsalted butter: This small addition is the secret to a glossy, professional looking finish that sets firm in the fridge.
Instructions
- Prep your pan and oven:
- Heat the oven to 175 degrees C (350 degrees F) and line your square baking pan with parchment, leaving overhang on two sides so you can lift the whole thing out later like a sling.
- Melt chocolate and butter together:
- Set a heatproof bowl over a saucepan of barely simmering water and stir the butter and chopped dark chocolate until the mixture is completely smooth and glossy. Take it off the heat before it gets too hot to touch.
- Build the batter:
- Whisk the sugar into the warm chocolate mixture, then beat in the eggs one at a time until each disappears completely before adding the next. Stir in the vanilla until everything smells like a bakery.
- Fold in the dry ingredients:
- Gently fold the flour and salt into the batter with a spatula, stopping the moment you no longer see dry streaks since overmixing makes brownies tough.
- Bake until just right:
- Pour the batter into your prepared pan and spread it to the edges, then bake 25 to 30 minutes until a toothpick comes out with moist crumbs clinging to it. The center should look set but still slightly soft since it continues cooking as it cools.
- Cool completely:
- Let the brownies cool in the pan on a wire rack until they reach room temperature, which takes patience but prevents the strawberry layer from wilting on contact.
- Layer the strawberries:
- Arrange the sliced strawberries in an even layer across the entire surface of the cooled brownie, overlapping slightly so every bite gets fruit.
- Make the chocolate coating:
- Melt the semisweet chocolate with the coconut oil or butter over simmering water, stirring until the mixture pours like silk and catches the light.
- Pour and set:
- Pour the melted chocolate over the strawberries and gently spread it to the edges with your spatula, then refrigerate the whole pan for at least one hour until the top is firm and snappy.
- Cut and serve:
- Use the parchment overhang to lift the block out of the pan, then cut into squares with a sharp knife warmed under hot water and dried for perfectly clean edges.
 Pin this
 The first time I cut into these, the chocolate top cracked in a jagged line and revealed this gorgeous cross section of dark brown, ruby red, and darker brown beneath. I stood there holding a imperfect square thinking that some things are better when they are a little messy.
Making It Your Own
A tablespoon of espresso powder in the brownie batter adds a mocha dimension that plays beautifully with the berries. If you prefer milk chocolate, swap out half the dark chocolate in the base for a sweeter, more nostalgic flavor that kids especially love.
Serving and Storing
These brownies are at their absolute best on day one when the strawberry layer is still fresh and the chocolate shell has that perfect snap. Store them in the refrigerator covered tightly and aim to finish them within two days since fresh strawberries are perishable guests in any dessert.
A Few Final Thoughts
Every time I make these, I think about how the simplest combination of chocolate and fruit somehow feels like the most elegant thing on the table. A glass of something sparkling alongside them turns a casual afternoon into an occasion worth remembering.
- Check your chocolate labels for nut traces if you are serving anyone with allergies since many brands share processing facilities.
- A warm, dry knife dipped in hot water between cuts keeps every edge looking bakery perfect.
- Let the brownies sit at room temperature for ten minutes before serving so the chocolate shell softens just slightly for easier biting.
 Pin this
 Some recipes are just dessert, and then some recipes become the thing people request by name at every gathering for years. These brownies have a way of becoming that recipe.
Recipe FAQs
- → Can I use frozen strawberries instead of fresh?
-
Fresh strawberries are strongly recommended for this treat. Frozen berries release excess moisture as they thaw, which can cause the chocolate coating to seize or prevent it from adhering properly to the brownie layer. If frozen is all you have, thaw and pat them completely dry with paper towels before arranging.
- → How do I get clean edges when cutting the brownies?
-
Use a sharp knife warmed under hot water, then dried quickly. Wipe the blade clean between each cut. Chilling the brownies thoroughly before slicing—at least the full hour recommended—helps the chocolate shell firm up, resulting in much neater squares.
- → What type of chocolate works best for the coating?
-
Semisweet chocolate chips or a chopped chocolate bar around 50–60% cocoa yield the best balance of sweetness and structure. Adding coconut oil or butter creates a smoother, shinier finish and helps the coating set with a satisfying snap rather than staying overly hard.
- → How should these brownies be stored?
-
Store them in an airtight container in the refrigerator because of the fresh strawberry layer. They are best enjoyed within one to two days. Let them sit at room temperature for about ten minutes before serving if you prefer a slightly softer texture.
- → Can I make the brownie base ahead of time?
-
Yes, the brownie base can be baked a day in advance. Let it cool completely, then wrap the pan tightly with plastic wrap and keep it at room temperature. When ready to assemble, layer on the strawberries and chocolate coating as directed. This makes the process more manageable for entertaining.
- → Why did my chocolate coating crack after setting?
-
Cracking usually happens when the brownies are too cold going into the fridge or when temperature changes are too abrupt. Let the assembled brownies come to room temperature first, then refrigerate gently. Also avoid pressing down on the coating while it sets.
