 Pin this
 This homemade yogurt delivers a smooth, creamy texture with a pleasant tang that far surpasses store-bought varieties. Using only whole milk and a small amount of starter yogurt containing active cultures, the process involves heating milk to 85°C, cooling it to around 43°C, then incubating the mixture for 8 to 12 hours until perfectly set.
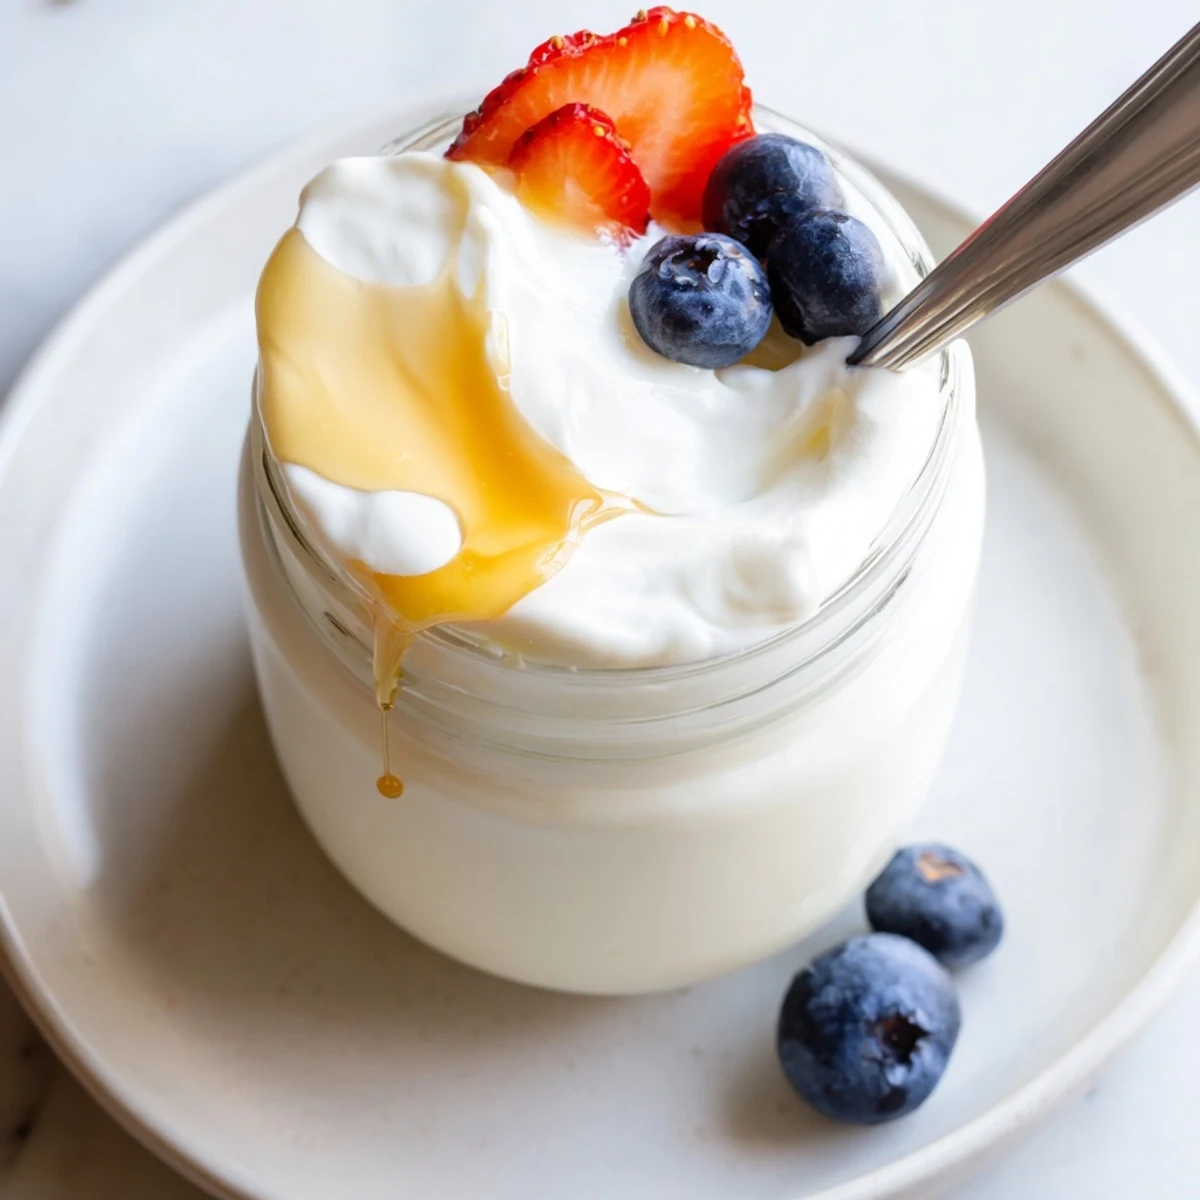
The result is a versatile dairy staple ideal for breakfast bowls topped with fresh fruit and honey, as a cooling side for spicy dishes, or as the base for dips and sauces. Each batch yields about 4 cups and keeps refrigerated for up to one week. You can easily save a portion to culture your next batch, making this an ongoing kitchen staple.
My kitchen smelled like a warm dairy farm the morning I decided to stop buying yogurt altogether. Steam curled up from the saucepan and the whole room felt quieter, almost meditative. There is something deeply satisfying about watching milk transform into something alive and tangy through nothing more than patience and a spoonful of culture. It felt like a small act of rebellion against the fluorescent lit dairy aisle.
I set my first batch on a rainy Tuesday and forgot about it until the next morning. When I opened the oven door and saw that wobbly, set yogurt waiting for me I actually laughed out loud. My partner wandered into the kitchen and we stood there eating spoonfuls straight from the jar with nothing on top.
Ingredients
- Whole milk (1 liter): Whole milk gives you that rich, velvety texture but low fat works if you prefer a lighter result.
- Plain yogurt with active cultures (2 tablespoons): This is your starter and it must contain live cultures so check the label carefully before you buy.
Instructions
- Warm the milk gently:
- Pour the milk into a saucepan and heat it over medium, stirring now and then, until your thermometer reads 85 degrees C. Keep it from boiling because scorched milk will ruin the whole batch.
- Cool it down:
- Take the pan off the heat and let the milk drop to between 43 and 45 degrees C. This is the sweet spot where the cultures can survive and thrive without being killed by the heat.
- Mix your starter:
- In a small bowl, whisk the yogurt starter with a few spoonfuls of the cooled milk until perfectly smooth. Tempering the starter this way prevents lumps from forming in your final yogurt.
- Combine everything:
- Pour the thinned starter back into the saucepan and stir gently but thoroughly so the cultures distribute evenly throughout the milk.
- Pour and cover:
- Transfer the mixture into a clean container or divide it among individual jars and cover them loosely to allow a tiny bit of airflow during incubation.
- Let it incubate:
- Place the containers in a warm spot like a turned off oven with the light on and leave them undisturbed for 8 to 12 hours. The longer you wait the tangier and firmer it becomes.
- Chill before eating:
- Move the set yogurt to the refrigerator for at least 2 hours so it can firm up properly and develop its final creamy texture.
 Pin this
 That first spoonful of still warm yogurt topped with a drizzle of honey and a handful of granola became a weekend ritual I never planned but now cannot imagine living without.
Getting the Right Thickness
If you crave that thick Greek style consistency straining is your best friend. Line a colander with cheesecloth, set it over a bowl, and let the yogurt drain in the fridge for several hours until it reaches the density you love. I once forgot about a batch straining overnight and ended up with something close to cream cheese, which I spread on toast with jam the next morning.
Flavoring Your Yogurt
Plain yogurt is a blank canvas and that is what makes it magical. Fold in vanilla bean paste, a pinch of cinnamon, or a swirl of fruit compote after it has chilled and set. I like to keep a jar plain for cooking and another jar dressed up with whatever fruit is looking sad in the fruit bowl.
Tools and Temperature Matters
A kitchen thermometer is the one tool you truly need because guessing at temperatures is how most batches go wrong. Beyond that, a clean container and a warm, draft free spot for incubation are all you need to succeed.
- Sanitize your jars with boiling water before filling them to keep unwanted bacteria out.
- If your oven light does not generate enough warmth try wrapping the jars in a thick towel instead.
- Always label your batch with the date so you know when it is time to make a fresh one.
 Pin this
 Homemade yogurt is less a recipe and more a quiet little habit that makes ordinary mornings feel a bit more special. Give it one try and you will see how easily it becomes part of your rhythm.
Recipe FAQs
- → What type of milk works best for making yogurt?
-
Whole milk produces the thickest, creamiest yogurt with the richest flavor. Low-fat milk also works but yields a slightly thinner result. Avoid ultra-pasteurized milk when possible, as the high-heat processing can affect culturing. For plant-based alternatives, choose a milk with added thickeners or protein for better setting.
- → Why does the milk need to be heated to 85°C first?
-
Heating the milk to 85°C (185°F) denatures the milk proteins, which allows them to form a tighter, smoother gel during fermentation. This step also kills any competing bacteria that could interfere with the active cultures. Heating ensures a thicker, more consistent final product.
- → How do I maintain the right temperature during incubation?
-
There are several effective methods: a dedicated yogurt maker provides consistent warmth, a turned-off oven with the interior light on works well, or you can wrap the container in towels and place it near a warm spot in your kitchen. The ideal incubation temperature range is between 38°C and 45°C (100°F–113°F).
- → Can I reuse my homemade yogurt as a starter for the next batch?
-
Yes, you can use a few tablespoons of your homemade yogurt to start a new batch. This works well for several generations, though the cultures may gradually weaken over time. For best results, use yogurt from a batch that is no more than 5 to 7 days old as your next starter.
- → How can I make my yogurt thicker?
-
For a thicker, Greek-style consistency, strain the finished yogurt through a cheesecloth or fine mesh strainer for several hours in the refrigerator. The longer you strain, the thicker it becomes. You can also heat the milk slightly longer during the initial step, or add a tablespoon of powdered milk before heating to boost protein content.
