 Pin this
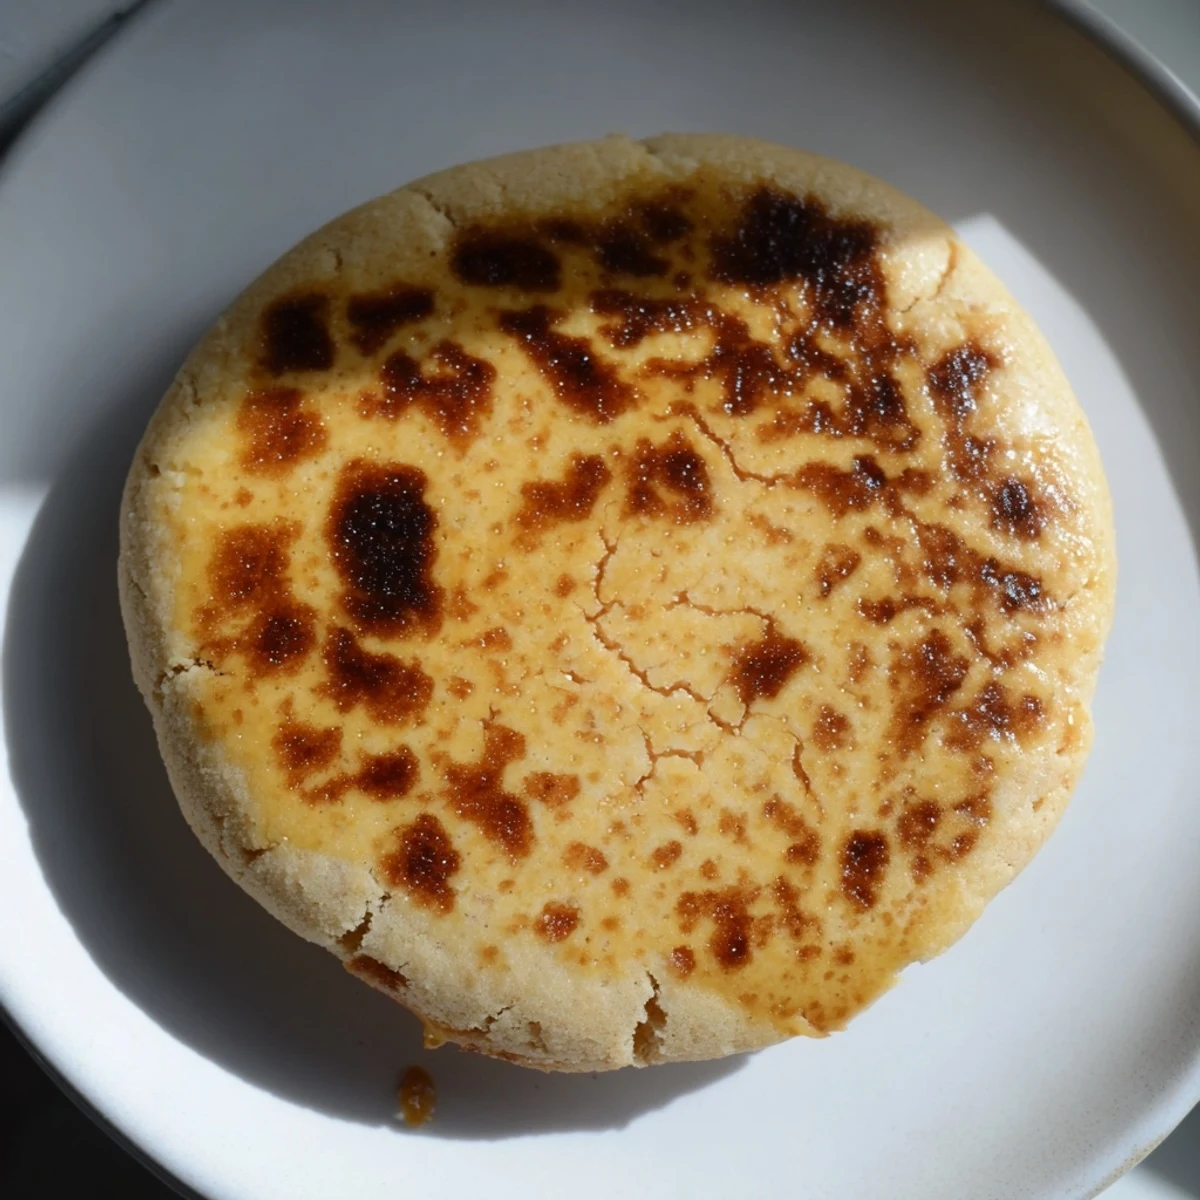
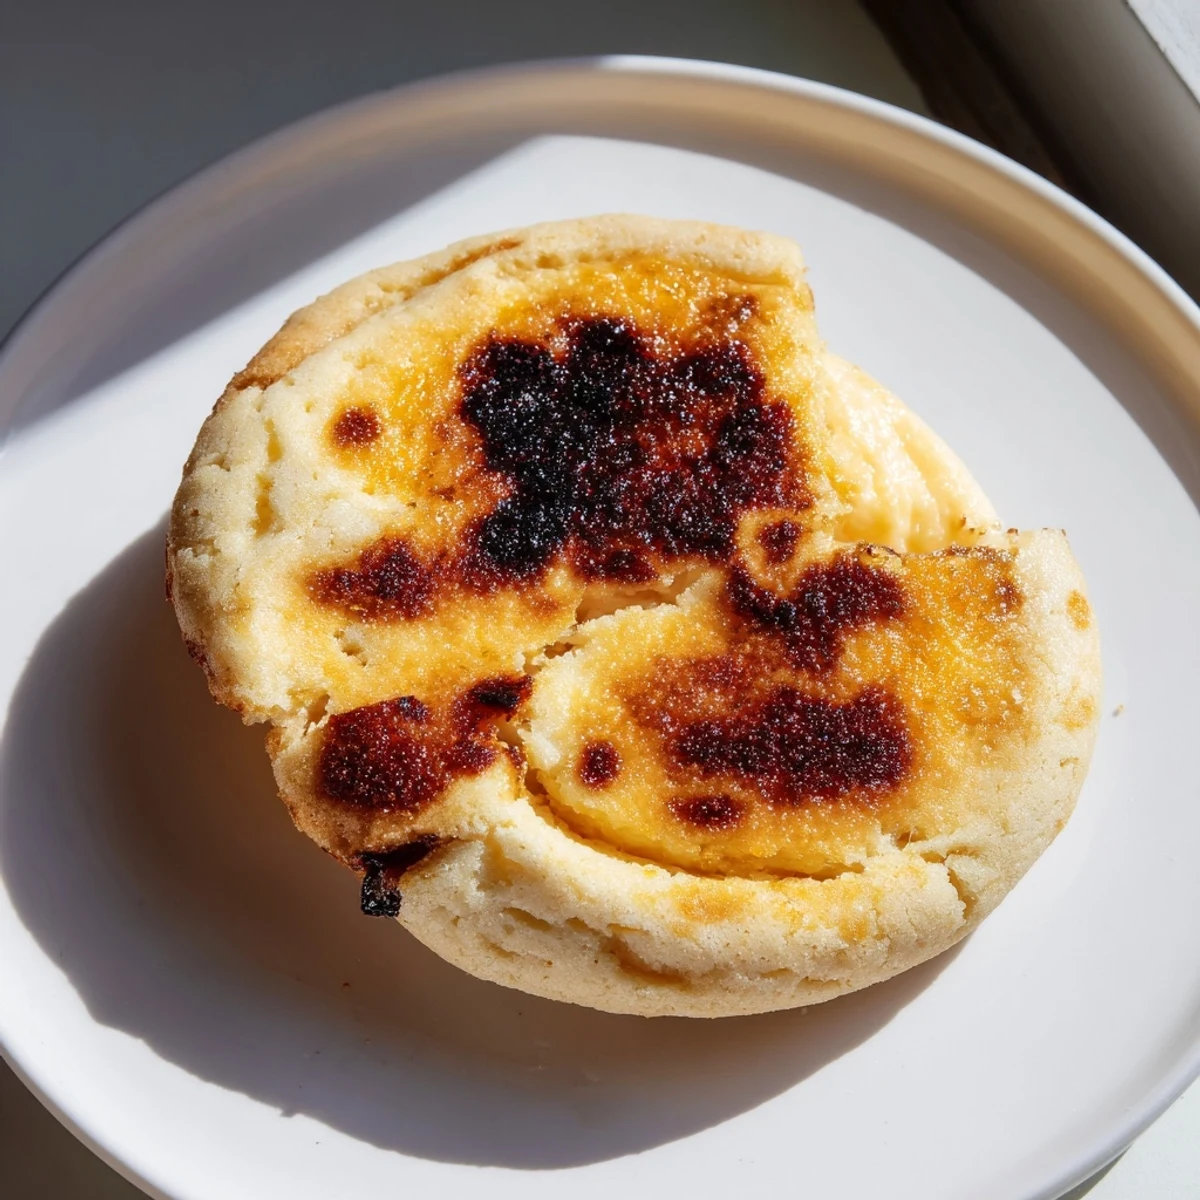
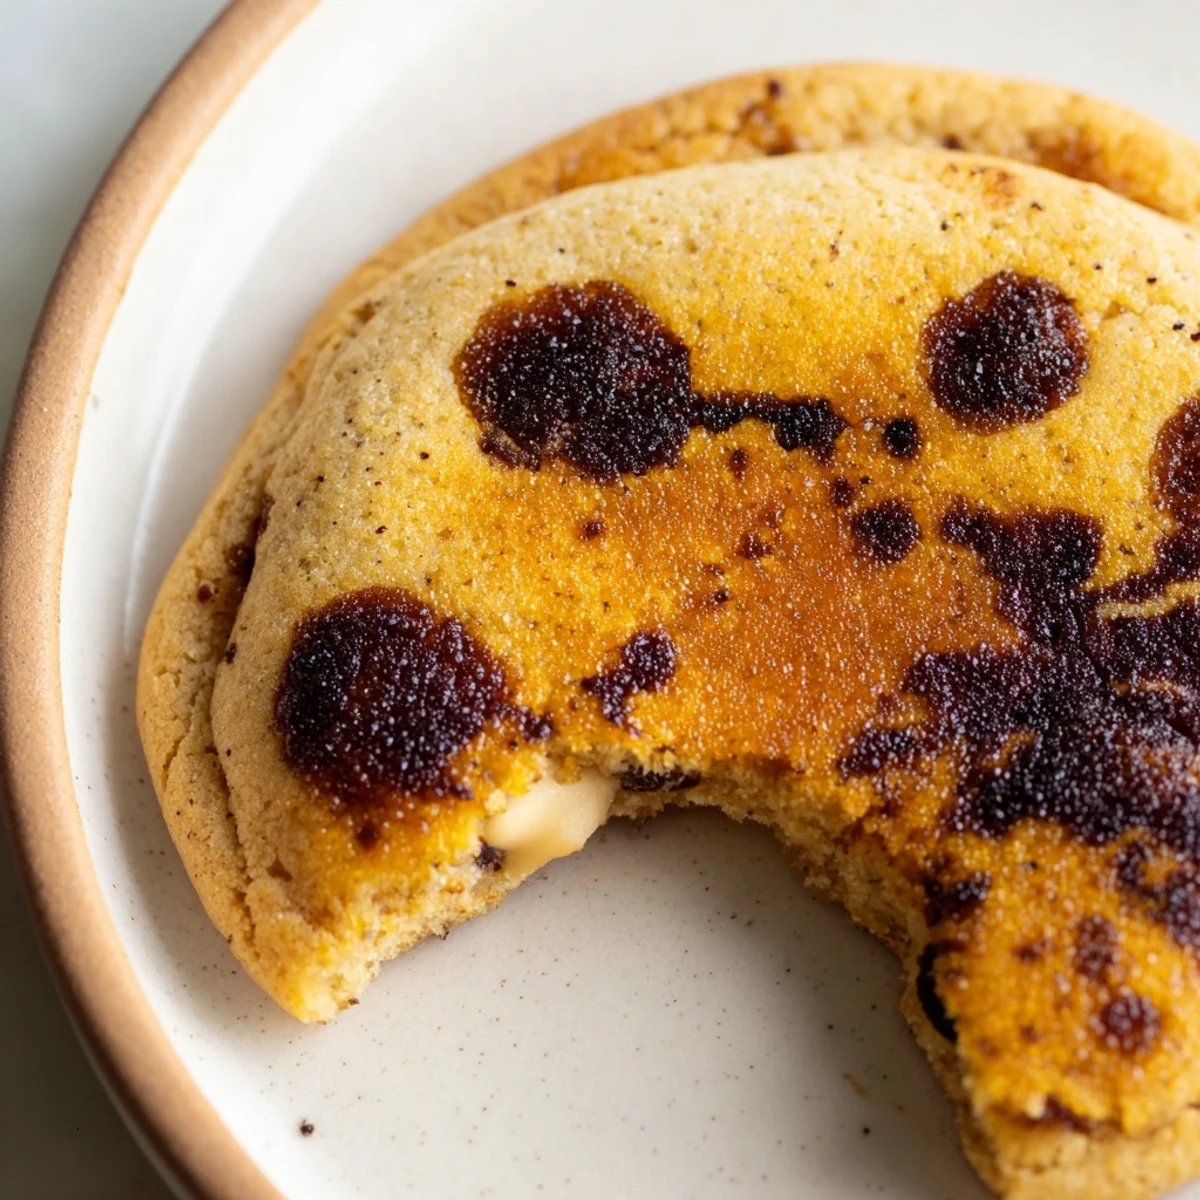
 These soft baked treats capture the essence of classic French crème brûlée in cookie form. The dough creates a tender, pillowy exterior that encases a rich cream cheese and vanilla filling. A final layer of torch-caramelized sugar adds the signature crunchy topping that cracks satisfyingly with each bite. Perfect for entertaining or elevating your baking repertoire with this sophisticated fusion of textures and flavors.
My sister called me at midnight last week, talking about some crème brûlée cookie trend she'd seen on social media. I rolled my eyes at first, but then she described that crackly burnt sugar shell giving way to soft vanilla cream, and honestly, I was grabbing my apron before we even said goodbye. We spent the entire weekend experimenting, burning through four batches of sugar before we finally nailed that perfect balance of chewy cookie and creamy center.
Last Sunday I brought these to a friend's potluck, and I wish I had a video of everyone's first bite. The room went quiet, then someone literally gasped when they hit that burnt sugar layer. Now half the group is demanding I teach them the torch technique, which is hilarious because I was absolutely terrified of using a kitchen torch until about two weeks ago.
Ingredients
- All-purpose flour: The foundation that gives these cookies their structure and tender crumb
- Baking soda: Helps the cookies puff slightly while maintaining that soft, chewy texture we want
- Salt: Just enough to balance all that sweetness and make the vanilla flavors pop
- Unsalted butter: Softened to room temperature so it creams beautifully into the sugar
- Granulated sugar: Sweetens the dough while helping create those perfectly crisp edges
- Egg yolks: Using only yolks adds incredible richness without making the cookies too cakey
- Pure vanilla extract: Don't skimp here because this is the backbone of all that lovely flavor
- Sour cream: The secret ingredient that keeps these cookies unbelievably soft and moist
- Cream cheese: Creates that luscious, tangy filling that mimics the custard in traditional crème brûlée
- Vanilla bean paste: Those little vanilla specks make the filling look and taste absolutely divine
- Extra granulated sugar: For that signature burnt sugar crust on top
Instructions
- Get your oven ready:
- Preheat to 350°F and line two baking sheets with parchment paper so nothing sticks
- Whisk the dry ingredients:
- Combine flour, baking soda, and salt in a medium bowl, then set it aside while you work on the wet ingredients
- Cream the butter and sugar:
- Beat softened butter with granulated sugar until it's light and fluffy, which usually takes about 3 minutes of serious mixing
- Add the eggs and flavor:
- Mix in egg yolks, vanilla extract, and sour cream until everything's fully incorporated and smooth
- Bring the dough together:
- Gradually stir in the dry ingredients just until a soft dough forms, being careful not to overmix or they'll turn tough
- Make the creamy filling:
- Beat cream cheese, sugar, and vanilla bean paste in a small bowl until it's completely smooth and lump-free
- Fill those cookies:
- Scoop about 2 tablespoons of dough, flatten it into a disc, and place 1 teaspoon of filling in the center before folding the dough around it and pinching it shut
- Bake to perfection:
- Place the sealed cookies seam-side down on your prepared sheets, spacing them 2 inches apart, and bake for 11 to 13 minutes until the edges are set but centers still look slightly soft
- Let them rest:
- Cool on the baking sheet for 10 minutes because they need this time to finish setting up, then transfer to a wire rack
- Create the magic crust:
- Sprinkle a thin, even layer of sugar on each cooled cookie and torch it until golden and crisp, then wait 5 minutes for that shell to harden
 Pin this
 My husband, who normally doesn't care about desserts, ate three of these straight from the cooling rack and asked if we could keep the torch out permanently. Something about that combination of textures just makes people genuinely happy, and I love how fancy they feel despite being so straightforward to make.
Mastering the Kitchen Torch
I was so nervous the first time I used my torch that I stood in the backyard with an oven mitt, which my neighbor definitely saw and probably questioned. The trick is holding it about 2 inches above the sugar and moving constantly in small circles until you see that golden color develop. It's mesmerizing once you get the hang of it, and there's something deeply satisfying about creating that perfect crackly shell.
Making These Ahead
These cookies actually get better after sitting for a day because the filling has time to meld with the cookie base. I bake them without the sugar topping, store them in an airtight container, and then torch them right before serving. That way everyone gets that fresh crackly crust experience, and I can actually get some sleep the night before a party instead of torching cookies at midnight.
Perfecting Your Technique
The most common mistake I see is overfilling the cookies, which leads to filling bursting out during baking. You want exactly 1 teaspoon of filling, which feels like too little but trust the process. Also, don't skip the cooling time on the baking sheet because those 10 minutes are crucial for letting the cookies set without falling apart.
- If your dough feels too sticky, chill it for 15 minutes before scooping
- A small cookie scoop helps keep the portion sizes consistent
- Always torch the sugar in short bursts rather than holding the flame continuously
 Pin this
 There's nothing quite like watching someone take that first bite and hearing the sugar shell crack. Hope these bring as much joy to your kitchen as they've brought to mine.
Recipe FAQs
- → Can I make these without a kitchen torch?
-
Yes, you can broil the cookies for 1-2 minutes under your oven's broiler setting. Watch closely to prevent burning and rotate the pan as needed for even caramelization.
- → How should I store these cookies?
-
Store in an airtight container at room temperature for up to 3 days. The caramelized sugar may soften slightly over time. For best texture, add the brûlée topping just before serving.
- → Can I freeze the dough or baked cookies?
-
You can freeze assembled, unbaked cookies for up to 3 months. Bake from frozen, adding 1-2 minutes to baking time. Already baked cookies freeze well for 2-3 months but add the sugar topping after thawing.
- → What's the difference between vanilla extract and vanilla bean paste?
-
Vanilla bean paste contains actual vanilla bean seeds and has a more intense flavor profile. Extract works perfectly fine as a substitute, though the paste adds beautiful specks throughout the filling.
- → Why did my cookie dough spread too much?
-
This can happen if the dough or butter is too warm. Chill the assembled cookies for 15-20 minutes before baking if your kitchen is warm. Also ensure you're measuring flour correctly by spooning it into the measuring cup rather than scooping directly.
- → Can I make these smaller or larger?
-
Absolutely. Adjust baking time accordingly—smaller cookies will need 8-10 minutes while larger ones may require 13-15 minutes. The yield will change based on your portion size.
