 Pin this
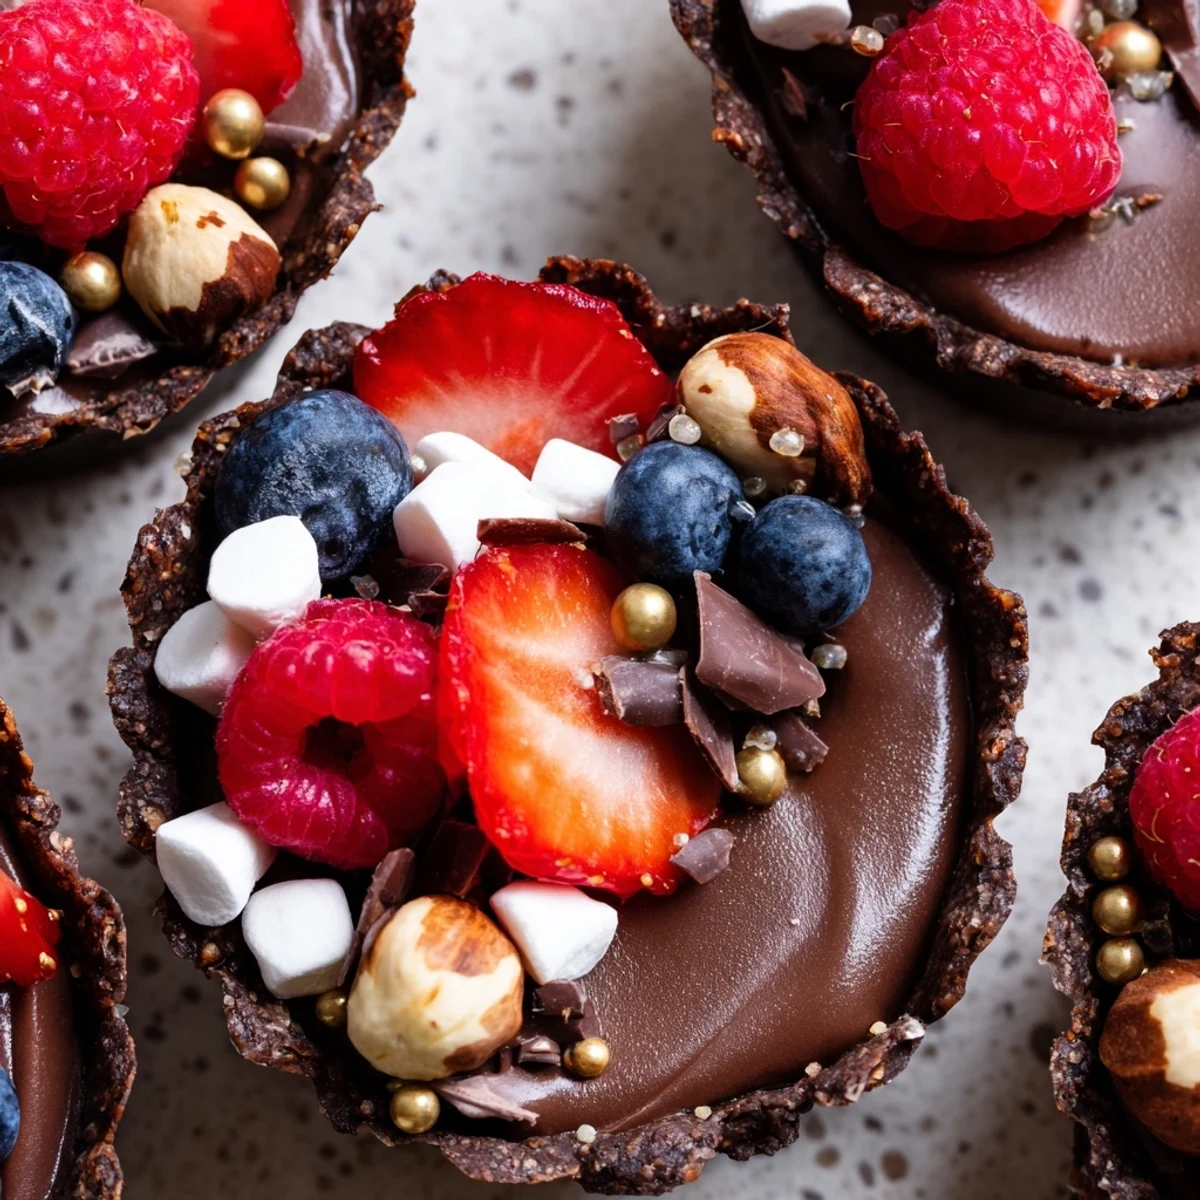
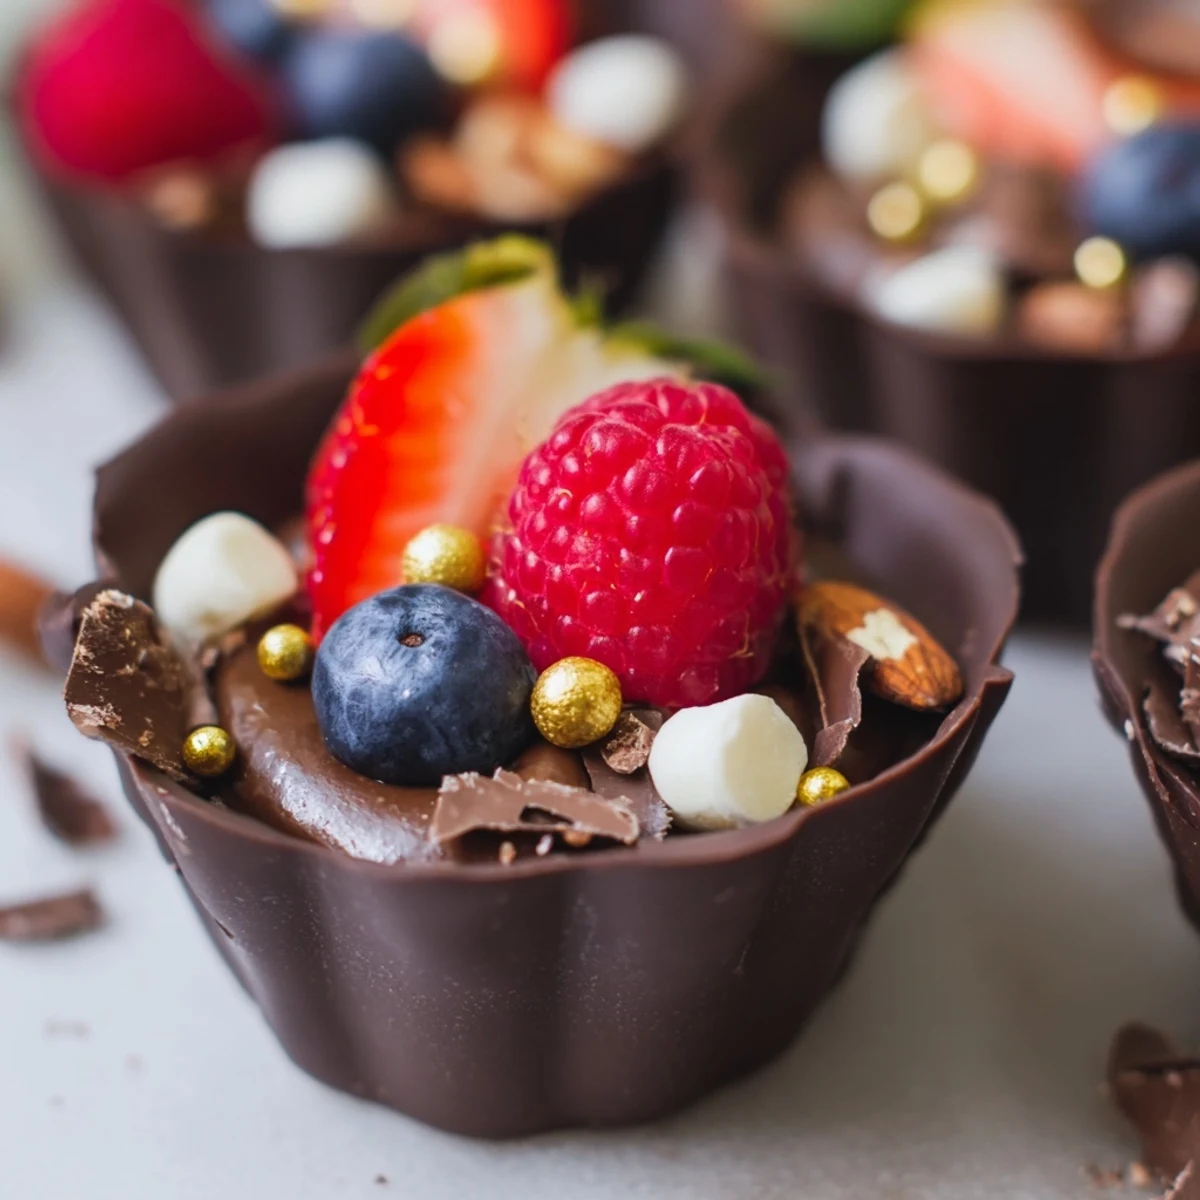
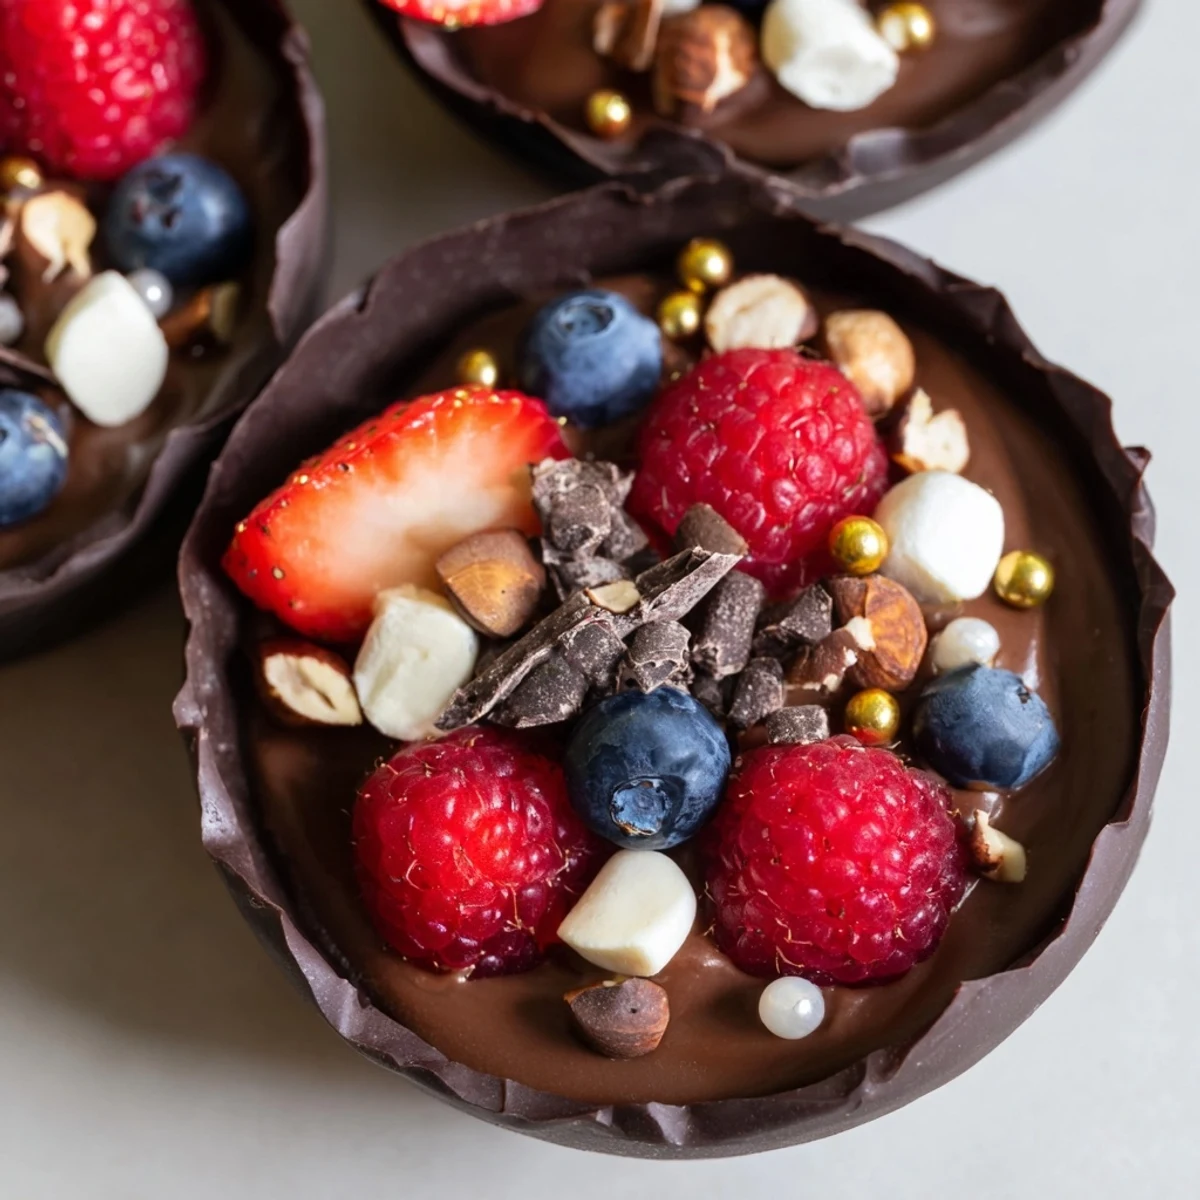
 Create stunning chocolate grazing cups with silky dark chocolate mousse and fresh berries. Each cup features a handcrafted chocolate shell filled with airy whipped mousse, then topped with vibrant mixed berries, toasted nuts, and mini marshmallows.
These individual desserts take just 35 minutes of active preparation, plus chilling time. The combination of velvety mousse and crisp chocolate creates luxurious texture contrast, while colorful toppings make them visually striking for dessert tables.
Perfect for dinner parties, celebrations, or whenever you want an impressive yet manageable sweet treat that guests can enjoy while mingling.
The first time I made these chocolate cups, my kitchen smelled like a chocolatier's shop and I honestly didn't want the scent to fade. These grazing cups started as an experiment for a dinner party and ended up being the most requested dessert I've ever made.
Last Valentine's Day, I set up a grazing table with these cups and watched my friend's eyes light up when she realized the chocolate containers were edible too. There's something genuinely magical about biting through chocolate into more chocolate.
Ingredients
- Dark chocolate (at least 60% cocoa): This creates the structure for your cups, and higher cocoa content means they'll hold their shape beautifully at room temperature
- Heavy cream: Cold from the refrigerator is nonnegotiable here—warm cream simply won't whip into those airy peaks you need for mousse
- Powdered sugar: Dissolves seamlessly into the cream unlike granulated sugar which can leave you with a grainy texture
- Vanilla extract: Pure vanilla makes all the difference in highlighting the chocolate's complex flavors
- Fresh mixed berries: The tartness cuts through the rich chocolate and adds this incredible freshness that brightens every bite
- Chopped nuts: Toast them lightly beforehand and you'll get this wonderful crunch and nutty aroma that complements the dark chocolate
- Mini marshmallows: These add a playful texture element and look so pretty nestled among the berries
- Chocolate curls: Use a vegetable peeler on a room temperature chocolate bar for professional looking garnish
- Edible gold leaf or pearls: Completely optional but transforms these from beautiful into genuinely show stopping
Instructions
- Craft Your Chocolate Cups:
- Melt your chocolate in 30 second bursts, stirring between each, until you have something smooth and glossy like liquid silk. Paint the insides of your cupcake liners with a generous even layer, paying special attention to the bottom corners where chocolate tends to pool too thin.
- Set the Foundation:
- Pop those painted liners into the refrigerator for at least 20 minutes until they're completely firm and no longer sticky to the touch. Peel away the liners as gently as you can—these chocolate vessels are surprisingly sturdy but will crack if you rush this part.
- Whip Up Clouds of Mousse:
- Melt your second batch of chocolate and let it cool until it's just slightly warm to the touch. In a chilled bowl whip that cold cream with the sugar and vanilla until soft peaks form—when you lift the whisk the cream should droop over gracefully like soft clouds.
- Bring Them Together:
- Fold a spoonful of whipped cream into your melted chocolate first to lighten it, then gently fold that mixture back into the remaining cream. Pipe or spoon this fluffy mousse into your chocolate cups filling them about two thirds full so there's room for all those gorgeous toppings.
- Make Them Yours:
- Arrange your berries, nuts, marshmallows and chocolate curls however feels beautiful to you—some people go for neat rows while others love this artful scattered look. Give everything another 20 minutes in the fridge to set before serving.
 Pin this
 My niece helped me assemble a batch last summer and created the most whimsical arrangement—marshmallows on one side, berries on another, like tiny edible landscapes. Sometimes the prettiest version comes from letting go of perfection and just playing with your food.
Making Them Your Own
White chocolate cups with milk chocolate mousse create this stunning contrast that looks almost too pretty to eat. I've also tried milk chocolate cups with dark mousse for people who find straight dark chocolate too intense—balance is everything.
Timing and Texture
These really are best assembled the same day you plan to serve them because the chocolate cups can start to soften after about 24 hours and lose that satisfying snap. The mousse itself holds up beautifully in the fridge for a day or two if you want to prep components ahead.
Serving Suggestions
A chilled glass of dessert wine creates this perfect moment of indulgence that feels like something out of a restaurant. Set everything up on a pretty board and let guests help themselves—it becomes part of the experience.
- Consider a small plate underneath since these cups can be slightly messy to eat
- Have extra berries on hand for anyone who wants to skip the heavier toppings
- These work beautifully as individual plated desserts or as part of a larger spread
 Pin this
 There's something deeply satisfying about handing someone a chocolate cup and watching them realize the container itself is part of the dessert. Pure edible magic in the most delicious way possible.
Recipe FAQs
- → How far in advance can I make chocolate grazing cups?
-
Prepare chocolate cups and mousse up to 24 hours ahead. Store cups in an airtight container in the refrigerator. Add fresh berries and toppings just before serving to maintain their texture and appearance. The chocolate shells stay crisp for up to 2 days when properly stored.
- → Can I use milk or white chocolate instead of dark chocolate?
-
Absolutely. Milk chocolate creates a sweeter, creamier profile while white chocolate offers delicate vanilla notes. Adjust sugar in the mousse accordingly—reduce powdered sugar when using milk chocolate, and consider adding vanilla bean paste when working with white chocolate for enhanced flavor.
- → What if I don't have silicone cupcake liners for the chocolate shells?
-
Small silicone molds, mini muffin tins, or even carefully inflated water balloons work as alternatives. For balloon method, dip and chill as usual, then carefully pop and remove the balloon. Small glass custard cups lined with plastic wrap also create effective chocolate vessels.
- → How do I prevent the chocolate cups from cracking or breaking?
-
Ensure your chocolate is properly tempered—melt slowly to 45°C, then cool to 28°C before using. Apply thick, even layers and chill thoroughly before removing liners. Work in a cool room around 20°C. If cups feel fragile, add a second coating of melted chocolate for extra stability.
- → What other toppings work well with these chocolate cups?
-
Try crushed cookies, pretzel pieces for salt contrast, caramelized nuts, dried fruits like cranberries or cherries, shaved coconut, or citrus zest. For adult versions, top with candied ginger, espresso beans, or a drizzle of salted caramel. Seasonal fruits like pomegranate seeds or fig pieces also create stunning presentations.
- → Can I make these cups vegan or dairy-free?
-
Use dairy-free dark chocolate (check labels for milk ingredients) and substitute coconut cream or plant-based whipping cream for the heavy cream. Coconut cream whips beautifully and adds subtle tropical notes. Ensure all toppings including marshmallows are vegan-friendly.
