 Pin this
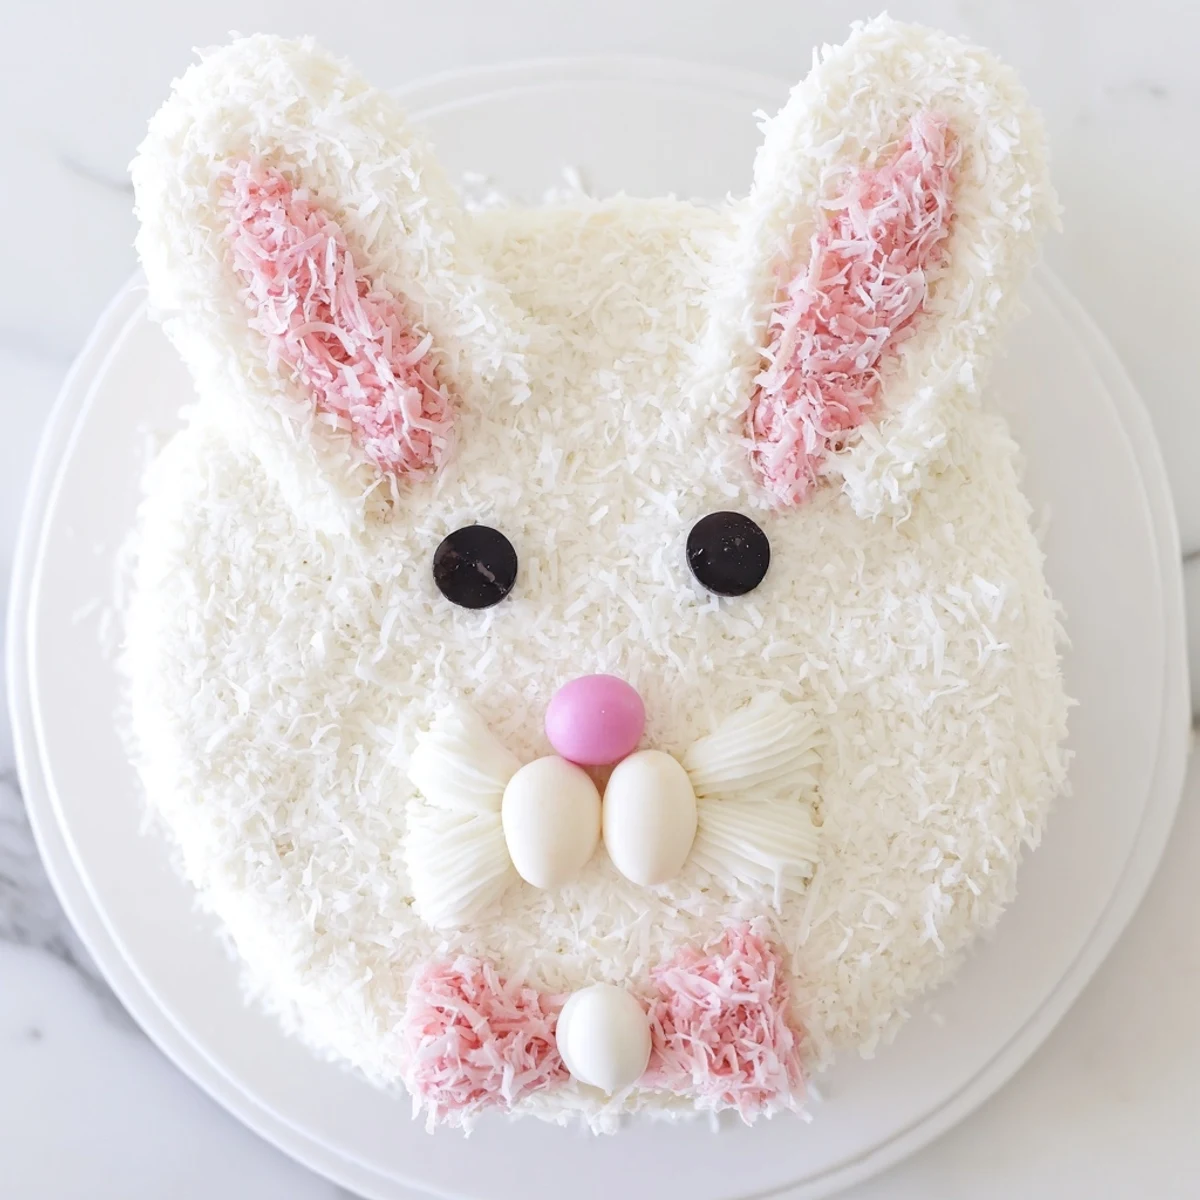
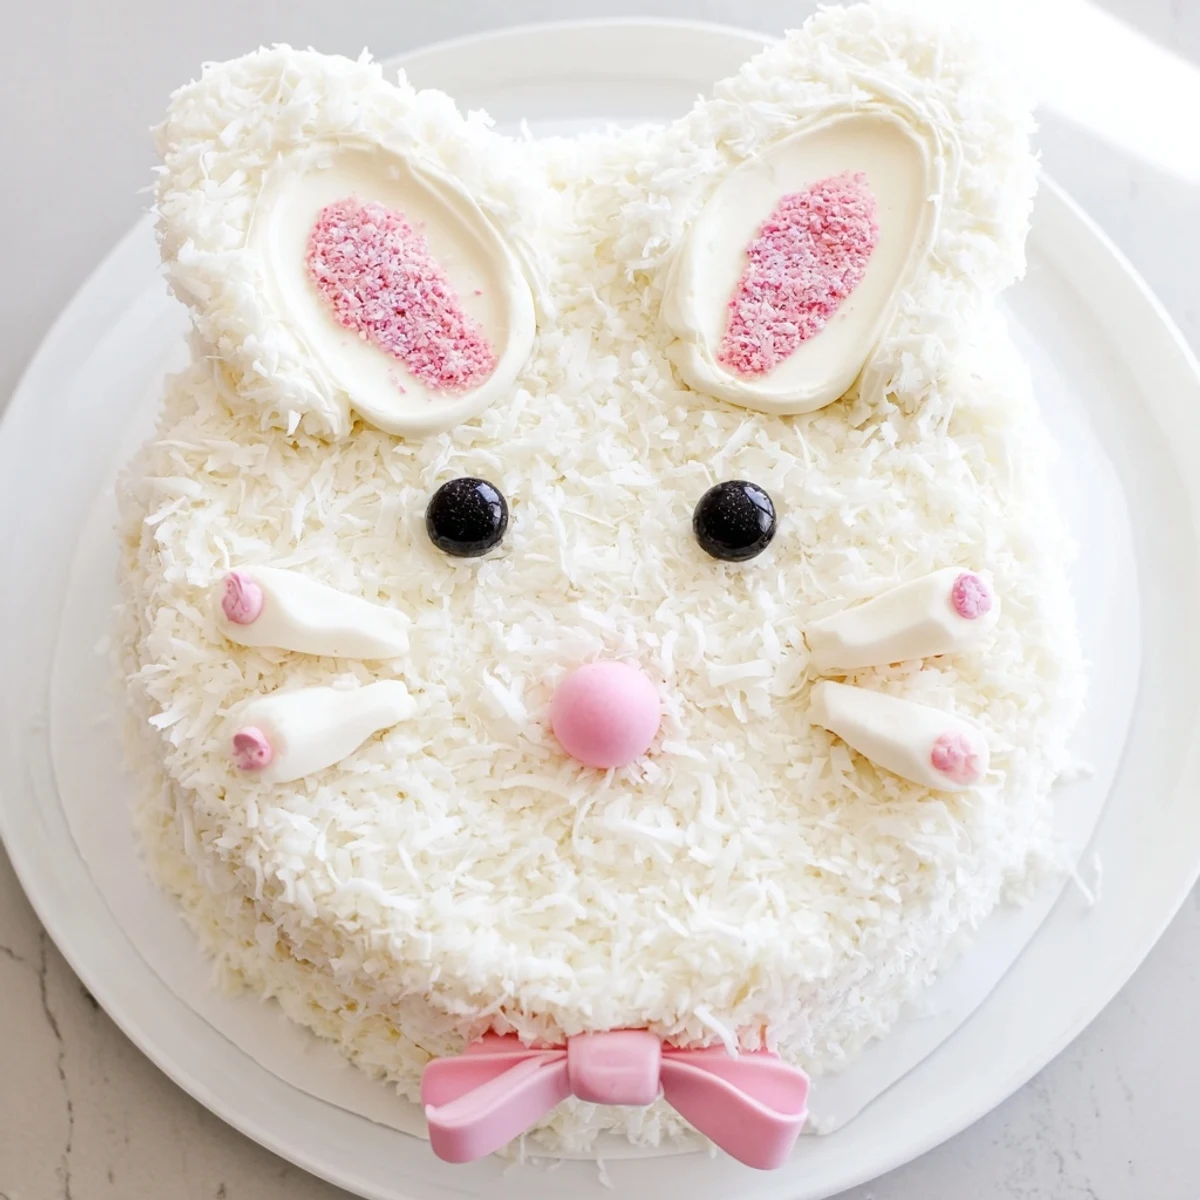
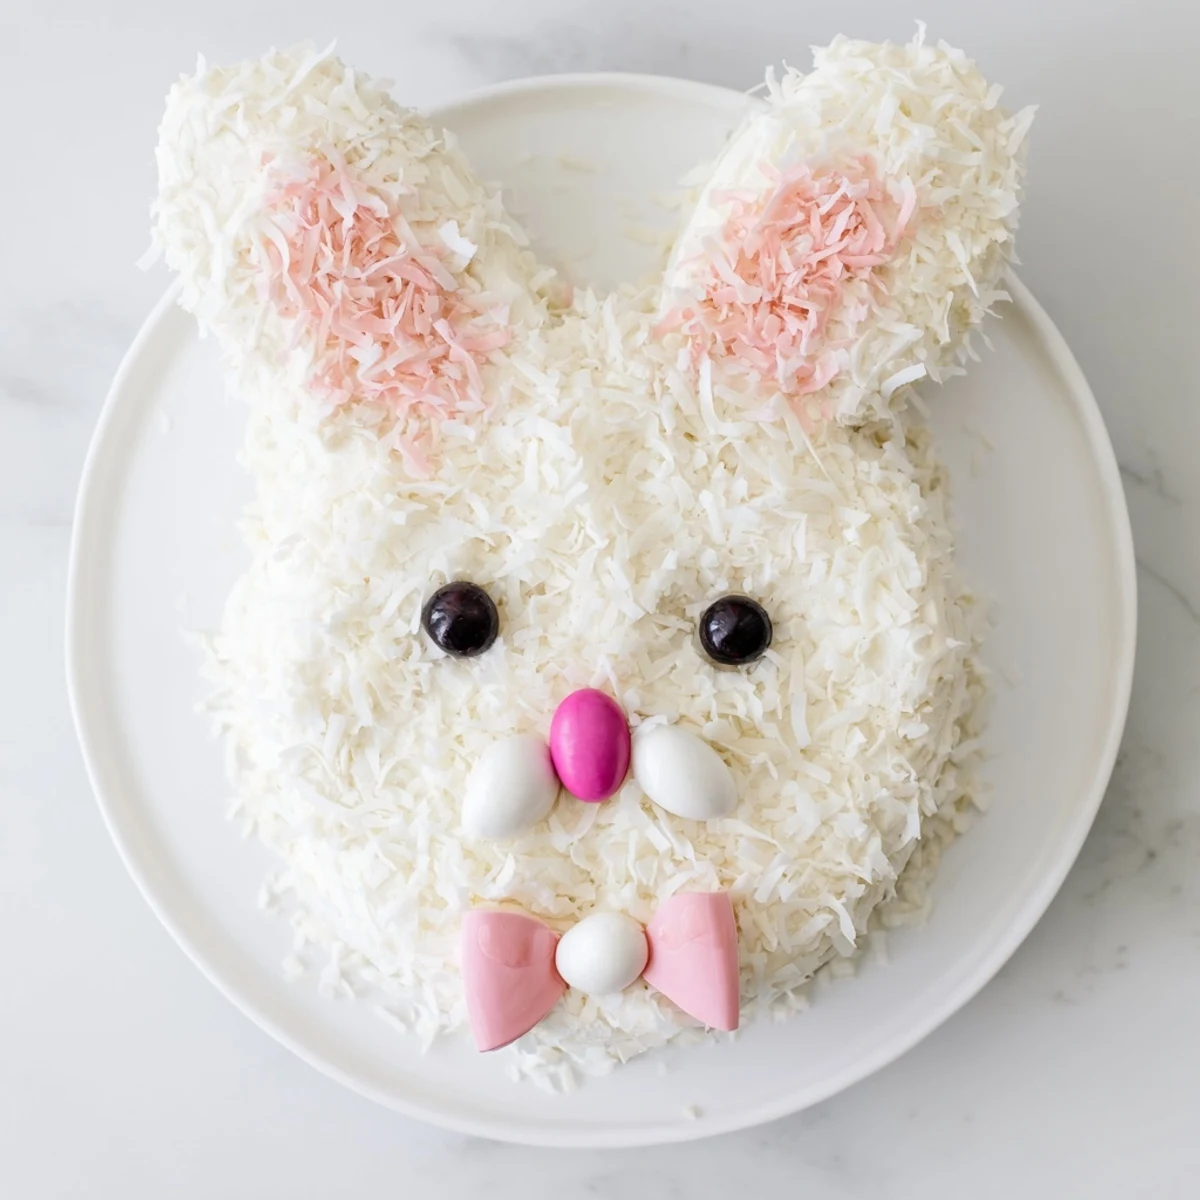
 This charming bunny-shaped dessert features two layers of moist vanilla cake arranged into a cute rabbit face with floppy ears and a bow tie. The entire creation gets covered in velvety buttercream and rolled in sweetened coconut for a fuzzy texture. Pink-tinted coconut creates delicate inner ears, while fondant details and candy eyes bring your bunny to life. Ready in just over an hour, this festive treat serves 12 and becomes an instant conversation starter at spring celebrations.
My daughter begged for a bunny cake after seeing one in a bakery window, and I figured how hard could it really be? The first attempt ended up looking more like a lopsided cat with weird ears, but she loved it anyway because we made it together. Now it is become our Easter tradition, and I have learned that imperfect cakes make the best memories.
Last spring, my sister came over early Saturday morning with two bags of coconut and zero patience. We turned up Motown classics, made a mess of the kitchen, and somehow created the cutest bunny cake either of us had ever managed. The coconut got everywhere, even in our hair, but that cake disappeared faster than anything I have ever baked.
Ingredients
- All-purpose flour: The foundation that gives this cake structure and substance
- Baking powder and baking soda: These work together to create the lift that makes each slice light and tender
- Salt: Do not skip this, it balances the sweetness and brings out all the vanilla notes
- Granulated sugar: Sweetens the cake while creating that beautifully tender crumb we all love
- Unsalted butter: Room temperature butter incorporates perfectly for maximum flavor and texture
- Large eggs: Bind everything together while adding richness and structure
- Whole milk: Creates moisture and tenderness in every single bite
- Vanilla extract: Pure vanilla makes such a difference here, splurge on the good stuff
- Unsalted butter for frosting: The base of your fluffy buttercream, make sure it is properly softened
- Powdered sugar: Sifting first prevents lumps and creates silky smooth frosting every time
- Milk for frosting: Adjust this to get exactly the consistency you want for spreading
- Shredded sweetened coconut: This creates the most convincing fluffy bunny fur effect
- Pink food coloring: Just a tiny drop transforms plain coconut into adorable inner ear details
- Jelly beans or mini candies: These become the personality, eyes and nose that bring your bunny to life
- Pink and white fondant or marshmallows: Shape these into perky ears that stand up tall
Instructions
- Preheat your oven and prepare your pans:
- Getting everything ready before you start makes the whole process feel calmer and more enjoyable
- Whisk the dry ingredients together:
- This ensures everything is evenly distributed before you start mixing
- Cream the butter and sugar:
- Take your time here, the fluffier this mixture gets, the better your cake will turn out
- Add eggs and vanilla:
- Crack each egg into a small bowl first to catch any shell pieces before adding to your batter
- Combine wet and dry ingredients:
- Start and end with the flour mixture, mixing gently until you just see the last streaks disappear
- Bake to golden perfection:
- The smell that fills your kitchen will tell you when it is almost done before the timer even beeps
- Cool completely before shaping:
- This patience pays off, warm cakes crumble and warm frosting melts right off
- Make the buttercream frosting:
- Beat it longer than you think you need to, airiness makes all the difference
- Shape your bunny pieces:
- Leave one cake whole for that sweet face, cut the other carefully into ears and a bow tie
- Apply the crumb coat:
- This thin layer locks in loose crumbs and makes the final frosting look professional
- Add the fluffy coconut coat:
- Press the coconut gently but thoroughly, patting it into place for that fur like texture
- Create the pink ear details:
- A tiny drop of coloring goes a long way, start with less and add more if needed
 Pin this
 The year my niece turned six, she helped decorate the bunny cake and insisted on giving it a tiny smile made of licorice. She was so proud of that cake that she made every single guest come look at it before we could even think about cutting into it.
Making The Shape Work
I learned the hard way that cutting the second cake round requires a sharp knife and a steady hand. Sketch your cutting lines lightly with a toothpick first, then follow those guides for ears that match almost perfectly. If something breaks, do not panic, frosting hides a multitude of sins.
Working With Coconut
Press the coconut into the frosting while it is still slightly tacky, and it will adhere beautifully without sliding off. Use a small offset spatula or the back of a spoon to gently pat it into place, working in small sections for even coverage.
Storage And Serving
This cake actually tastes better on the second day after the flavors have had time to meld together. Store it covered at room temperature if your kitchen is cool, or pop it in the refrigerator if it is warm out.
- Bring refrigerated cake to room temperature 30 minutes before serving
- Use a sharp serrated knife for clean slices that show off the layers
- The bow tie piece makes perfect taste tests while you are decorating
 Pin this
 There is something about serving a cake shaped like a bunny that makes people smile before they even take a bite. Happy Easter baking, may your kitchen be covered in coconut and your heart full of joy.
Recipe FAQs
- → How far in advance can I make this?
-
Prepare the cake layers up to 2 days ahead. Wrap tightly in plastic and store at room temperature. Frost and decorate the day before serving for best freshness and texture.
- → Can I use cake mix instead of from scratch?
-
Absolutely. Use two boxed vanilla cake mixes prepared according to package directions. The shaping and decorating process remains exactly the same.
- → What if I don't have round pans?
-
Square or rectangular pans work too. Bake according to pan instructions, then use cardboard templates to cut out bunny shapes. You may need extra batter for larger surface area.
- → How do I transport the finished bunny?
-
Assemble directly on a sturdy serving platter or cake board. Cover loosely with foil or a cake dome. Transport on a flat surface—the coconut makes it fairly forgiving for minor bumps.
- → Can I make this chocolate instead?
-
Yes. Substitute chocolate cake for vanilla, or use chocolate frosting under the coconut. The white coconut coating provides beautiful contrast against chocolate layers.
