 Pin this
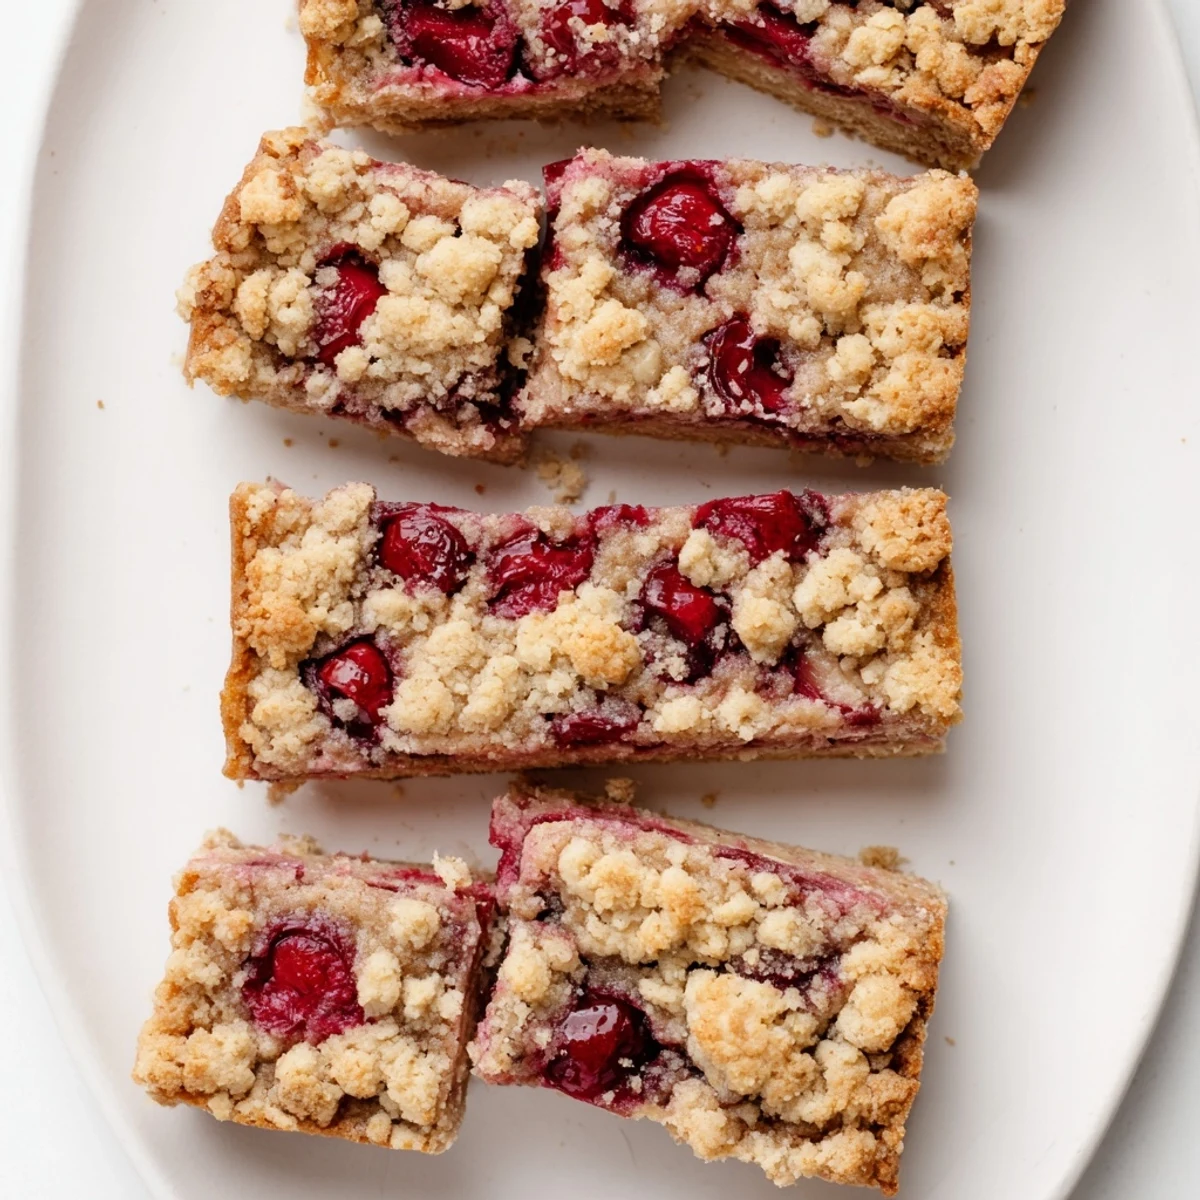
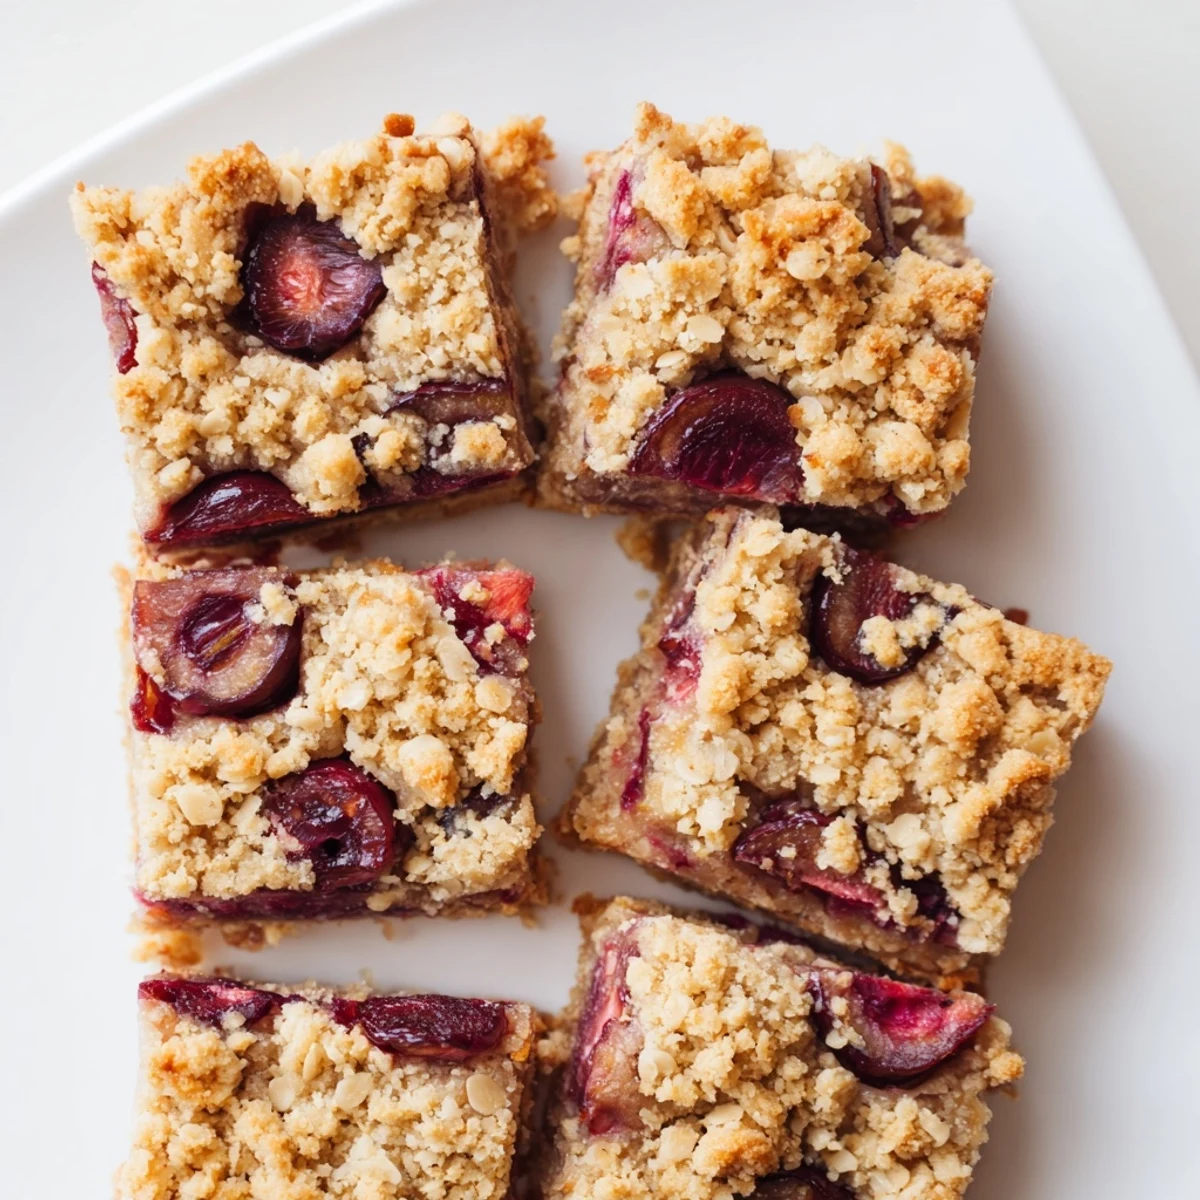
 These cherry crumble bars feature a tender, buttery crust topped with sweet, juicy cherries and finished with a golden oat crumble. The combination of old-fashioned rolled oats and melted butter creates irresistibly crumbly layers, while fresh or frozen cherries provide bursts of tart sweetness. Ready in just under an hour, these bars are ideal for busy weekdays, casual gatherings, or whenever cravings strike. Serve them warm with a scoop of vanilla ice cream for extra indulgence, or enjoy them at room temperature for a portable treat.
My youngest daughter declared these the official summer dessert after I made them on a whim last July. We'd picked way too many cherries at the orchard, and I needed something that wouldn't heat up the kitchen for hours. The buttery smell drifting through the house had both kids hovering around the oven door, asking if they were done yet.
I brought these to a potluck last month and watched three different people ask for the recipe within ten minutes. Something about that combination of tart cherries and sweet buttery crumble just makes people comfortable. My neighbor actually texted me the next day saying her family ate the entire pan before dinner.
Ingredients
- 1 ½ cups all-purpose flour: The structure builder that keeps these bars firm enough to hold but tender enough to melt in your mouth
- 1 ½ cups old-fashioned rolled oats: Use these instead of quick oats for better texture and that hearty crumble everyone loves
- ¾ cup granulated sugar: Sweetens both the crust and crumble layers evenly
- ½ cup packed light brown sugar: Adds a subtle molasses depth that makes the butter flavor really sing
- 1 tsp baking powder: Just enough lift to keep the crust from becoming too dense
- ½ tsp salt: Balances all that sweetness and makes the cherry flavor pop
- 1 cup unsalted butter, melted: The magic ingredient that creates that irresistible crumbly texture
- 1 tsp vanilla extract: Pure vanilla makes a noticeable difference here
- 3 cups fresh or frozen pitted cherries, halved: Fresh cherries in season are amazing but frozen work beautifully year round
- ⅓ cup granulated sugar: Just enough to sweeten the tart cherries without making them cloying
- 2 tbsp cornstarch: Thickens those cherry juices into a perfect jammy consistency
- 1 tbsp lemon juice: Brightens the cherry flavor and prevents it from becoming too sweet
- ½ tsp almond extract: Optional but highly recommended for that bakery style flavor
Instructions
- Get your oven ready:
- Preheat to 350°F and line a 9x13 inch pan with parchment, letting the edges hang over like handles that will save you later.
- Make the crumble base:
- Mix flour, oats, both sugars, baking powder, and salt in a large bowl until everything looks evenly distributed.
- Add the butter:
- Pour in melted butter and vanilla, then stir until you have a mixture that looks like wet sand and holds together when squeezed.
- Reserve some topping:
- Measure out 1 ½ cups of this crumble mixture and set it aside for the top later.
- Press the crust:
- Dump the remaining crumble into your prepared pan and press it down firmly with the bottom of a measuring cup until it's flat and even.
- Prepare the cherries:
- In a separate bowl, toss cherries with sugar, cornstarch, lemon juice, and almond extract until every piece is coated.
- Layer it all up:
- Spread the cherries evenly over the crust, then sprinkle that reserved crumble on top like you're tucking them in.
- Bake until golden:
- Bake for 35 to 40 minutes until the top is golden brown and you can see the cherry filling bubbling through the crumble.
- The hardest part:
- Cool completely in the pan before lifting out with the parchment and cutting into squares.
 Pin this
 My mom called me mid bite on her first visit after I'd mastered these, asking what bakery I'd visited. When I told her I made them, she spent the rest of the afternoon on my front porch, eating another bar and asking questions about my technique. Now she makes them for her book club and claims they're her own invention.
Making These Year Round
I've learned to keep frozen cherries in my freezer specifically for this recipe. They work just as well as fresh, and I love that I can get that taste of summer even in January. The baking time stays the same, though you might notice slightly more liquid at first.
Getting The Perfect Cut
After years of making crumble bars that fell apart, I finally figured out that chilling the cooled pan in the fridge for 30 minutes makes cutting so much cleaner. Use a sharp knife and wipe it off between cuts for those picture perfect squares that look like they came from a bakery.
Serving Ideas
These are delicious on their own but become something special with a scoop of vanilla ice cream melting into the warm fruit. I've also served them with whipped cream for a casual dinner party dessert that feels fancy but took minimal effort.
- They keep well in the fridge for up to five days if tightly covered
- Warm individual bars in the microwave for 15 seconds before serving
- Dust with powdered sugar right before serving for a bakery finish
 Pin this
 There's something about pulling a bubbling pan of these out of the oven that makes any day feel like a celebration. Hope they become as loved in your kitchen as they are in mine.
Recipe FAQs
- → Can I use frozen cherries instead of fresh?
-
Yes, frozen cherries work beautifully in these bars. No need to thaw them first—simply toss them with the sugar and cornstarch mixture, then add about 5 extra minutes to the baking time to ensure the filling bubbles properly.
- → How should I store these cherry bars?
-
Store the cooled bars in an airtight container at room temperature for up to 3 days. For longer freshness, refrigerate them for up to a week. They also freeze well—wrap individual bars in plastic wrap and freeze for up to 3 months.
- → Can I substitute other fruits for the cherries?
-
Absolutely. This versatile crumble base works with berries, sliced peaches, apples, or a combination of fruits. Adjust the sugar slightly based on fruit sweetness, and keep the cornstarch amount the same for proper thickening.
- → What's the best way to get clean cuts?
-
Let the bars cool completely in the pan before cutting. Use a sharp knife and wipe it clean between cuts for neat edges. The parchment overhang makes lifting the entire batch out easy for more controlled slicing.
- → Can I make these ahead of time?
-
These bars actually taste better the next day as flavors meld. Make them up to 24 hours before serving, or freeze the uncut batch and thaw at room temperature when needed. They're perfect for batch cooking and meal prep.
