 Pin this
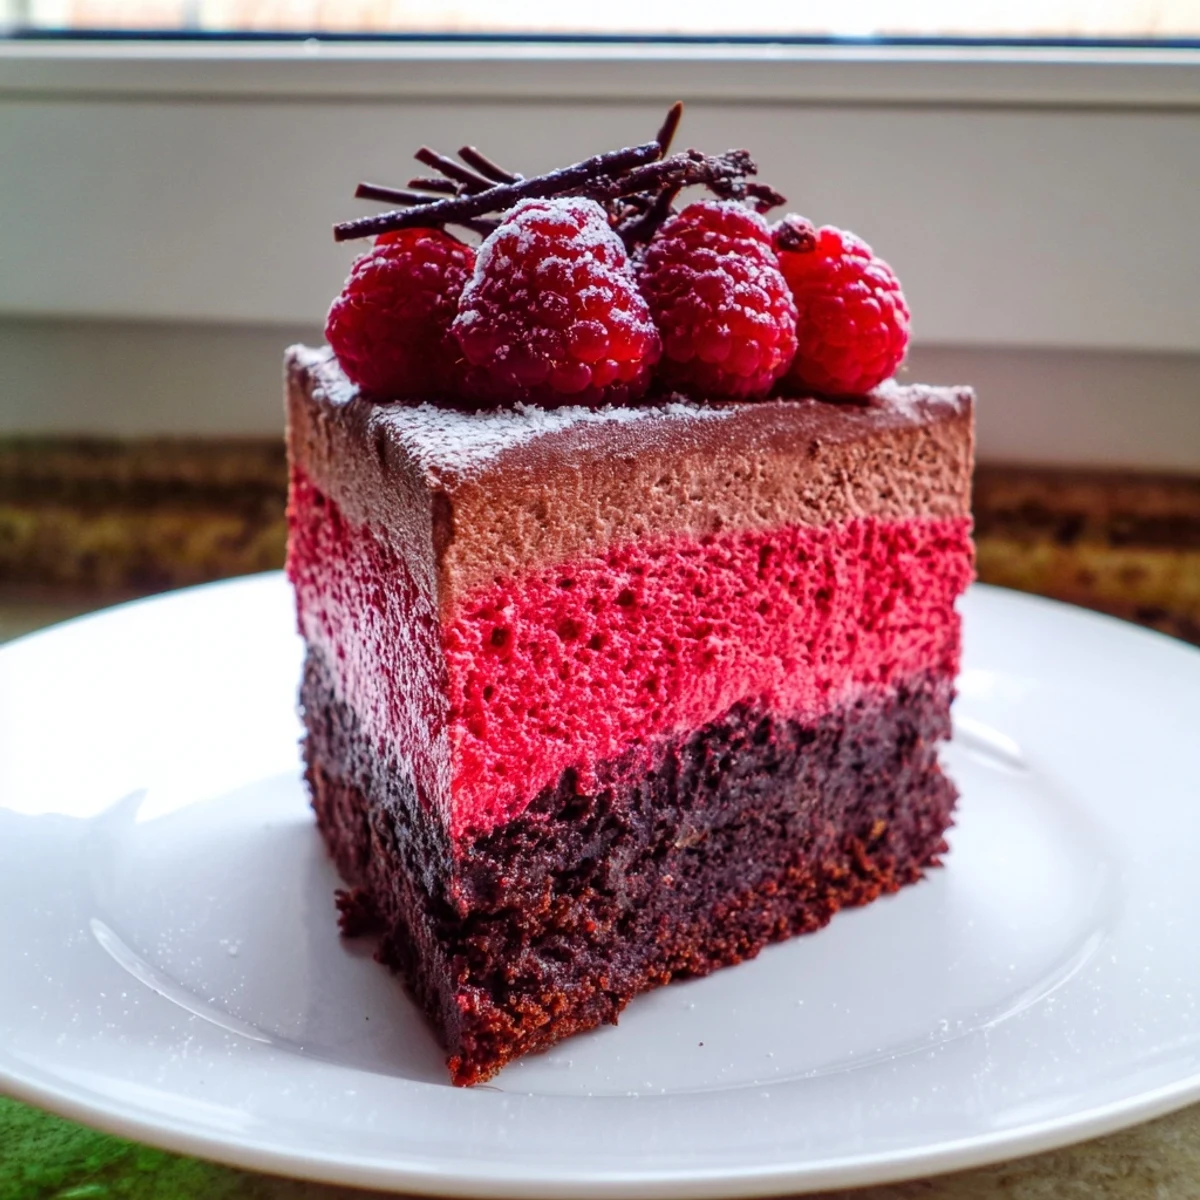
 This stunning multi-layered dessert brings together three irresistible textures: a fudgy chocolate cake base, a jewel-toned raspberry layer, and a cloud-like chocolate mousse on top. While it requires some patience with chilling time, each component is straightforward to prepare.
Start by baking a thin chocolate sponge, then add a tangy raspberry puree layer that sets with gelatin. Crown it all with a silky dark chocolate mousse made by folding whipped cream and beaten egg whites into melted chocolate. After a minimum four-hour chill, you'll have a showstopping dessert worthy of any celebration. Finish with fresh raspberries and chocolate curls for an elegant presentation.
The rain was hammering against the kitchen window the afternoon I first tackled this cake, and honestly I needed a project that would eat up an entire day.
My sister walked in just as I was folding egg whites into the mousse and declared it looked like a science experiment, then ate two slices the next day without a word of apology.
Ingredients
- Chocolate Cake Base: 75 g all purpose flour, 25 g unsweetened cocoa powder, 100 g granulated sugar, 2 large eggs, 60 g unsalted butter melted, 1 tsp vanilla extract, 1/2 tsp baking powder, and 1 pinch salt. Keep the cocoa powder fresh because stale cocoa makes the base taste flat.
- Raspberry Layer: 300 g fresh or frozen raspberries, 50 g granulated sugar, 2 tbsp water, and 2 sheets gelatin or 1 and 1/2 tsp powdered gelatin. Frozen berries work beautifully here so do not stress about finding fresh ones.
- Chocolate Mousse: 200 g dark chocolate at 60 to 70 percent cacao chopped, 3 large eggs separated, 50 g granulated sugar, 250 ml heavy cream cold, 1 tsp vanilla extract, and 1 pinch salt. The chocolate quality determines everything so pick one you would happily eat plain.
- Decoration: 100 g fresh raspberries, shaved dark chocolate or chocolate curls, and optional icing sugar for dusting.
Instructions
- Prep the pan and oven:
- Preheat your oven to 175 degrees C or 350 degrees F and line a 20 cm springform pan with parchment paper so nothing sticks later.
- Build the cake base:
- Whisk together flour, cocoa powder, baking powder, sugar, and salt in one bowl while combining eggs, melted butter, and vanilla in another. Fold wet into dry just until combined and spread it evenly into your prepared pan.
- Bake and cool:
- Bake for 20 to 25 minutes until a toothpick comes out clean, then let the base cool completely right in the pan.
- Create the raspberry layer:
- Soften gelatin in cold water while you heat raspberries, sugar, and water in a saucepan until the berries collapse into a vivid red sauce. Puree and strain out the seeds, then warm the smooth puree gently and dissolve the gelatin into it before letting it cool to room temperature.
- Set the fruit:
- Pour the cooled raspberry mixture over your cake base and chill until firm, which takes roughly one hour.
- Melt the chocolate:
- Use a water bath or short microwave bursts to melt the chopped chocolate, then let it cool slightly so it does not scramble the eggs.
- Whip the yolks:
- Beat egg yolks with 25 g sugar and vanilla until the mixture turns pale and looks thick and ribbon like, then stir in the melted chocolate until completely smooth.
- Whip the whites:
- In a spotlessly clean bowl, whip egg whites with a pinch of salt to soft peaks, then gradually add the remaining 25 g sugar and beat until stiff glossy peaks hold their shape.
- Whip the cream:
- In yet another bowl, whip the cold heavy cream to soft peaks, being careful not to overbeat it into butter.
- Bring the mousse together:
- Fold the whipped cream into the chocolate mixture first, then gently fold in the egg whites with a large spatula using slow sweeping motions until everything is light and uniform.
- Assemble and chill:
- Pour the mousse over the set raspberry layer, smooth the top, cover gently, and refrigerate for at least 4 hours or until fully set and sliceable.
- Finish and serve:
- Release the cake from the springform pan and arrange fresh raspberries, chocolate curls, and a light dusting of icing sugar on top.
 Pin this
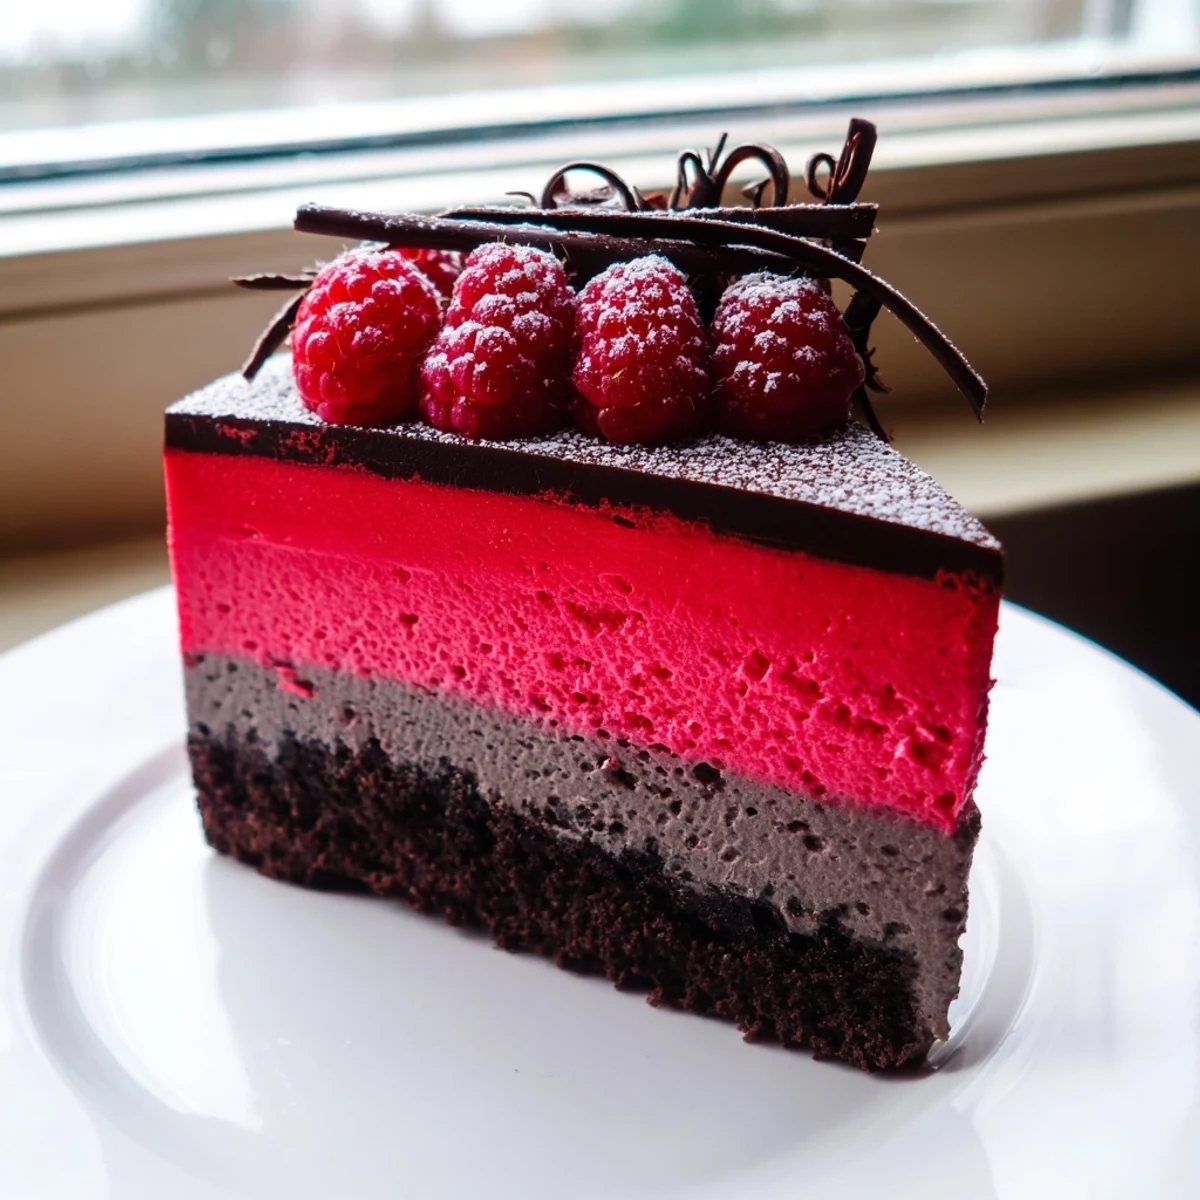
 The moment I carried this cake to the table for my friends birthday she went completely silent, which from her is the highest compliment possible.
Handling Gelatin Without Fear
Gelatin used to intimidate me until I realized it just needs patience and cold water. Always soften sheets in cold water for at least five minutes before squeezing them dry and stirring them into something warm. If you are using powdered gelatin, bloom it in a splash of cold water first and give it a minute to absorb before heating. Never boil gelatin directly because it loses its setting power and you end up with a sad soup.
Choosing the Right Chocolate
I once used cheap baking chocolate for this mousse and regretted it instantly because the texture turned grainy and the flavor tasted flat. Spend a little extra on a bar you actually enjoy eating and you will taste the difference in every spoonful. Anything between 60 and 70 percent cacao gives you that deep richness without overwhelming bitterness. Chop the chocolate finely and evenly so it melts at the same rate and you avoid stubborn lumps.
Getting Clean Slices Every Time
There is nothing more frustrating than spending hours layering a cake only to mangle it when serving. Run a long thin knife under hot water and wipe it dry between each cut for edges that look like they came from a bakery window. Use a gentle sawing motion rather than pressing straight down, which compresses the mousse.
- Chill the finished cake in the pan until the very last moment before serving.
- A chilled plate helps each slice hold its shape on the way to the table.
- Let the cake sit at room temperature for five minutes before cutting so the mousse softens just slightly.
 Pin this
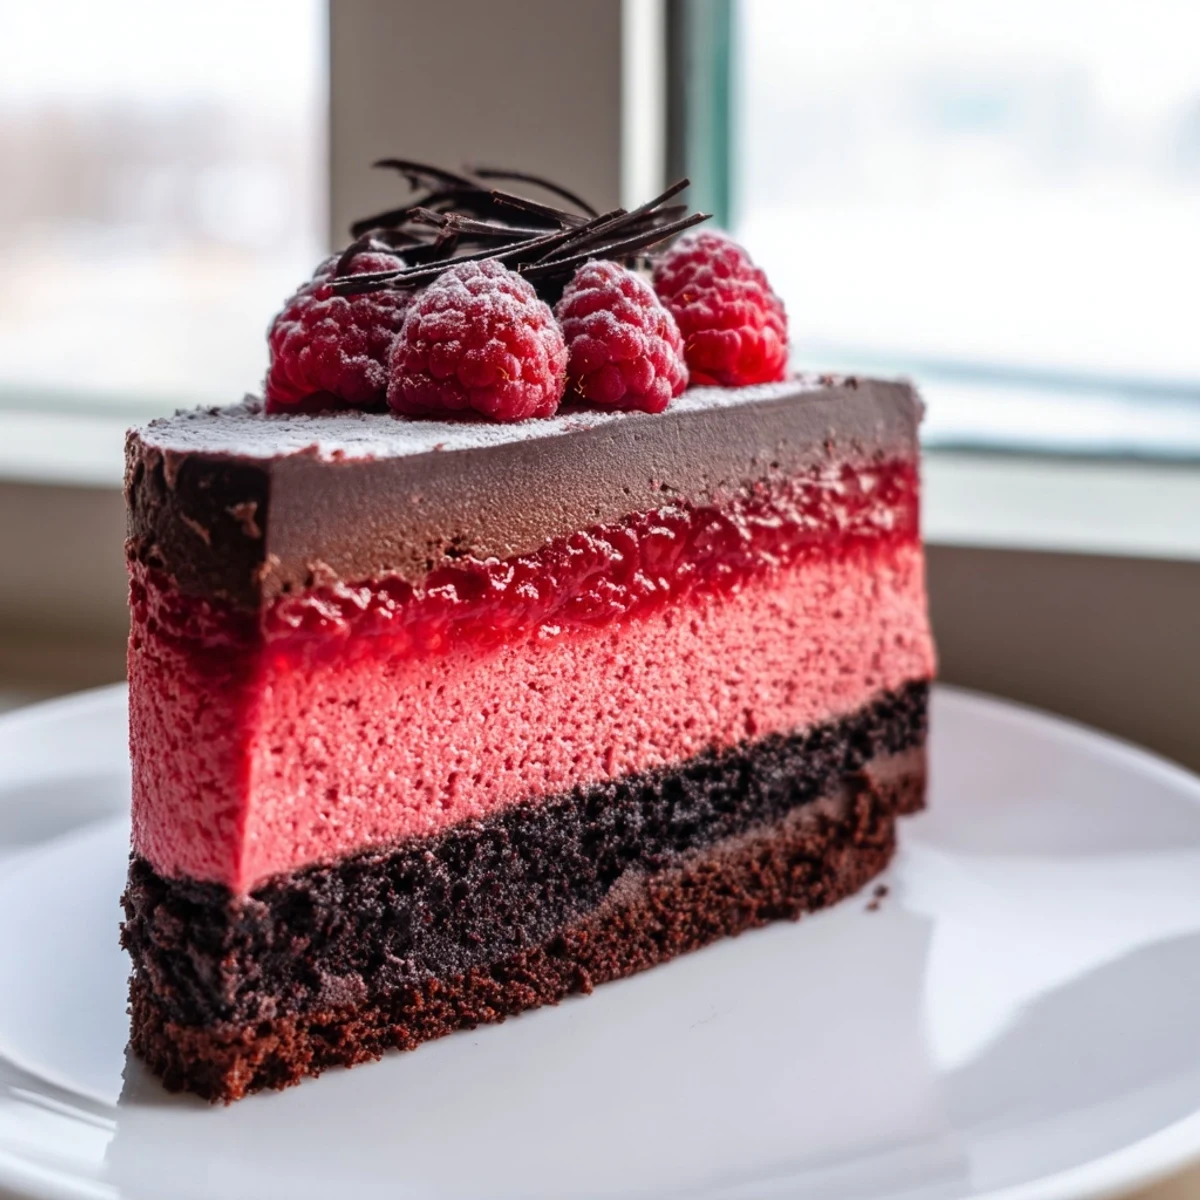
 This cake has a way of turning any ordinary afternoon into something worth remembering, one dark chocolate and raspberry forkful at a time.
Recipe FAQs
- → Can I make this mousse cake ahead of time?
-
Yes, this dessert actually benefits from being made in advance. You can prepare it up to 48 hours ahead and keep it chilled in the refrigerator. The layers will set beautifully and the flavors will meld together. Just add the fresh raspberry and chocolate curl decorations right before serving for the best visual impact.
- → What type of chocolate works best for the mousse layer?
-
Use a good-quality dark chocolate with 60 to 70 percent cacao content. This range provides the perfect balance of richness and sweetness. Avoid using chocolate chips as they contain stabilizers that prevent smooth melting. Couverture chocolate or high-quality baking bars yield the silkiest texture for your mousse.
- → How do I prevent the mousse from deflating when mixing?
-
The key is gentle folding with a large rubber spatula. First fold in the whipped cream to the chocolate base, then fold in the egg whites in two additions. Use a cutting and folding motion rather than stirring. Also ensure your melted chocolate has cooled slightly but is still liquid, as hot chocolate will melt the whipped components.
- → Can I use frozen raspberries instead of fresh ones?
-
Frozen raspberries work perfectly fine for the puree layer. Thaw them first, then proceed with cooking them down with sugar and water. For the decoration on top, fresh raspberries look and taste best. If you only have frozen berries for garnish, thaw them on paper towels and pat dry to prevent excess moisture from bleeding onto the mousse.
- → Is there a substitute for gelatin in the raspberry layer?
-
You can replace the gelatin with agar-agar for a fully plant-based setting agent. Use approximately half the amount of agar-agar powder compared to gelatin powder, and ensure you bring the raspberry puree to a brief boil after adding it, as agar-agar requires heat to activate. Note that agar-agar sets more firmly than gelatin, so the raspberry layer will have a slightly different mouthfeel.
- → How do I get clean slices when cutting this cake?
-
Dip a sharp knife in hot water and wipe it clean between each cut. The warm blade glides through the mousse and raspberry layers cleanly. Work quickly but deliberately. Some bakers also find it helpful to chill the cake for an extra thirty minutes in the freezer before slicing for the neatest results.
