 Pin this
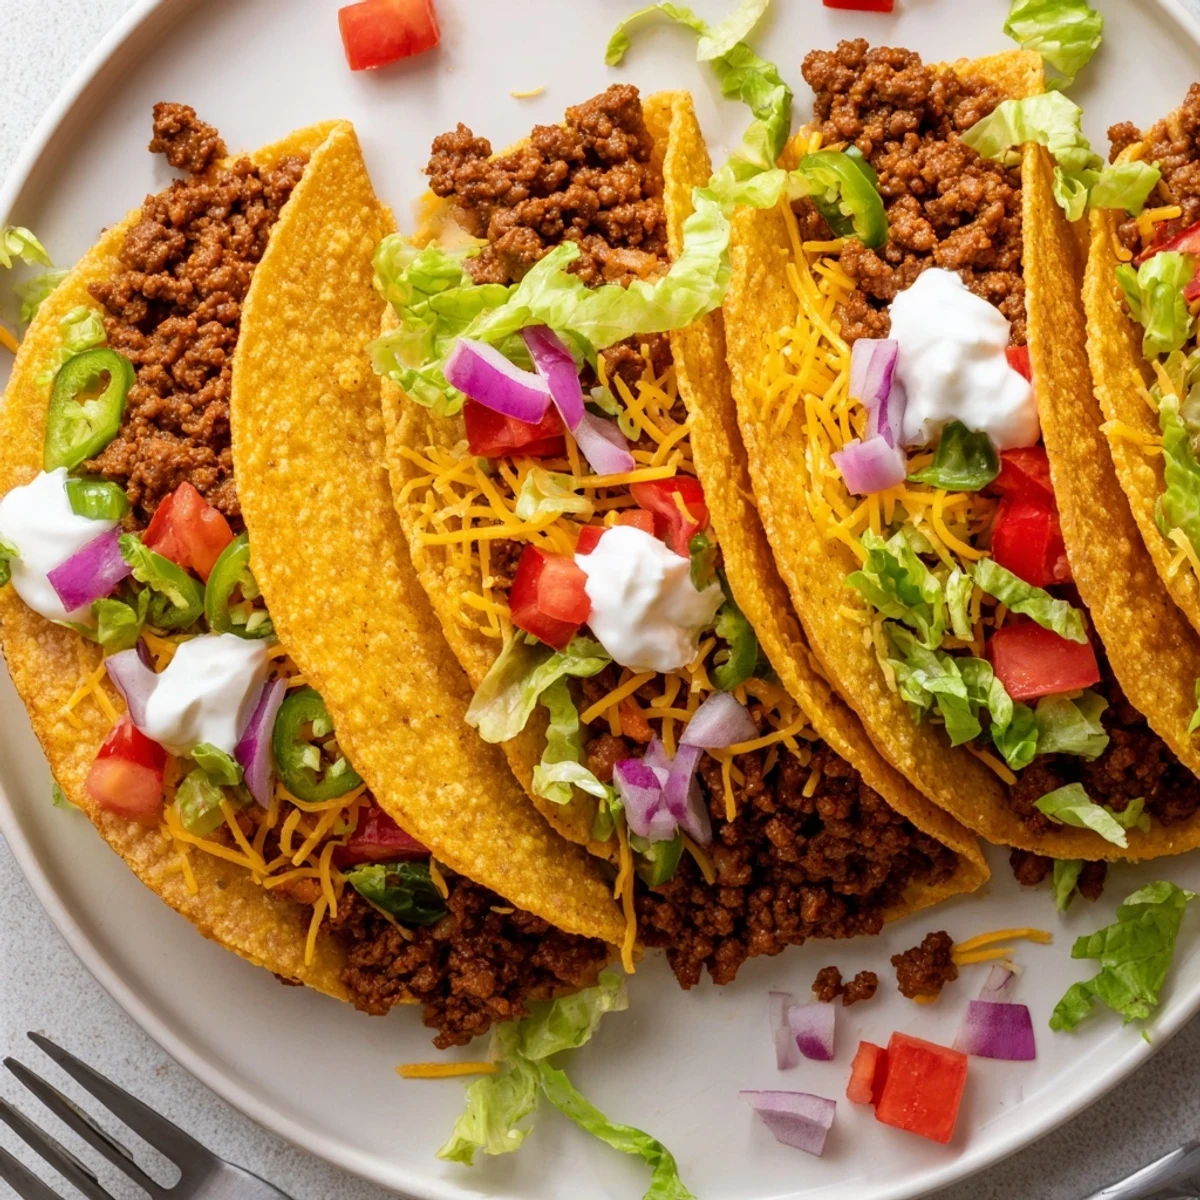
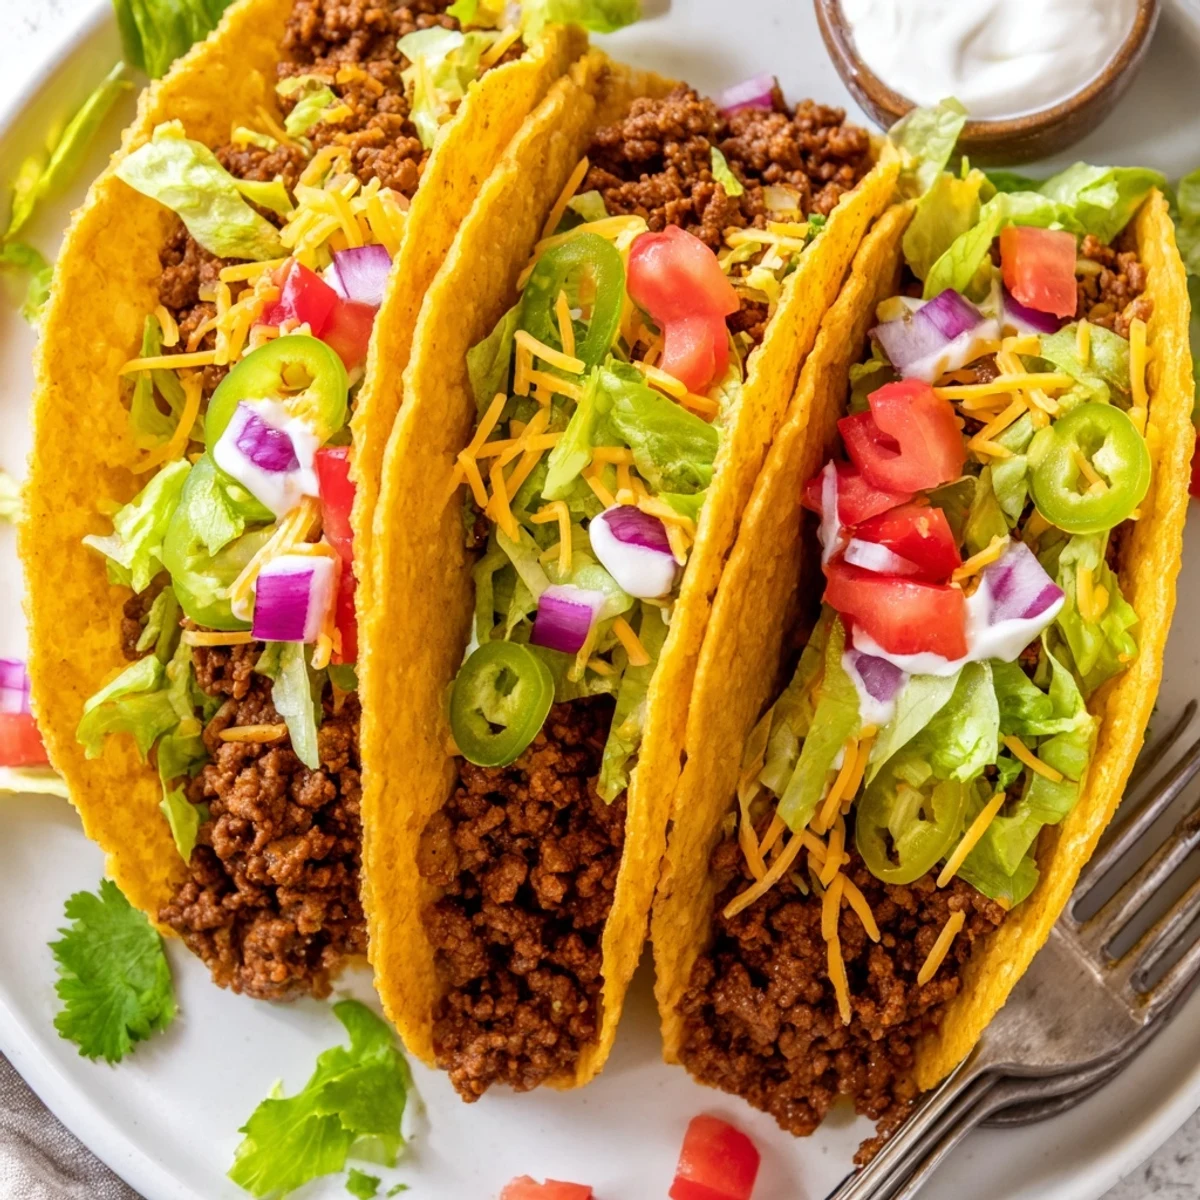
 These crispy beef tacos start with seasoned ground beef cooked with chili powder, cumin, and smoked paprika for deep, savory flavor. The tortillas are fried until golden and crunchy, then filled with the warm beef mixture and topped with shredded cheddar or Monterey Jack cheese.
Customize each taco with shredded lettuce, diced tomatoes, jalapeños, sour cream, and fresh cilantro. The whole dish comes together in just 40 minutes, making it perfect for busy weeknights or casual gatherings.
Use corn or flour tortillas depending on your preference, and swap the beef for ground turkey or plant-based mince if desired.
There is something about the sound of a tortilla hitting hot oil that makes everyone in the house appear in the kitchen within seconds. It is a crackling, unpredictable sizzle that promises something golden and wonderful. These crispy beef tacos became a Tuesday ritual in my home after I stumbled upon the technique of frying your own shells while trying to use up leftover corn tortillas. Now nothing else compares.
My neighbor knocked on the door one evening asking if I had borrowed his tongs, and I handed them back grease splattered with an apologetic grin and a plate of these tacos. He forgot about the tongs immediately and stood in the doorway eating two of them before heading home. We now have an unspoken agreement that taco night means his doorbell rings.
Ingredients
- 500 g (1 lb) ground beef: Use a decent fat content around 15 to 20 percent for the best flavor and juiciness in the filling.
- 1 small onion, finely chopped: Yellow or white onion both work, just make sure the pieces are small so they melt into the beef.
- 2 cloves garlic, minced: Fresh garlic makes a noticeable difference here, do not reach for the jarred stuff.
- 1 tbsp chili powder: This is the backbone of the seasoning blend and gives the filling its warm, deep color.
- 1 tsp ground cumin: Cumin is what makes it taste like a taco instead of just seasoned hamburger meat.
- 1/2 tsp smoked paprika: Adds a subtle smokiness that complements the frying oil beautifully.
- 1/2 tsp dried oregano: Mexican oregano if you have it, but regular oregano is completely fine.
- 1/4 tsp cayenne pepper (optional): Leave it out if you are sensitive to heat, the tacos are still delicious without it.
- 1/2 tsp salt and 1/4 tsp black pepper: Seasoning is everything, taste the beef before you pull it off the stove.
- 2 tbsp tomato paste: This gives the filling body and a slight tang that brings all the spices together.
- 120 ml (1/2 cup) beef broth or water: Broth adds more depth, but water works in a pinch.
- 1 tbsp vegetable oil: For cooking the beef and onion mixture.
- 12 corn or flour tortillas (15 cm or 6 inch): Corn tortillas fry up crispier, flour tortillas stay slightly chewy inside, both are wonderful.
- Vegetable oil for frying: You need about 2 cm or an inch of oil in a deep skillet.
- 150 g (1 1/2 cups) shredded cheddar or Monterey Jack cheese: Shred it yourself for better melting, pre shredded bags contain anti caking agents.
- Toppings (optional): Shredded lettuce, diced tomato, sliced jalapenos, diced red onion, sour cream, fresh cilantro, lime wedges, and salsa.
Instructions
- Soften the aromatics:
- Heat one tablespoon of vegetable oil in a large skillet over medium heat. Add the chopped onion and cook for about three minutes until it turns translucent and sweet smelling, then stir in the garlic for one more minute until fragrant.
- Brown the beef:
- Add the ground beef to the skillet and break it apart with a spoon as it cooks. Keep going for about seven minutes until every last bit is browned and no pink remains.
- Bloom the spices:
- Stir in the chili powder, cumin, smoked paprika, oregano, cayenne if using, salt, and black pepper. Let everything cook together for one minute until your kitchen smells absolutely incredible.
- Build the sauce:
- Add the tomato paste and stir it through so it coats the beef evenly. Pour in the beef broth and let it simmer for three to four minutes, stirring now and then, until the liquid is mostly absorbed and the filling is saucy but not runny. Take it off the heat.
- Fry the shells:
- Heat about two centimeters of oil in a deep skillet over medium high heat. Carefully lay a tortilla in the oil using tongs and fold it in half right away to form a taco shape, frying each side for one to two minutes until golden and crisp. Set them on paper towels to drain.
- Fill and melt:
- Spoon the warm beef mixture into each crispy shell and sprinkle generously with cheese while everything is still hot so it melts into gooey layers.
- Top and serve:
- Pile on whatever toppings make you happy and squeeze a lime wedge over the top. Serve immediately while the shells are still crackling.
 Pin this
 I once set a plate of these down for a group of friends during a football game and the room went completely silent for about five minutes. That silence, punctuated only by the crunch of shells, told me everything I needed to know about whether the recipe worked.
When You Want to Switch Things Up
Ground turkey works surprisingly well as a leaner substitute, though you may want to add an extra splash of broth since turkey dries out faster. Plant based crumbles also hold up nicely to the bold spices if you are cooking for someone who avoids meat entirely. The frying technique stays the same regardless of what you put inside.
What to Drink Alongside
A cold Mexican lager with a lime wedge squeezed in is the obvious and correct choice here. If you prefer something stronger, a margarita with a salted rim cuts through the richness of the fried shells beautifully. Even a simple glass of iced tea with lemon does the job on a weeknight.
Getting Ahead Without Losing the Crunch
The beef filling actually tastes better the next day, so making it in advance is a smart move if you are feeding a crowd. Store it in the fridge and reheat gently on the stove with a splash of water to loosen it back up. The shells, however, are a fry and serve situation that does not wait.
- Keep tortillas wrapped in a warm towel until you are ready to fry so they stay pliable.
- Set up a draining station with paper towels before you start frying so you are not scrambling with hot tongs in hand.
- Assemble tacos right before eating because nothing survives the refrigerator once it has been filled.
 Pin this
 Some recipes earn their place in your rotation because they are impressive, and others earn it because they make people genuinely happy around your table. These tacos do both without asking very much of you at all.
Recipe FAQs
- → Can I use store-bought taco shells instead of frying my own?
-
Yes, store-bought crispy taco shells work well as a time-saving alternative. Simply warm them according to the package directions before filling with the seasoned beef and toppings.
- → What type of tortillas work best for crispy tacos?
-
Corn tortillas fry up with a sturdier, crunchier texture and hold their shape well. Flour tortillas will also crisp up but tend to be slightly more delicate. Both work well, so choose based on your preference or dietary needs.
- → How do I keep the taco shells crispy after frying?
-
Drain the fried shells on paper towels immediately after cooking and keep them in a warm oven at around 95°C (200°F) until ready to fill. Avoid stacking them while hot, as trapped steam can soften the shells.
- → Can I make the beef filling ahead of time?
-
Absolutely. The seasoned beef filling can be prepared up to 3 days in advance and stored in an airtight container in the refrigerator. Reheat it in a skillet over medium heat with a splash of broth or water before assembling the tacos.
- → What can I substitute for ground beef?
-
Ground turkey or chicken works well for a lighter option. For a vegetarian version, use plant-based mince or try crumbled seasoned tofu. Adjust the seasoning to taste since lighter meats may need a bit more salt and spice.
- → How do I fry the tortillas safely?
-
Use tongs to carefully place each tortilla into hot oil, folding it in half to form the taco shape. Fry for 1 to 2 minutes per side until golden and crisp. Work in small batches to avoid overcrowding the pan, and let the oil come back to temperature between batches.
