 Pin this
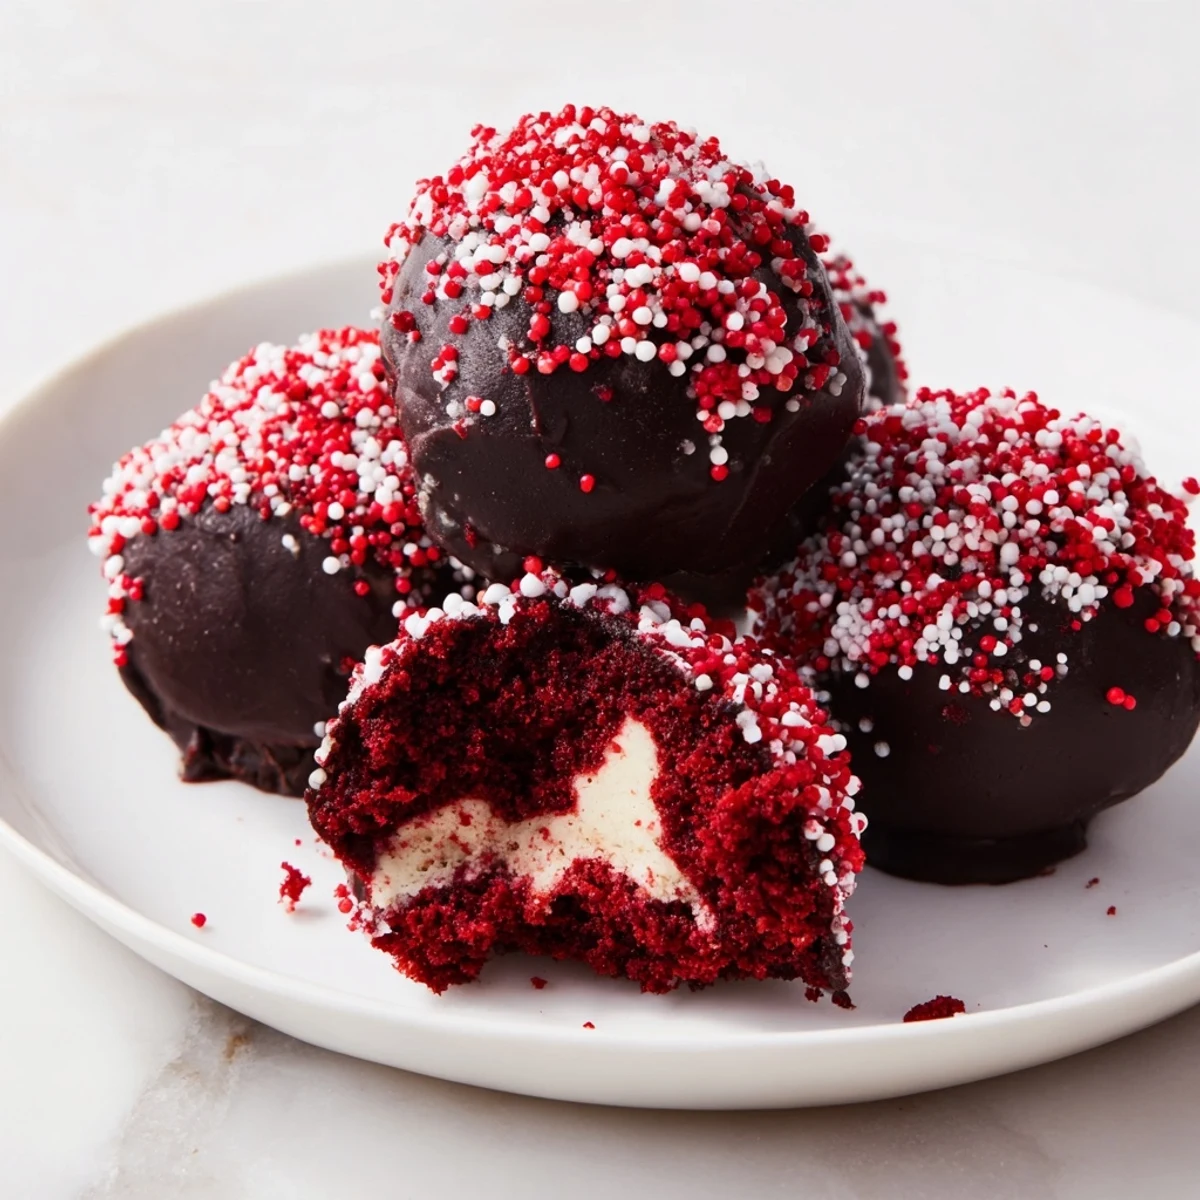
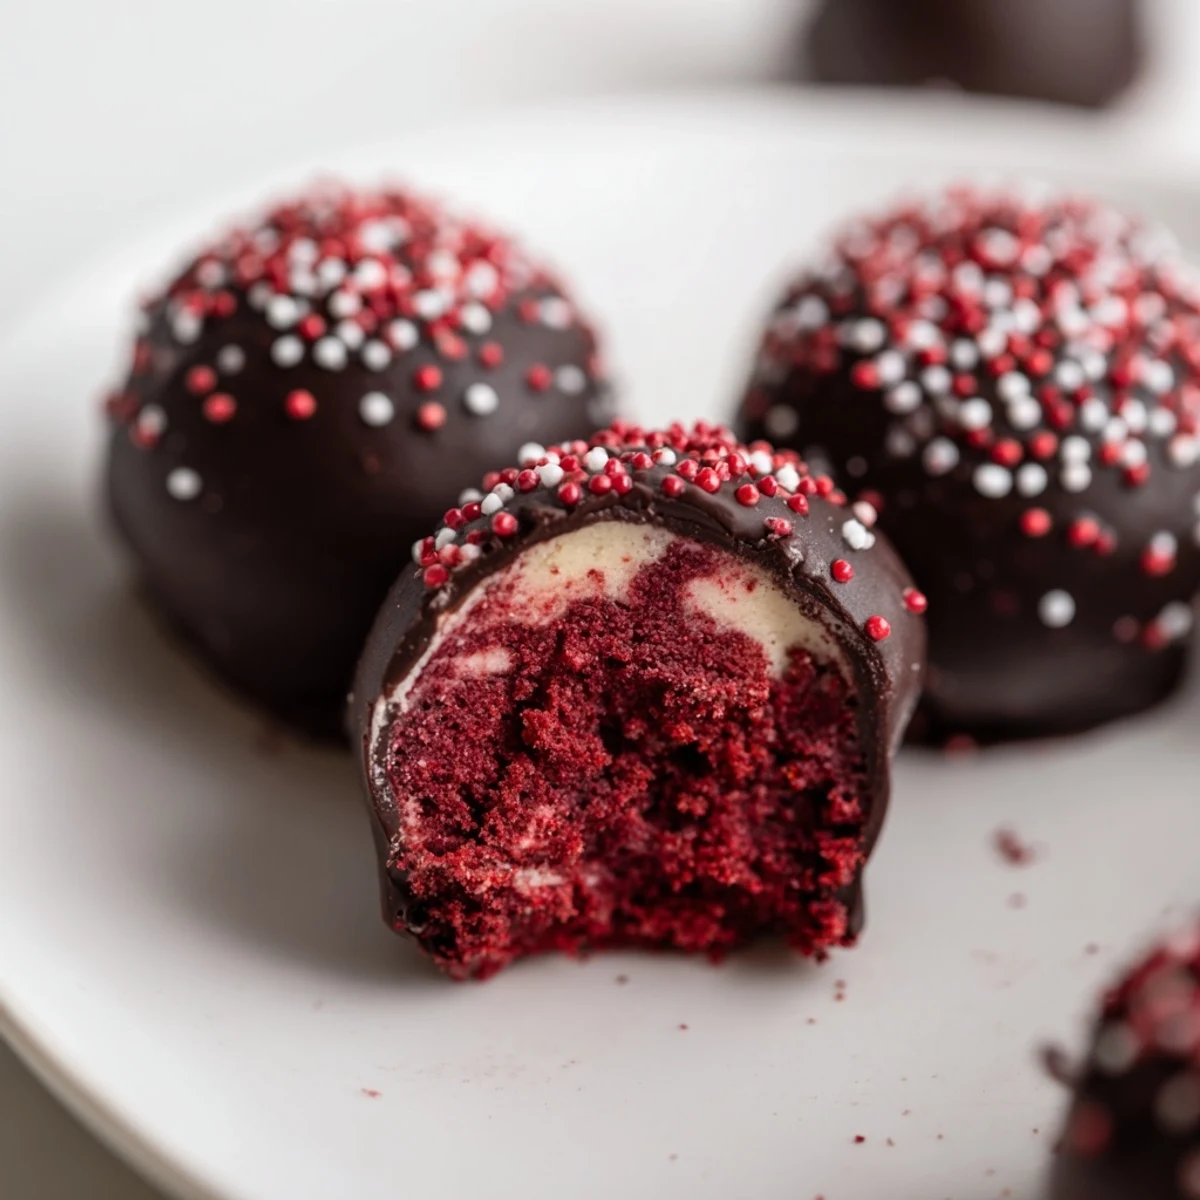
 These elegant red velvet cheesecake balls combine the rich, moist crumb of classic red velvet cake with a smooth, tangy cheesecake center. Each bite-sized sphere gets dipped in melted chocolate, creating a luscious shell that crackles beautifully when you bite into it. The contrast between the creamy filling, tender cake, and crisp chocolate coating makes these an impressive addition to any dessert table. They come together quickly and can be prepared ahead of time, making them ideal for entertaining or gift-giving during holidays and special celebrations.
My kitchen counter looked like a crime scene the first time I made these, red batter splattered across the backsplash and somehow on the ceiling fan. I was supposed to bring something to my neighbor Sarahs holiday party and had promised something impressive without actually having anything impressive prepared at ten oclock the night before. These little cheesecake stuffed bites saved me completely, and Sarah still texts me every December asking if Im bringing the red ones. The combination of moist red velvet cake wrapped around a tangy cheesecake center and then dunked in chocolate is the kind of over the top indulgence that makes people close their eyes when they take a bite.
I brought a tray of these to a potluck at work once and watched three otherwise composed adults hover protectively near the dessert table, casually blocking anyone else from reaching them. One colleague actually hid four in her coat pocket and I caught her eating one in the elevator with the most satisfied expression. That was the moment I realized these were not just good, they were dangerous.
Ingredients
- All purpose flour (1 1/4 cups, 160 g): Spoon and level it rather than scooping directly from the bag, which packs it down and makes the cake dense and heavy.
- Granulated sugar (3/4 cup, 150 g): Standard white sugar works perfectly here, no need for anything fancy.
- Unsweetened cocoa powder (2 tbsp, 16 g): Just enough to give red velvet its signature subtle chocolate undertone without overpowering the red color.
- Baking soda (1/2 tsp) and salt (1/4 tsp): These two work together to give the cake a tender crumb and balanced flavor.
- Buttermilk (1/2 cup, 120 ml, room temperature): The acidity is what makes red velvet special, so please use real buttermilk if you can find it.
- Unsalted butter (1/2 cup, 110 g, softened): Leave it out on the counter for an hour before baking so it blends smoothly into the batter.
- Large eggs (2, room temperature): Cold eggs can cause the batter to seize and look curdled, so warm eggs mean a smoother mix.
- Vanilla extract (1 tsp plus 1/2 tsp for cheesecake): Use the real stuff, imitation vanilla will flatten the whole flavor profile.
- Red food coloring (1 tbsp): Gel coloring gives the most vivid results without thinning your batter with excess liquid.
- Cream cheese (8 oz, 225 g, softened): Full fat brick style cream cheese is the only way to go here, low fat versions get watery and sad.
- Powdered sugar (1/4 cup, 30 g): This sweetens and stabilizes the cheesecake filling so it holds its shape inside the balls.
- White or dark chocolate (10 oz, 285 g): Melting wafers are the easiest option but good quality chopped chocolate works beautifully too.
- Red or white sprinkles (optional): A fun finishing touch that makes these look instantly party ready.
Instructions
- Bake the Red Velvet Cake:
- Preheat your oven to 350°F (175°C) and grease an 8x8 inch pan with parchment lining the bottom. Whisk the flour, sugar, cocoa, baking soda, and salt in one bowl while you combine the buttermilk, softened butter, eggs, vanilla, and red food coloring in another until the mixture is a gorgeous deep crimson. Fold the wet into the dry just until everything disappears into a smooth batter and pour it into your pan, baking for 18 to 20 minutes until a toothpick comes out clean. Let the cake cool completely because patience here means your balls will hold together later.
- Whip Up the Cheesecake Filling:
- Beat the softened cream cheese with powdered sugar and vanilla until it is silky smooth and no lumps remain. If your kitchen is warm and the mixture feels too soft, pop it in the fridge for about 15 minutes so it firms up enough to work with.
- Form the Balls:
- Crumble the completely cooled cake into a large bowl with your hands, breaking it down into fine crumbs. Add the cheesecake mixture and work it through with your fingers or a spoon until everything comes together into a rich dough like consistency. Roll into one inch balls and set them on a parchment lined sheet, then freeze for a full hour until they are rock solid and ready for dipping.
- Dip and Coat:
- Melt your chocolate in a microwave safe bowl in short 20 second bursts, stirring between each one until the chocolate is glossy and completely smooth. Drop a frozen ball in, roll it around gently with a fork to coat every side, then lift it out and tap off the excess before placing it back on parchment. Add sprinkles immediately while the chocolate is still wet because it sets faster than you think.
- Let Them Set:
- Leave the coated balls at room temperature until the chocolate hardens completely, or speed things up in the fridge for about 15 minutes. Serve them chilled or let them come to room temperature, both ways are delicious.
 Pin this
 One Christmas Eve my niece walked into the kitchen and spotted a full tray of these sitting on the counter waiting to be packed up. She ate seven of them before anyone noticed and then fell asleep on the couch with red chocolate smudges all over her cheeks. Nobody even pretended to be mad about it.
Choosing Your Chocolate Coating
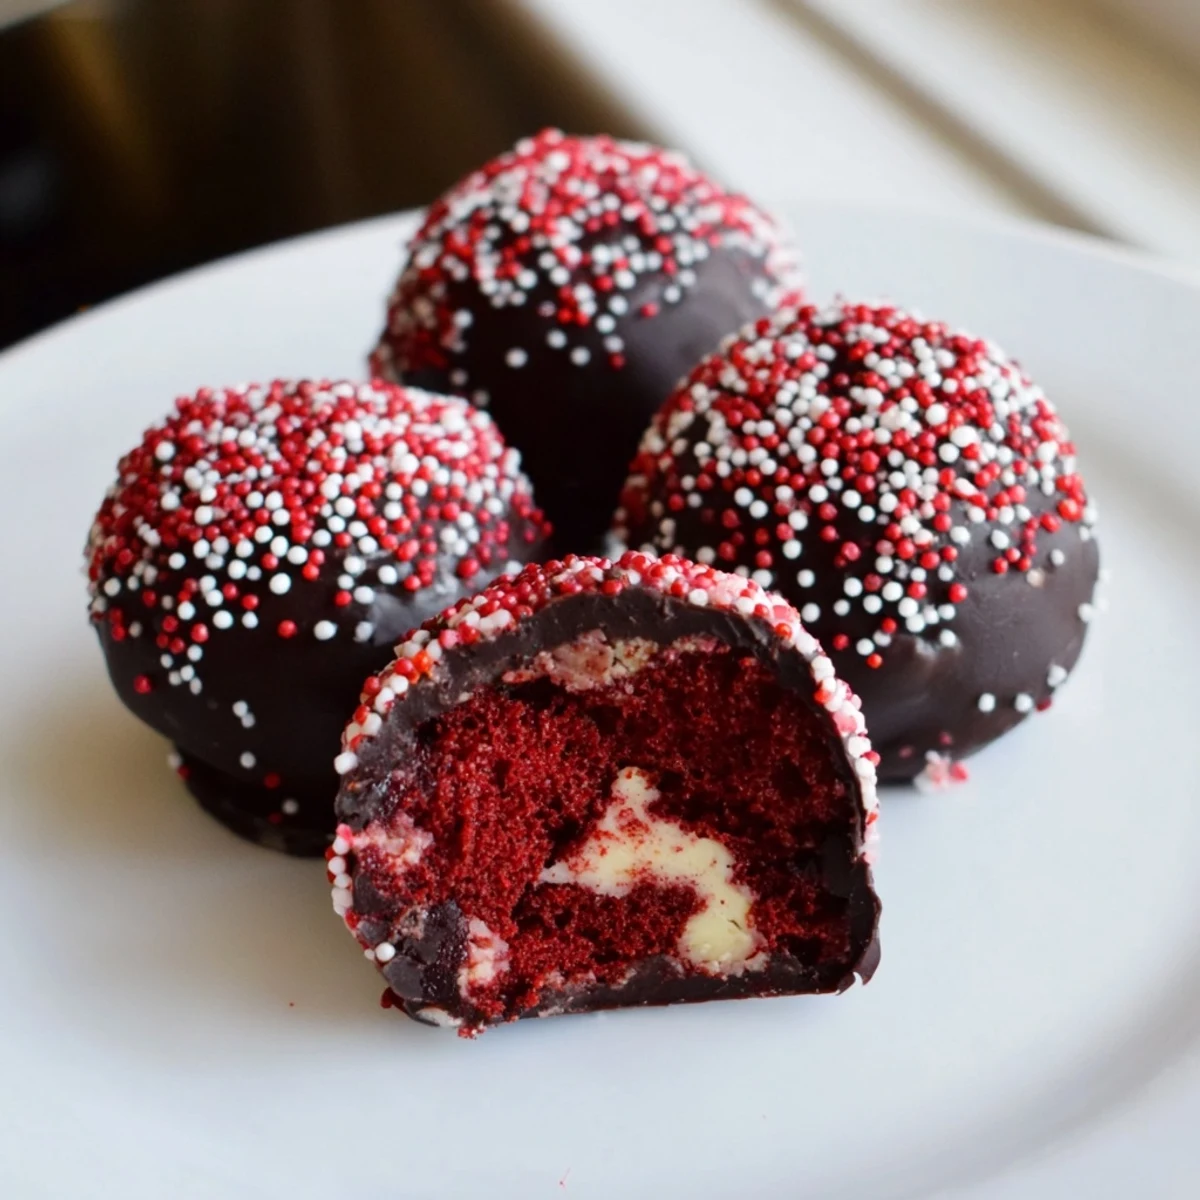
White chocolate gives a beautiful contrast against the red velvet interior and looks stunning with red sprinkles, but dark chocolate creates a richer more sophisticated flavor that balances the sweetness of the cake. Ruby chocolate is another fantastic option that adds a fruity tang and a gorgeous pinkish hue if you want something unexpected. Whatever you choose, avoid cheap chocolate chips because they contain stabilizers that prevent smooth melting and will leave your coating thick and stubborn instead of thin and glossy.
Making Them Ahead for Parties
These balls actually improve with a night in the fridge because the flavors meld together and the chocolate shell firms up to the perfect snap. You can make them up to a week in advance and store them in an airtight container in the refrigerator, or freeze them for up to a month wrapped tightly. I always make a double batch because they disappear shockingly fast and you will want leftovers for yourself hidden behind the vegetables in the fridge door.
Fun Variations to Try
Once you master the basic technique you can play around with all kinds of flavor combinations and coatings. The cheesecake filling is a blank canvas that takes well to extracts, liqueurs, and mix ins.
- Try adding a tablespoon of Chambord or Baileys to the cheesecake mixture for a grown up version that pairs beautifully with dark chocolate.
- Roll the finished balls in crushed peppermint candies or toasted pecans instead of sprinkles for different texture and flavor.
- A tiny dab of strawberry jam hidden in the center of each ball before freezing creates a delicious surprise when someone bites into it.
 Pin this
 These little bites of joy are worth every fingerprint of red batter and every smear of chocolate on your kitchen apron. Share them generously but maybe stash a few in the back of the fridge first.
Recipe FAQs
- → How long do these need to chill before serving?
-
The balls need at least 1 hour in the freezer to firm up before coating. After dipping, let the chocolate set at room temperature for 15-20 minutes or refrigerate for 10 minutes. For best texture, serve chilled but not frozen straight from the freezer.
- → Can I use store-bought red velvet cake instead of baking from scratch?
-
Absolutely! Use a store-bought red velvet cake or cake mix. Just ensure it's completely cooled before crumbling. One boxed cake mix (9x13 inch) or one store-bought round cake will work perfectly. You might have some leftover crumbs.
- → What type of chocolate works best for coating?
-
White chocolate creates a beautiful contrast with the red velvet, while dark or semi-sweet chocolate adds richness. Use melting wafers or chopped baking chocolate for smoothest results. Avoid chocolate chips as they contain stabilizers that make coating difficult.
- → How should I store these cheesecake balls?
-
Store in an airtight container in the refrigerator for up to 1 week. Place parchment paper between layers to prevent sticking. You can also freeze them for up to 1 month. Thaw frozen balls in the refrigerator for 2-3 hours before serving.
- → Can I make these without red food coloring?
-
You can substitute beet juice or use natural red food coloring. Alternatively, make these as classic chocolate cheesecake balls by increasing the cocoa powder to 1/4 cup and omitting the red coloring entirely—they'll be just as delicious!
- → Why did my chocolate coating crack?
-
Cracking usually happens when the chilled balls cause the chocolate to cool too quickly. Let the balls sit at room temperature for 5 minutes after removing from the freezer before dipping. Also, ensure your chocolate isn't too hot—around 90°F is ideal.
