 Pin this
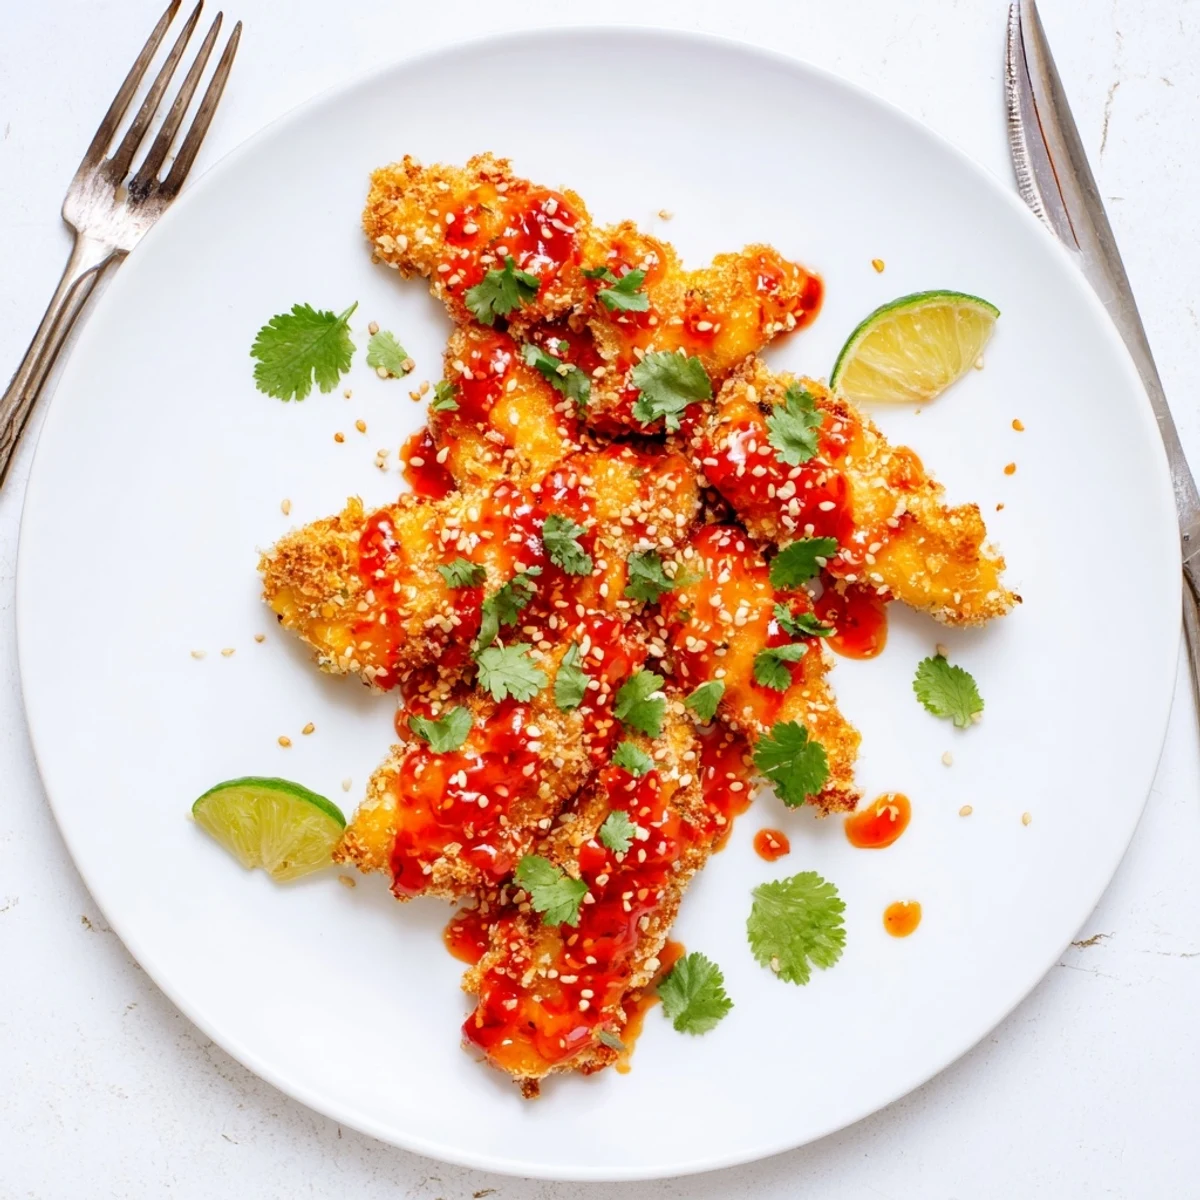
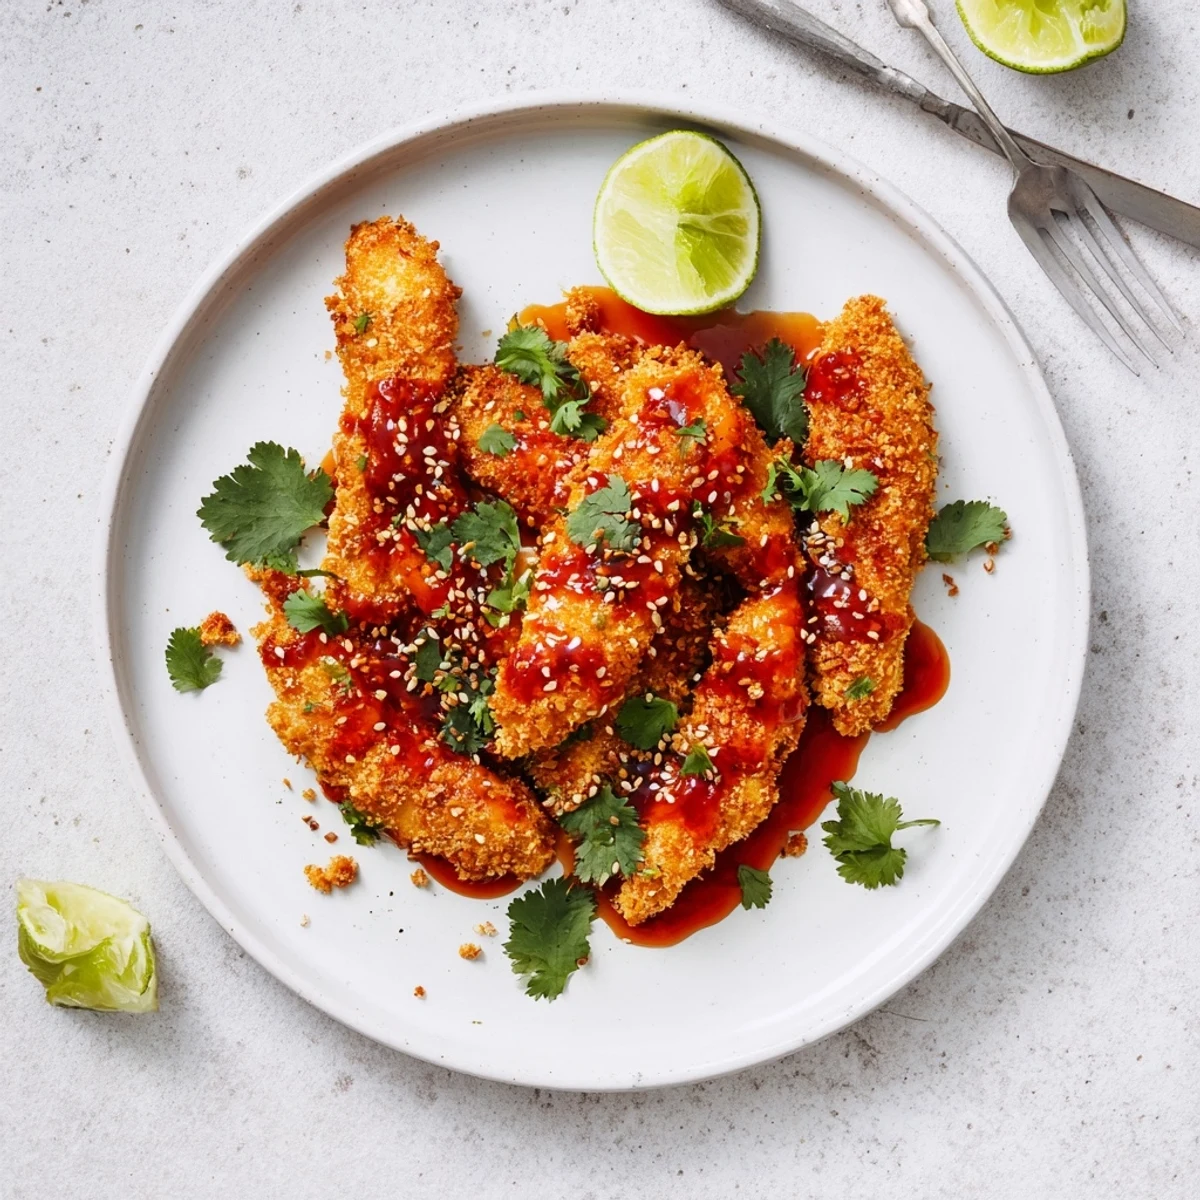
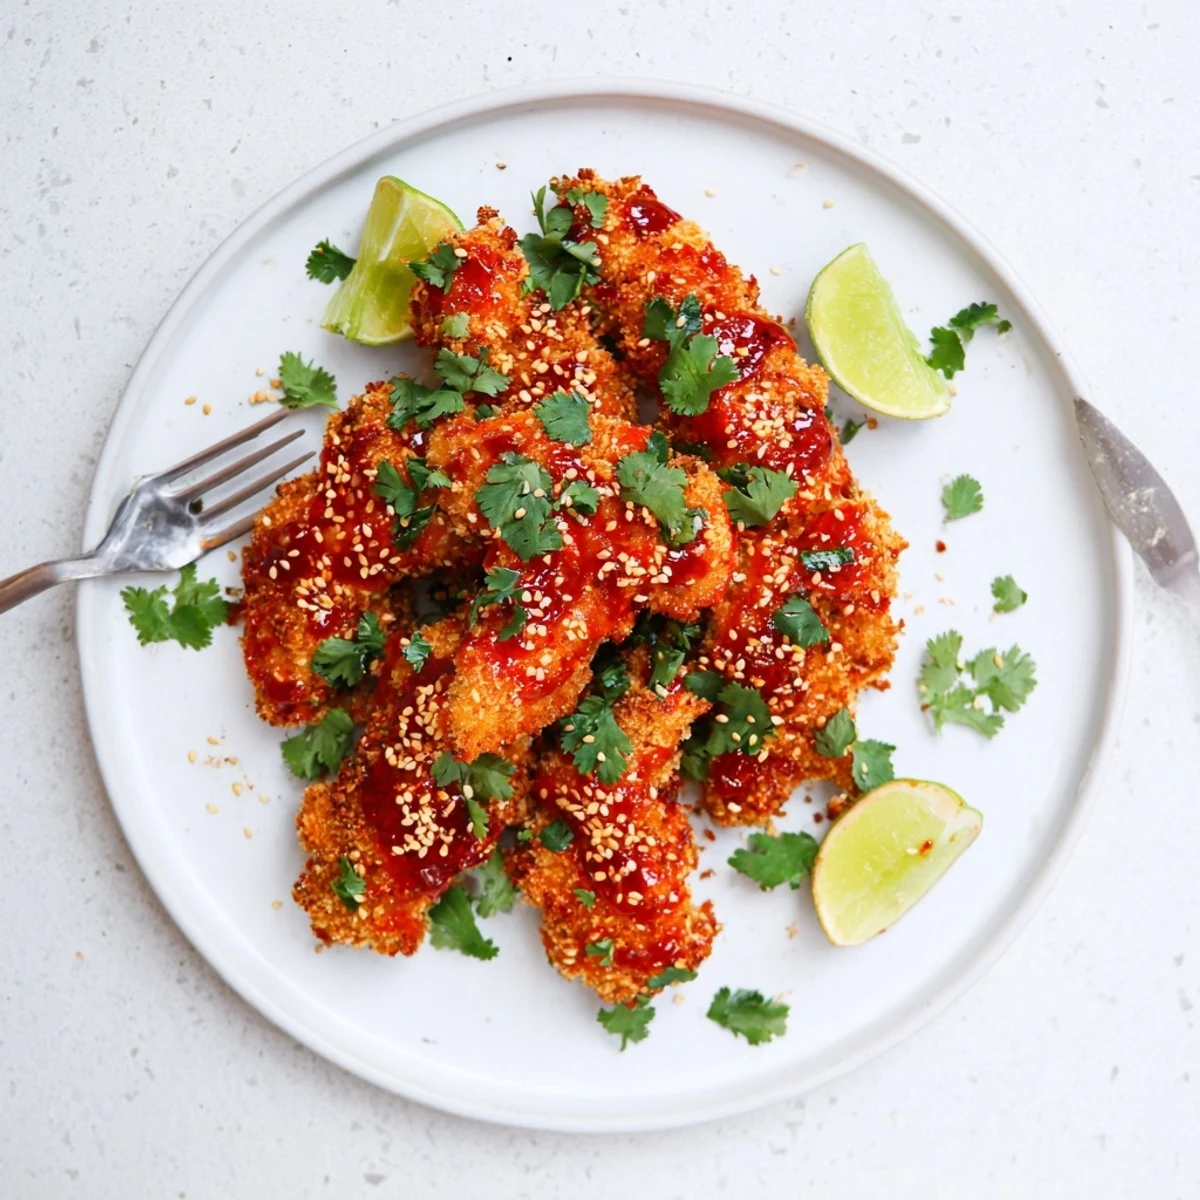
 These Thai sticky chicken fingers feature tender chicken strips coated in crispy panko breadcrumbs, baked until golden, then tossed in a luscious sweet chili and soy glaze.
The sauce brings together honey, rice vinegar, sriracha, and sesame oil for a balance of sweet, tangy, and mildly spicy flavors that cling to every crunchy bite.
Ready in just 35 minutes with only 15 minutes of prep, they work beautifully as a party appetizer or paired with jasmine rice and veggie slaw for a satisfying weeknight dinner.
The smell of sweet chili hitting a hot pan is enough to make anyone wander into the kitchen asking what is for dinner. These Thai sticky chicken fingers came out of a rainy Tuesday experiment when I had nothing planned and a bottle of sweet chili sauce staring me down from the fridge door. Ten minutes later I was elbow deep in panko and my kitchen looked like a flour bomb went off. The result was so absurdly good that my partner ate an entire batch before I could even plate them properly.
I made these for a game night with friends once and they vanished before kickoff. Someone actually asked if I ordered takeout and was lying about cooking, which honestly felt like the highest compliment I have ever received in my kitchen.
Ingredients
- Boneless skinless chicken breasts (600 g): Cut into even strips about the width of your index finger so they all cook at the same rate.
- Salt and black pepper (1/2 tsp each): A simple seasoning base that wakes up the chicken before anything else touches it.
- All-purpose flour (1 cup): This is your first coat and it helps the egg adhere properly to the chicken surface.
- Large eggs (2) and water (2 tbsp): Beating them together makes a smooth wash that binds the panko to the flour layer.
- Panko breadcrumbs (2 cups): Japanese breadcrumbs give that airy crunch you cannot get from regular breadcrumbs so do not substitute.
- Sweet chili sauce (1/3 cup): The backbone of the glaze providing sweetness and a gentle warmth that builds slowly.
- Soy sauce (2 tbsp): Adds saltiness and umami depth that balances the honey and chili.
- Honey (2 tbsp): Helps the sauce thicken and cling to every ridge of the crispy chicken.
- Rice vinegar (1 tbsp): A bright acidic note that keeps the glaze from tasting flat or one dimensional.
- Sriracha (1 tbsp, optional): Only if you want a real kick that sneaks up on you after the sweetness fades.
- Sesame oil (1 tsp): A tiny amount goes a long way toward that toasty nutty flavor.
- Garlic clove, minced (1): Fresh garlic makes a noticeable difference here so skip the jarred version if you can.
- Chopped fresh cilantro, toasted sesame seeds, and lime wedges for garnish: These finish the dish with color and a hit of freshness.
Instructions
- Prep your oven and pan:
- Crank the oven to 220 degrees Celsius (425 Fahrenheit), line a baking sheet with parchment, and give it a quick spray of oil so nothing sticks later.
- Season the chicken:
- Toss the chicken strips with salt and pepper in a bowl, making sure every piece gets coated evenly.
- Set up your breading station:
- Arrange three shallow bowls in a row with flour in the first, the beaten eggs and water in the second, and panko in the third so you can work quickly with one hand dry and one wet.
- Bread each strip:
- Dredge a strip in flour shaking off excess, dunk it in egg, then press it firmly into the panko until fully coated and lay it on the baking sheet with space between each piece.
- Bake until golden:
- Slide the tray into the oven for 18 to 20 minutes, flipping the strips halfway through so both sides get evenly crispy and deeply golden.
- Make the sticky sauce:
- While the chicken bakes, whisk the sweet chili sauce, soy sauce, honey, rice vinegar, sriracha, sesame oil, and garlic in a small saucepan over medium heat until it starts bubbling then pull it off the stove.
- Toss and coat:
- Transfer the hot baked chicken to a large bowl, pour the warm sauce over top, and gently tumble everything together with tongs until every strip is gleaming and coated.
- Garnish and serve:
- Arrange the sticky fingers on a platter and scatter cilantro and sesame seeds over top with lime wedges on the side for squeezing.
 Pin this
 There is something deeply satisfying about watching people eat with their hands and not care about the mess. These chicken fingers have a way of making a regular weeknight dinner feel like a small celebration.
Serving Suggestions That Actually Work
These sticky fingers are substantial enough to stand alone as a main but they really shine next to a pile of steamed jasmine rice that soaks up any extra sauce. A quick slaw of shredded cabbage, carrots, and a squeeze of lime adds crunch and keeps the meal from feeling heavy.
Making It Gluten Free
Swap the all-purpose flour for a gluten free blend, use gluten free panko, and replace the soy sauce with tamari. The texture changes slightly but the flavor holds up beautifully and nobody at my table noticed the difference when I tested it.
Storage and Reheating
Leftovers keep in an airtight container in the fridge for up to three days but honestly they rarely last that long in my house. Reheating in a hot oven or air fryer for a few minutes brings back some of the crispiness that the microwave will destroy.
- Store the sauce separately from the chicken if you want to preserve crunch for next day leftovers.
- Air fry at 200 degrees Celsius for about 4 minutes and they come back shockingly close to fresh.
- Never freeze the coated and sauced chicken because the texture breaks down completely upon thawing.
 Pin this
 Keep a stack of napkins nearby and embrace the sticky fingers because that is half the fun. This is the kind of recipe that becomes a rotation staple before you even realize it.
Recipe FAQs
- → Can I make Thai sticky chicken fingers ahead of time?
-
You can bake the chicken strips up to a day in advance and store them uncovered in the fridge to maintain crispiness.
Reheat in a 200°C (400°F) oven for 8-10 minutes until crunchy again, then toss with the freshly warmed sauce just before serving.
- → What can I substitute for panko breadcrumbs?
-
Regular breadcrumbs work but yield a slightly less crunchy coating. Crushed cornflakes or crushed pretzels are excellent alternatives that add great texture and flavor.
For a gluten-free option, use gluten-free panko or finely crushed rice cereal.
- → How do I adjust the spice level of the Thai sauce?
-
The sriracha is optional, so you can omit it entirely for a mild, family-friendly version that still has plenty of flavor from the sweet chili sauce and soy.
For more heat, increase the sriracha to 2 or 3 tablespoons, or add a pinch of red pepper flakes to the sauce while heating.
- → Can I fry these chicken fingers instead of baking?
-
Absolutely. Shallow-fry the breaded strips in about 1 cm of oil at 175°C (350°F) for 3-4 minutes per side until deeply golden and cooked through.
Drain on a wire rack set over a baking sheet to keep them crisp before coating in sauce.
- → What side dishes pair well with Thai sticky chicken fingers?
-
Jasmine rice is a natural companion that soaks up the extra glaze beautifully.
A fresh Asian-style slaw with cabbage, carrots, and a sesame-ginger dressing provides a crisp, refreshing contrast. Steamed edamame or a simple cucumber salad also work wonderfully.
