 Pin this
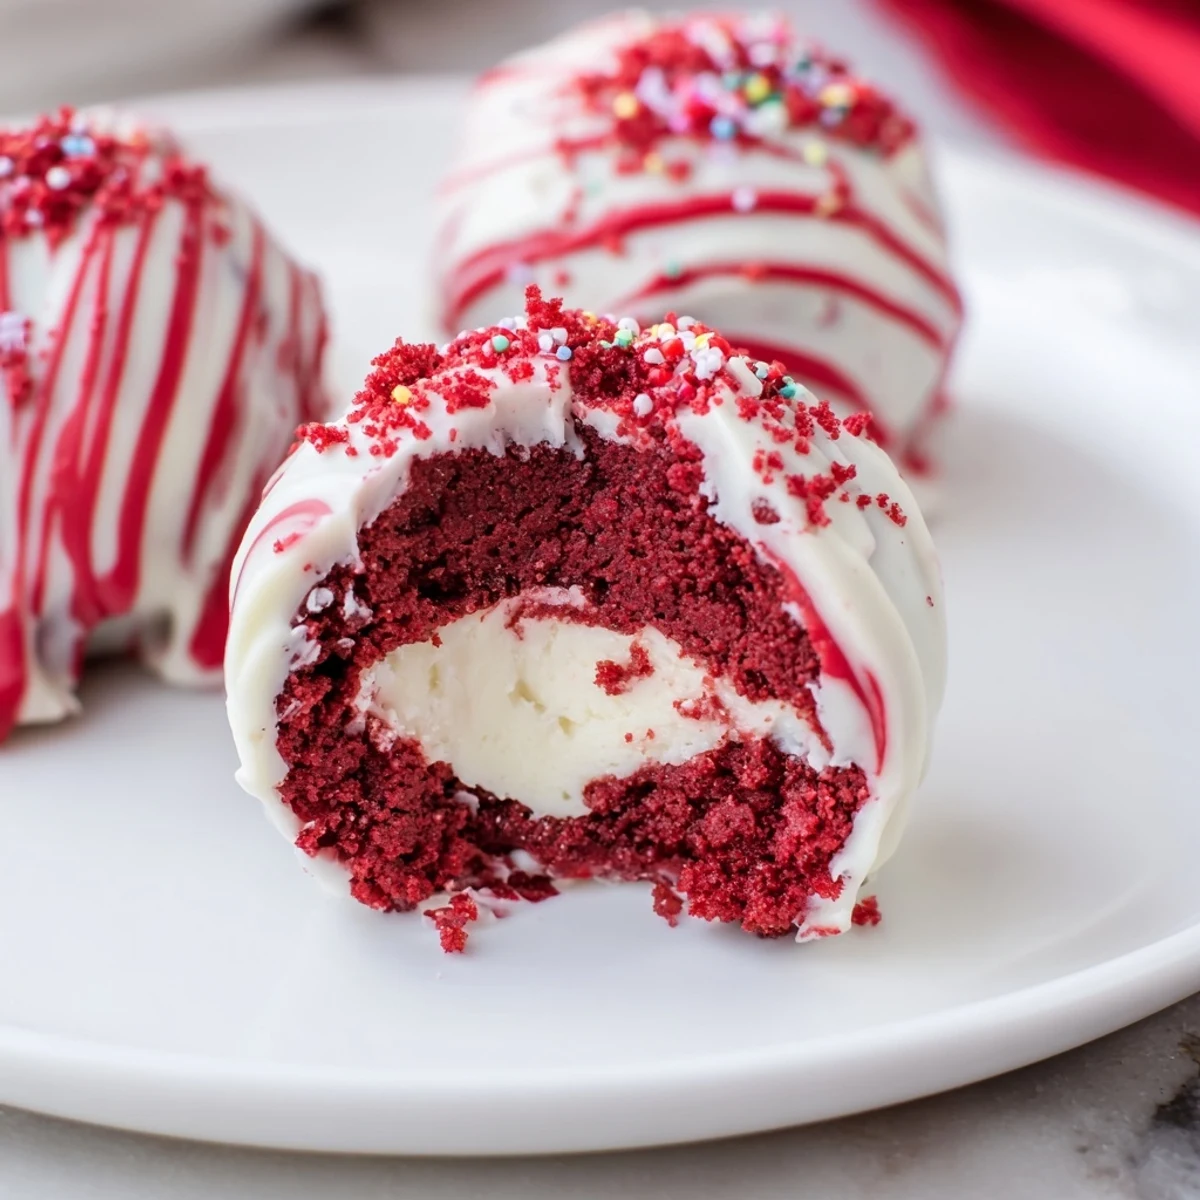
 Combine crumbled red velvet cake with whipped cream cheese sweetened with powdered sugar and vanilla until a soft, moldable mixture forms. Portion and roll into tablespoon-sized balls, then chill until firm. Dip each chilled ball in melted chocolate—add a touch of red coloring if desired—and top with crumbs or sprinkles. Keep refrigerated in an airtight container; serve chilled.
The kitchen smelled like a bakery had collided with a candy shop, and honestly, that is exactly the chaos I needed on a rainy Saturday afternoon. Red velvet cheesecake balls were never part of the plan. I had leftover cake from a dinner party and a block of cream cheese staring me down from the fridge, and somewhere between boredom and curiosity, these little truffle like gems were born.
I brought a tray of these to my neighbors holiday potluck and watched three people argue over who got the last one. That argument ended friendships, or at least caused a very dramatic fifteen minute standoff near the dessert table.
Ingredients
- Red velvet cake (300 g): Day old cake actually works better because it crumbles more easily and binds beautifully with the filling.
- Cream cheese (200 g, softened): Leave it out for about thirty minutes so it blends without lumps, because nobody wants a chunky cheesecake ball.
- Powdered sugar (40 g): Just enough sweetness to complement the cake without making the filling cloying.
- Vanilla extract (1 tsp): Use the real stuff here, imitation vanilla will stick out like a sore thumb in such a simple mixture.
- White chocolate (250 g): Good quality melting chocolate makes all the difference, cheap chips will seize and leave you frustrated.
- Red food coloring (optional): A few drops in the white chocolate create a gorgeous pink coating that looks stunning on a dessert tray.
- Red velvet crumbs and sprinkles (optional): Save a handful of cake crumbs before mixing for the most beautiful natural decoration.
Instructions
- Break it down:
- Crumble the red velvet cake into fine crumbs in a large bowl, using your fingers or a fork until no large chunks remain. The finer the crumbs, the smoother your final texture will be.
- Whip the filling:
- In a separate bowl, whisk the softened cream cheese, powdered sugar, and vanilla until completely smooth and creamy. You want it lump free and silky, like a thick frosting.
- Bring it together:
- Pour the cream cheese mixture over the cake crumbs and mix with your hands or a spatula until everything forms a soft, dough like mass. It should hold together when you squeeze a small amount in your palm.
- Roll them out:
- Scoop tablespoon sized portions and roll them between your palms into smooth balls, placing each one on a parchment lined tray. Try to keep them uniform so they look polished and professional.
- Chill out:
- Refrigerate the tray for at least one hour so the balls firm up enough to handle without falling apart during dipping. This step is non negotiable, trust me.
- Melt the chocolate:
- Melt the white chocolate in a microwave safe bowl in twenty second bursts, stirring between each, or use a double boiler for gentler control. Stir in red food coloring now if you want that rosy finish.
- Dip and dazzle:
- Drop each chilled ball into the chocolate, roll it to coat, lift it with a fork letting excess drip off, and return it to the parchment. Work quickly before the chocolate sets in the bowl.
- Finish with flair:
- Sprinkle red velvet crumbs or sprinkles over the wet chocolate immediately before it hardens. Let them set at room temperature or pop them back in the fridge for faster results.
 Pin this
 There is something deeply satisfying about biting through a crisp chocolate shell into a soft, tangy center. These little bites turned a random afternoon of kitchen experimentation into the most requested dessert in my social circle.
Storing and Making Ahead
These balls keep beautifully in an airtight container in the refrigerator for up to five days, and honestly, they taste even better on day two when the flavors have had time to meld. You can also freeze them for up to a month, just layer them between sheets of parchment so they do not stick together.
Choosing Your Chocolate
White chocolate gives the prettiest contrast against the red velvet, but dark chocolate creates a more sophisticated, less sweet finish that some people genuinely prefer. Milk chocolate lands somewhere in the middle and is always a crowd pleaser for kids parties.
Mix Ins and Variations
The base recipe is wonderfully forgiving and welcomes all sorts of additions depending on your mood. Get creative, but keep the ratios balanced so the balls hold their shape.
- Stir a tablespoon of finely chopped pecans into the filling for a subtle crunch that pairs perfectly with the creamy texture.
- Roll the finished balls in toasted coconut flakes instead of dipping them in chocolate for a lighter, tropical twist.
- A pinch of espresso powder in the cream cheese filling adds depth without anyone guessing your secret ingredient.
 Pin this
 Share these with someone who thinks they do not like red velvet, and watch them change their mind before the second bite. That conversion is the real reward.
Recipe FAQs
- → Can I use store-bought cake for the filling?
-
Yes — fully baked and cooled red velvet cake works well. Crumble it finely so it binds smoothly with the cream cheese mixture for an even texture.
- → How long should the balls chill before dipping?
-
Chill for at least one hour to firm up. Proper chilling prevents the filling from falling apart when dipped and helps the coating set evenly.
- → What chocolate works best for coating?
-
White chocolate melts smoothly and takes color well, but dark or semisweet chocolate gives a deeper flavor. Tempering helps a crisp finish, though simple melting works for home use.
- → Any tips for a smooth coating?
-
Work with well-chilled balls, use a fork or dipping tool to let excess chocolate drip, and place on parchment to set. Thin the chocolate with a little neutral oil if it’s too thick.
- → How can I vary the filling texture?
-
Add 1–2 tablespoons of crushed nuts, shredded coconut, or a touch more powdered sugar to adjust firmness and introduce extra crunch or chew.
- → How should these be stored and how long do they keep?
-
Store in an airtight container in the refrigerator for up to five days. Bring to cool room temperature for a few minutes before serving for best flavor and texture.
